How to Turn a Photo into a Beautiful Painting in Photoshop

The best thing about Photoshop is that it allows you to do things in a few minutes that would normally take hours or days to complete. Case in point: rather than payment 0.5 a lifespan painting an image, you’ll use Adobe Photoshop to form a photograph appear as if a hand-painted masterpiece in minutes.
Converting a photo into a painting takes more than just using Photoshop’s default tools. You need a variety of filters, brushes, and design techniques to actually make it look realistic. Fortunately, it’s still a straightforward method, particularly since we’ve spelled it all out for you during this tutorial.
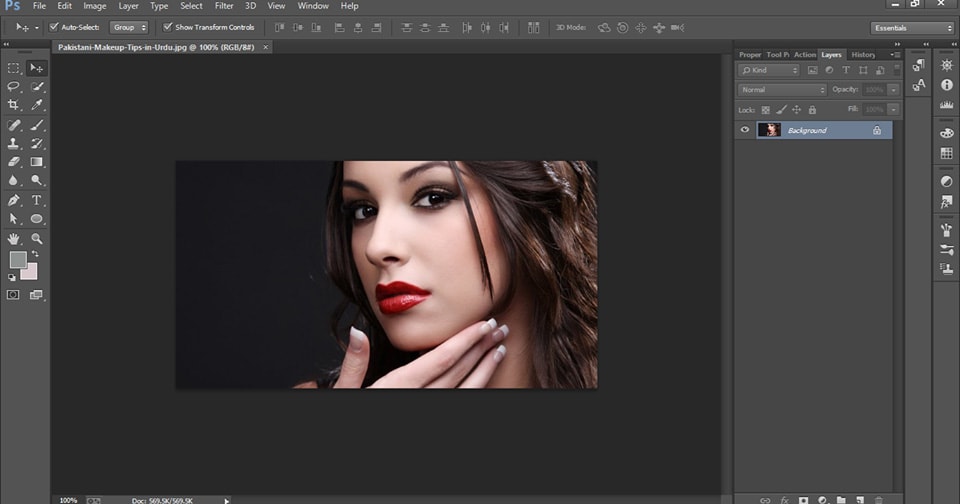
Let’s start by opening up a new document in Photoshop by clicking File>open your photo and set up background
Painting in Photoshop
1st stepLet’s now Make a duplication of the stock image layer by clicking Layer>Duplicate Layer or using CTL+J. Move this new duplicate layer above the first contour layer so that it’s the very top layer. If this layer is still invisible, make it visible so that you can work on it.
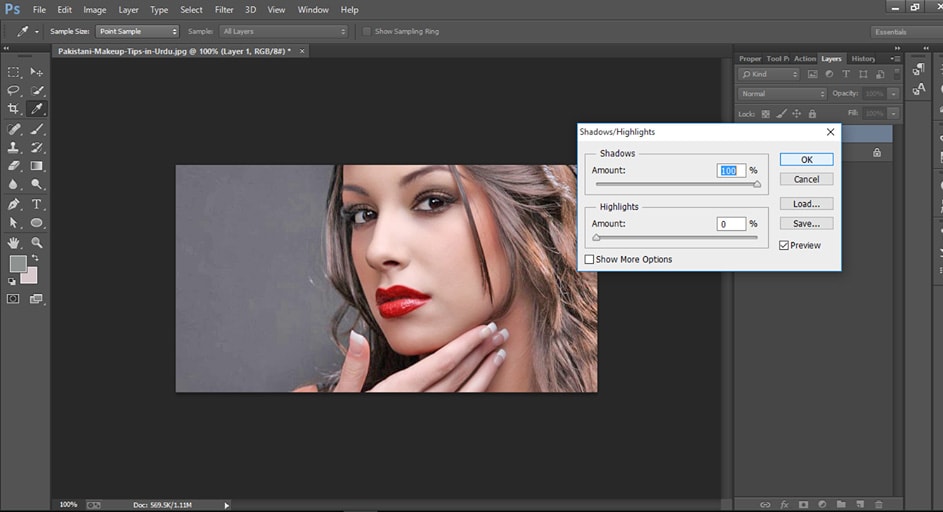
Click on Image>Adjustments> Shadows/highlights and set the Shadows 100highlights0.

Painting in Photoshop
Painting in Photoshop
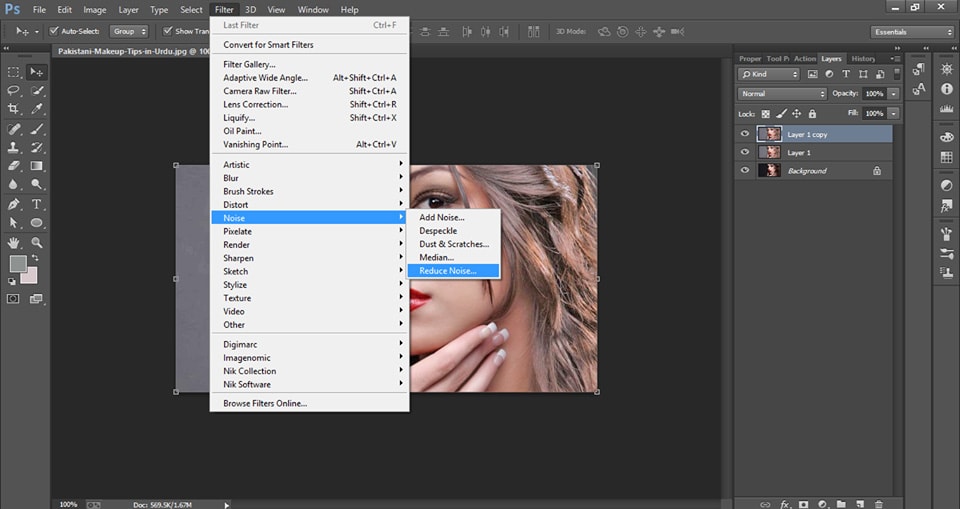
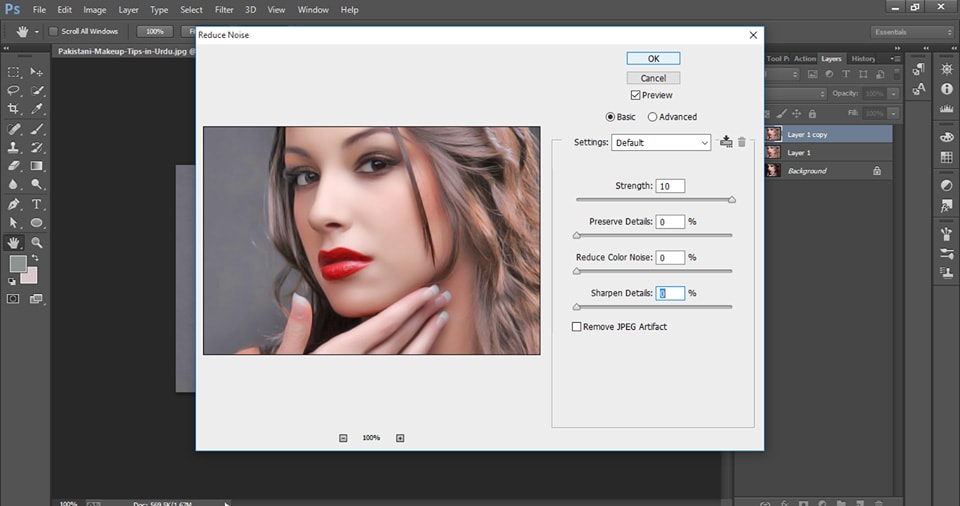
This time do like that 1st step andClick on filter>noise>reduce noise>strength are 10 all popup are 0 then click ok.
Painting in Photoshop
Painting in Photoshop
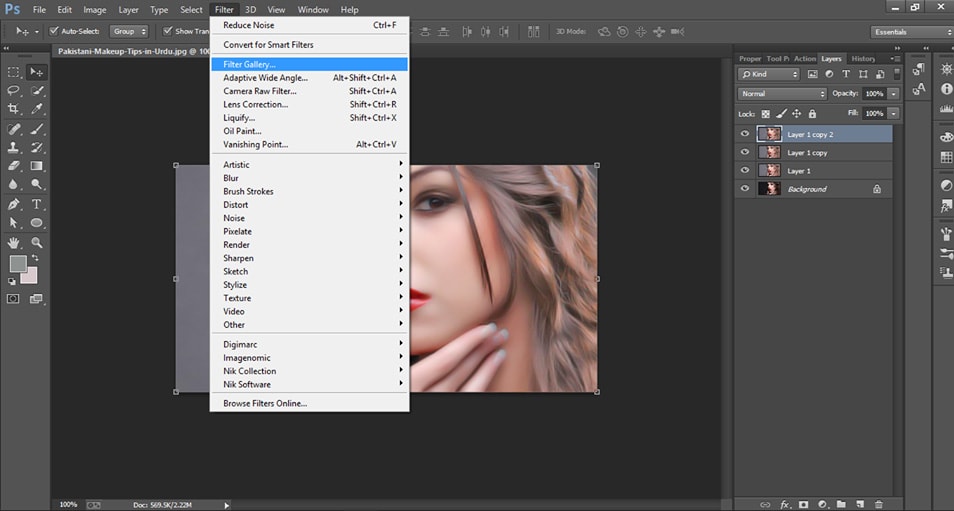
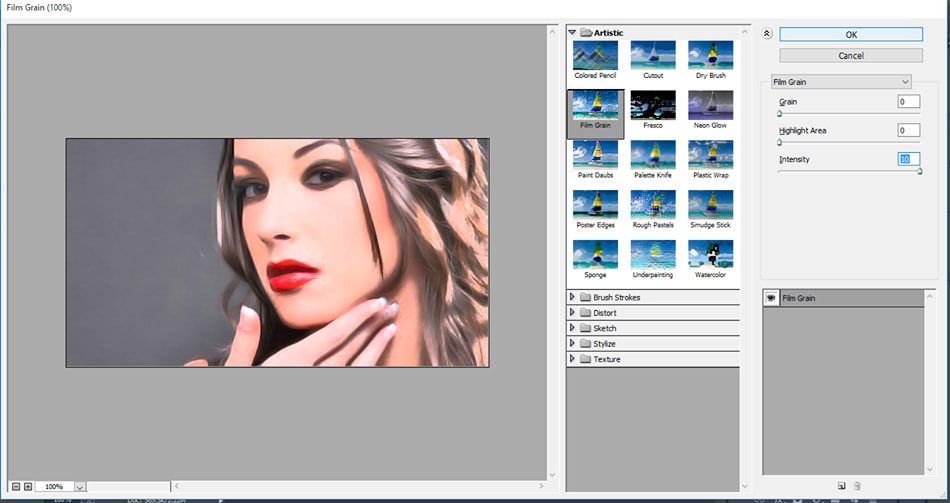
This time also do like that 1st step and click on filter>filter gallery> film grain>intensity are 10 all popup are 0 then click ok
Painting in Photoshop
Painting in Photoshop
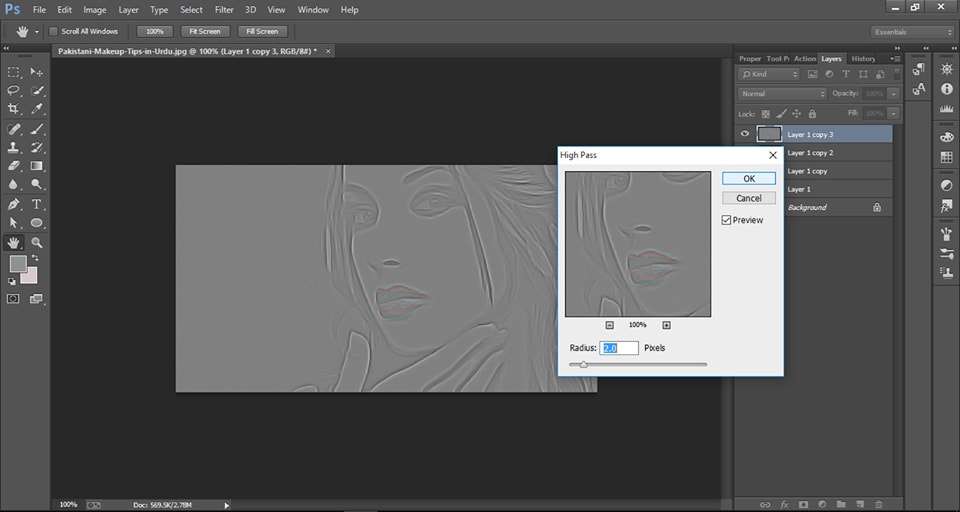
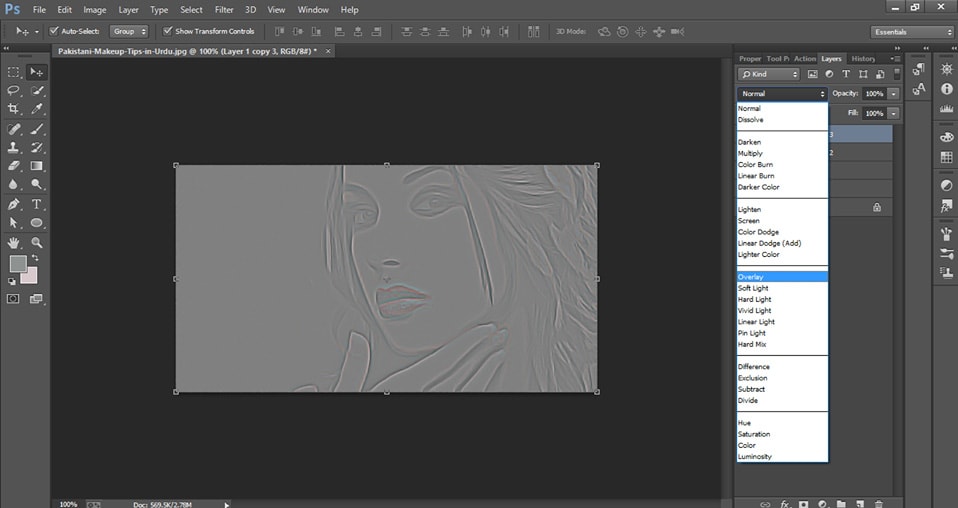
This time also do like that 1st step and filter>other>high pass>radus are 2 and then click ok and also click right of the bottom <normal> and popup will come and <overlay>

Painting in Photoshop
Painting in Photoshop
Painting in Photoshop
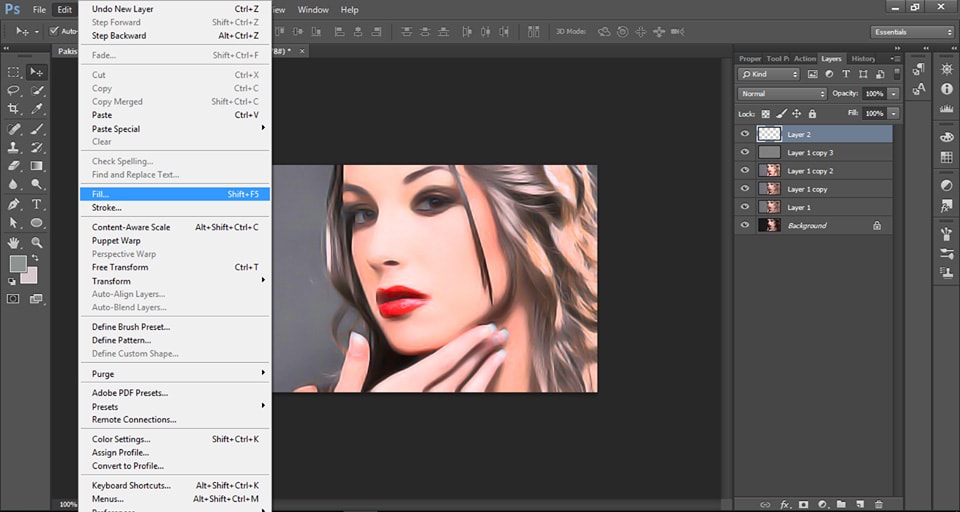
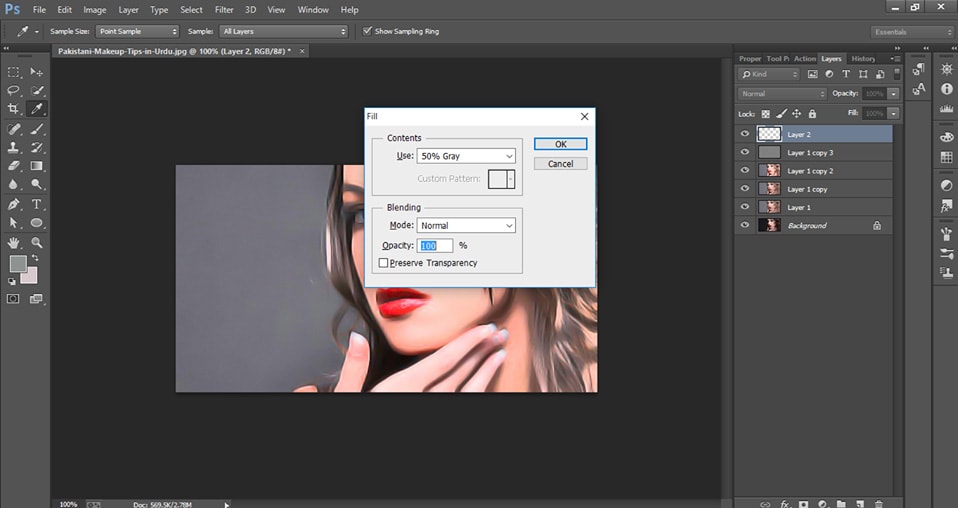
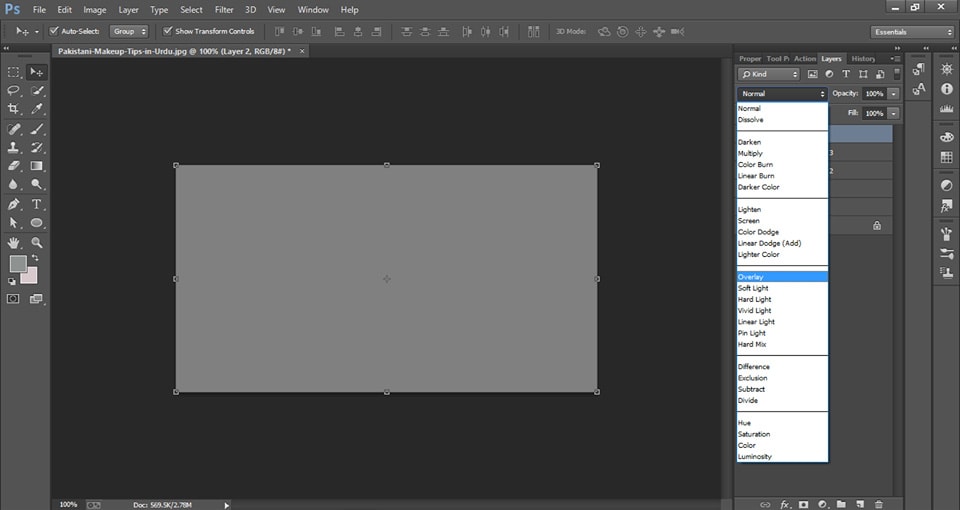
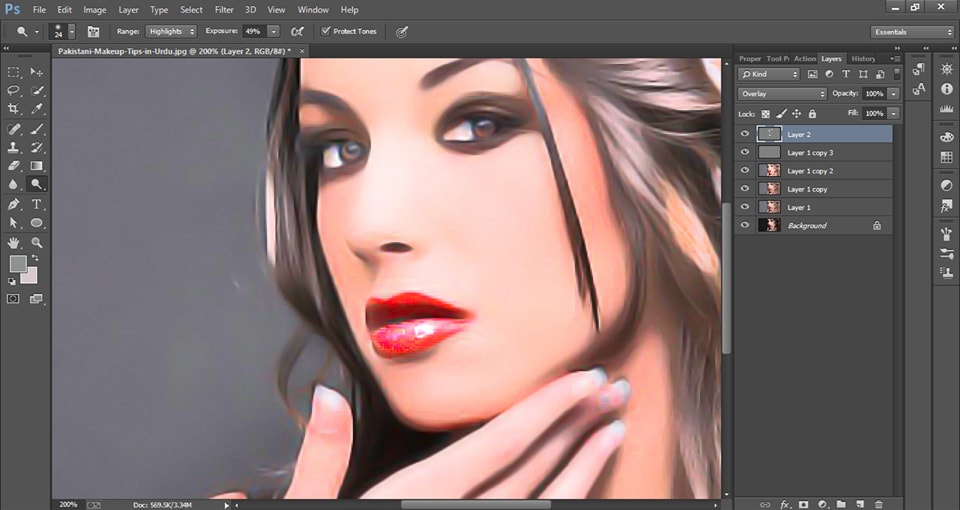
This time create new layer and click on <edit>fill> and opacity 100 and click ok then click right of the bottom <normal> and popup will come and <overlay>
Painting in Photoshop
Painting in Photoshop
Painting in Photoshop
Now Click the dodge tool and select Shape, setting the minimum diameter at 30%, and set up highlight top of the bottom. And doing like this of the dodge tool.
Painting in Photoshop
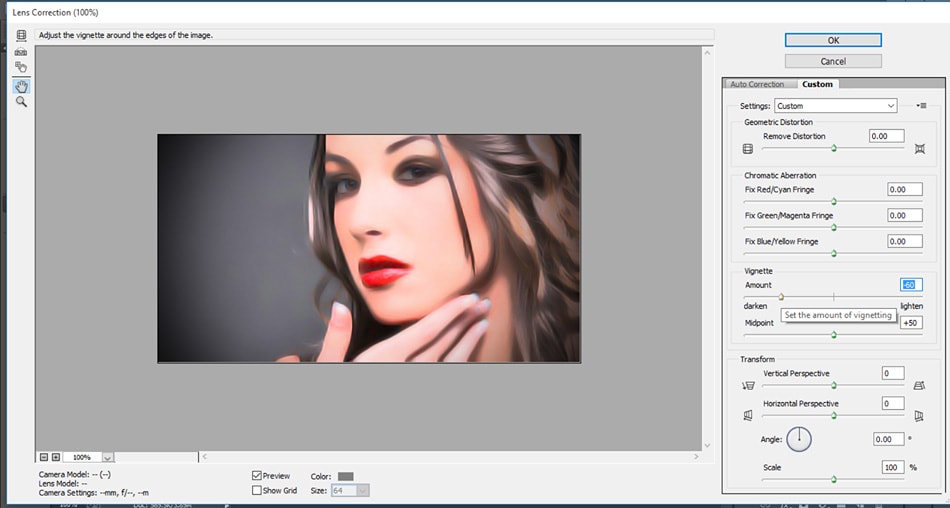
This time also do like that 1st step and filter>lens correction and setting minimum amount -60 and then ok
Painting in Photoshop
Painting in Photoshop
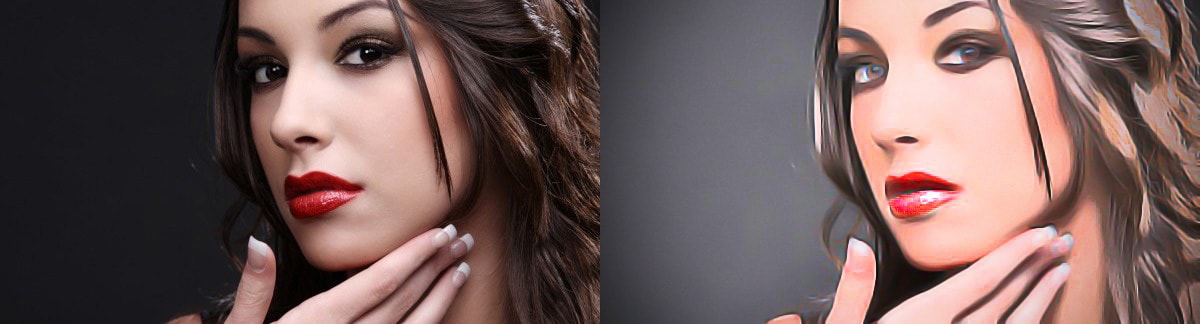
If you’ve followed these steps correctly, you should have an image that looks like this:

Painting in Photoshop
Difference between after and before photo
Painting in Photoshop
Now that you’ve completed this tutorial, you can apply these same concepts to other images. Of course, you will have to slightly adapt the data from this tutorial to use it to a special image, however the basis principles stay an equivalent.
Whether you follow the tutorial to a tee or use it as a stepping stone to be experimental, we want to see your results. Share your best photo-to-painting masterpieces within the comments below and sing their own praises your onerous work!
If You Have Any Question About This Please Comment.
Join our Facebook, Youtube, Google+, Twitter page to learn more video


Leave a Reply
Want to join the discussion?Feel free to contribute!