How To Quickly Transform Image In Photoshop
How To Quickly Transform Image In Photoshop
Image enhancement services can enhance a very normal and dull image to look it like a professional and best quality image. These services have the capability to give your ordinary shots a look of digitally attractive and alluring picture. Image enhancement services involve the adjusting of saturation, balancing the colors, increasing or decreasing contrast to a satisfactory level, infusing appealing brightness, adjusting the density level, applying the appropriate filters, removing or inserting the beautiful backgrounds, cropping and removing blemishes and other such things which enhance the quality level of an image to make it much better.
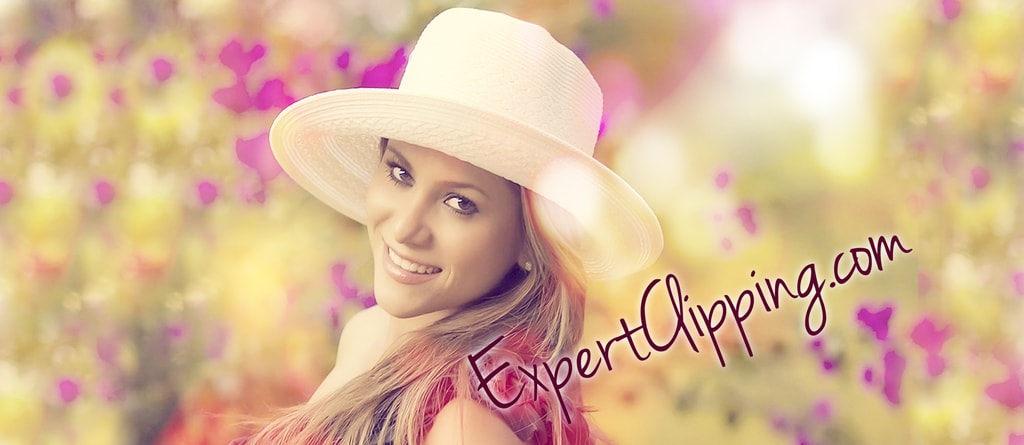
Today I’m going to show you how to give your photos a dreamy, romantic effect and then and text to it to personalize them.
This effect, especially well on portraits.
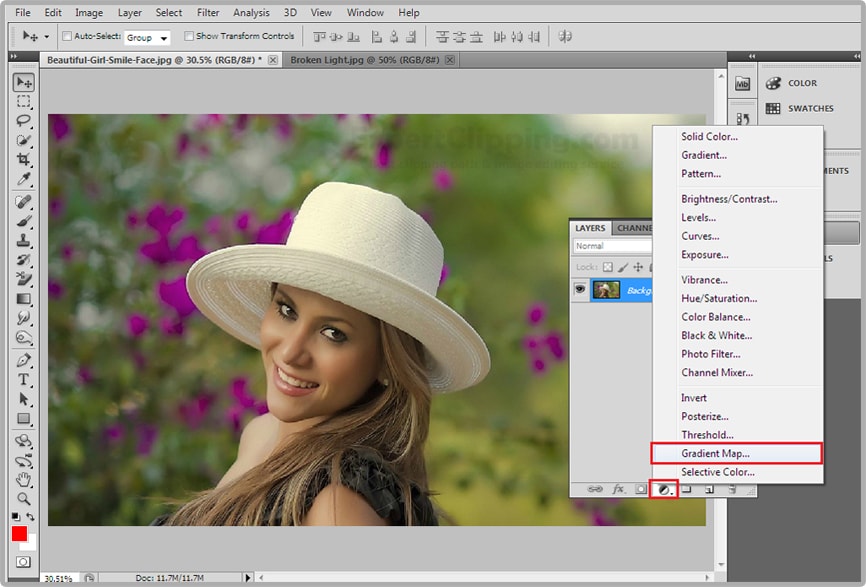
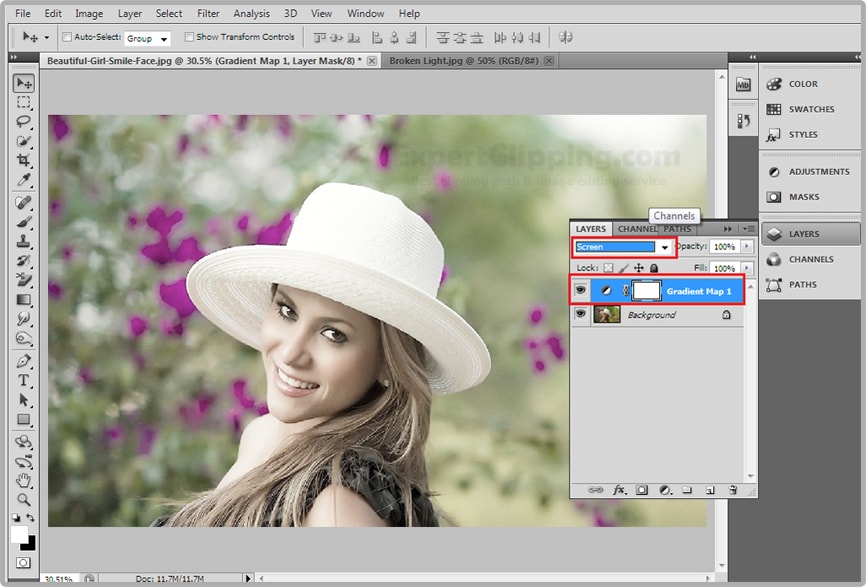
Open a photo you like to use, First click the Adjustment Layer icon and choose “Gradient Map” change the blend mode to screen.
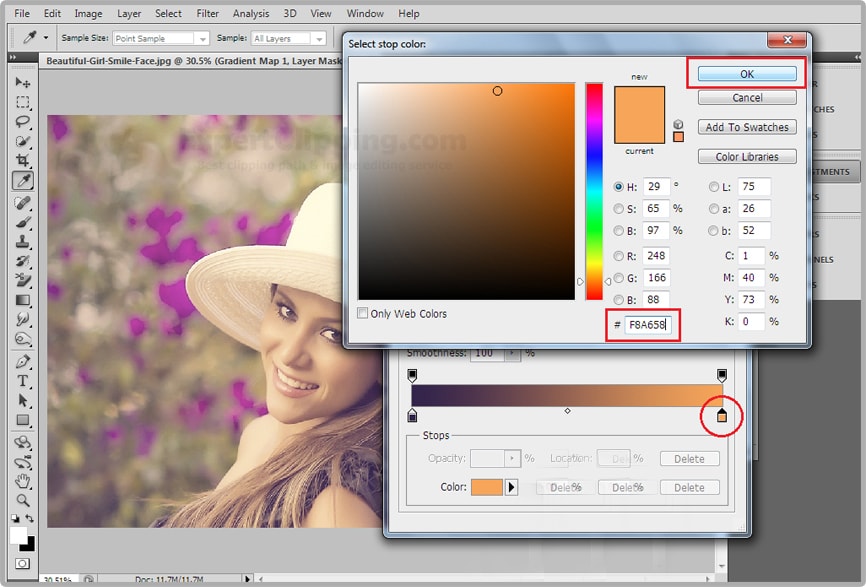
Click the Gradient bar which open the Gradient Editor. Click the Violet/Orange preset, these colors works well with most photos.
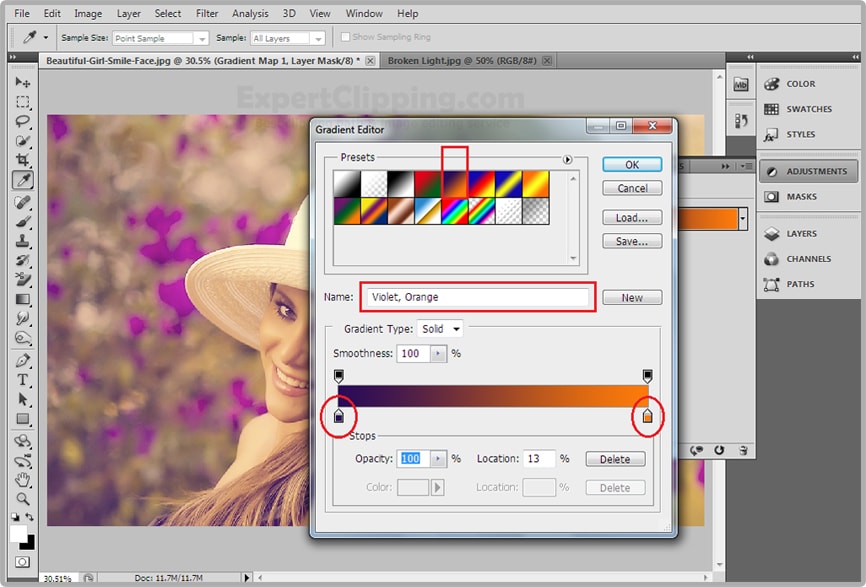
But for this example i’ll tweak them a bit, click the lower left Stops the color box and type in “32224C” then click ok, and click the lower right Stops the color box and type in “F8A658” then press enter or return.
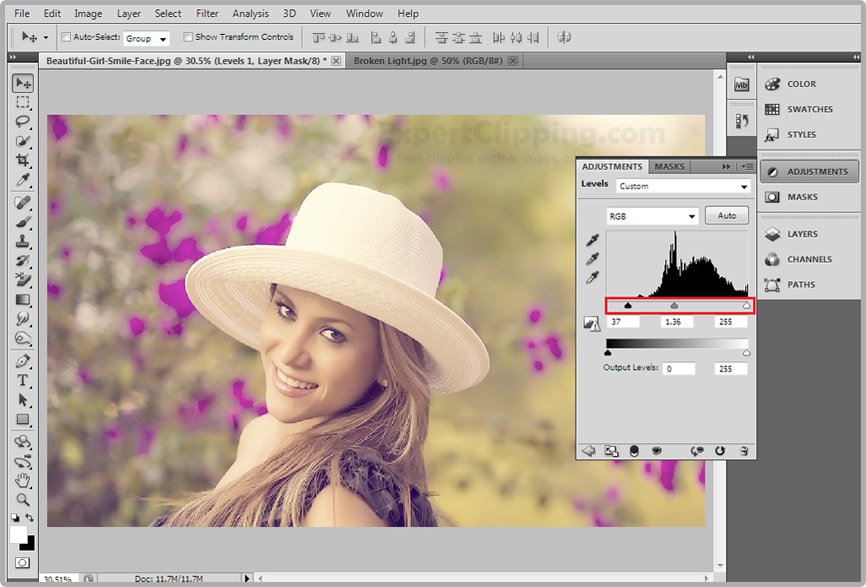
Click the adjustment layer again and this time choose “Levels” Drag the black a little left and where the histogram starts to rise this will slightly darken the darkest color. Drag the input mid tones to the left to lighten them.
Click the new layer icon to make a new layer and open your brush tool, choose the large brush, depending size & resolution of your photo, make the Hardness 0% then enter.
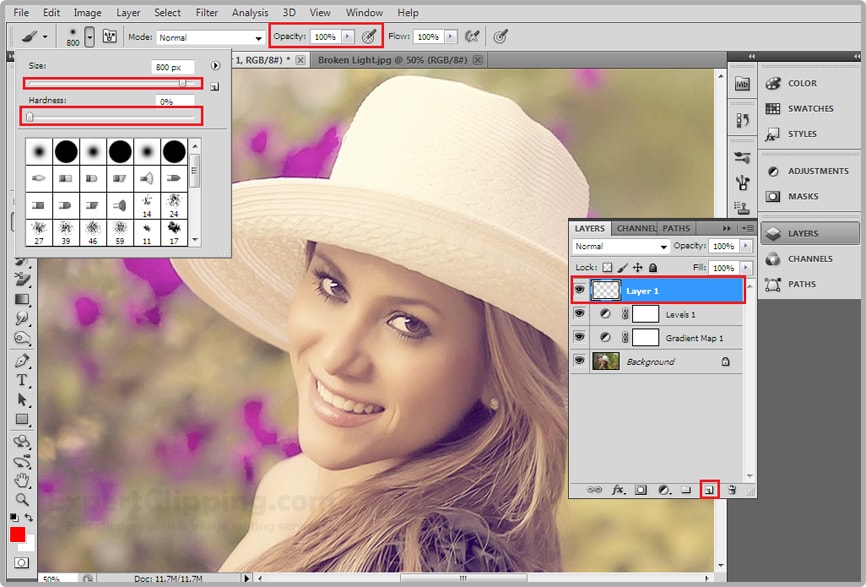
Click the Foreground color and type in “FFD43D” and OK

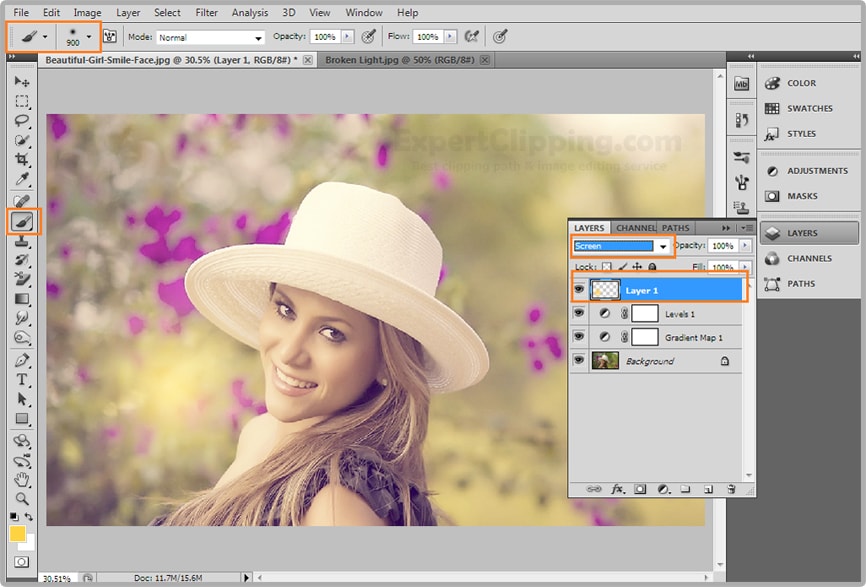
Press B to open your brush tool, turned off you caps lock key otherwise you won’t be able to see your brush on your screen now left click once next to your subject’s head. And change the blend mode to screen.
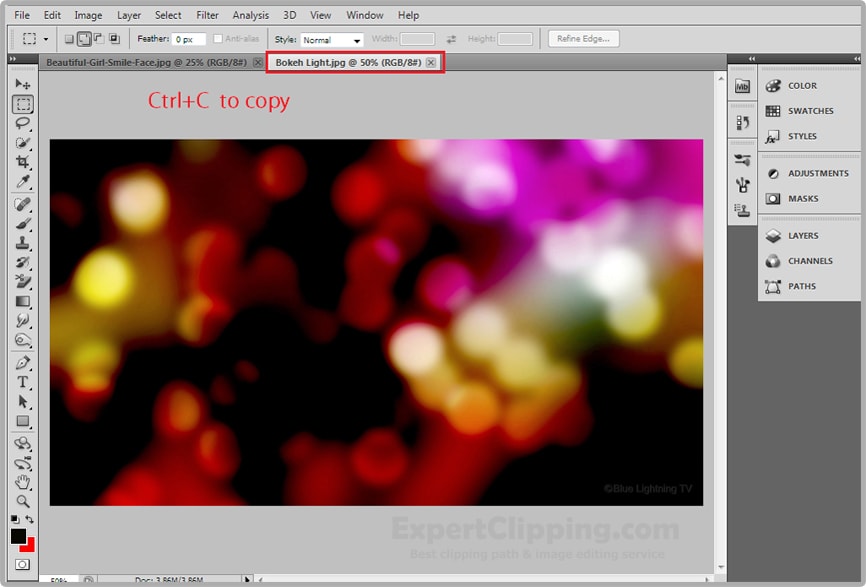
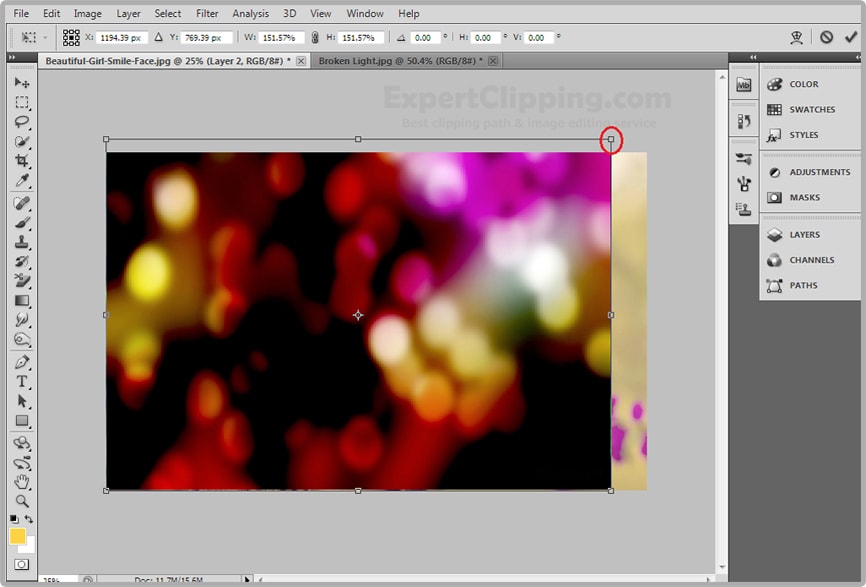
Now we’ll add the bokeh lights to further enhance overall effect. Open a bokeh file like you and press ctrl and c to copy it open back up your photo and press ctrl+v to paste the bokeh light into your document.
To transform the bokeh lights to the vertical angle and to increase its size press ctrl+t to open your transform tool go to a corner and when you see a straight double arrow hold down shift and drag it out until completely covers your document press enter or return.
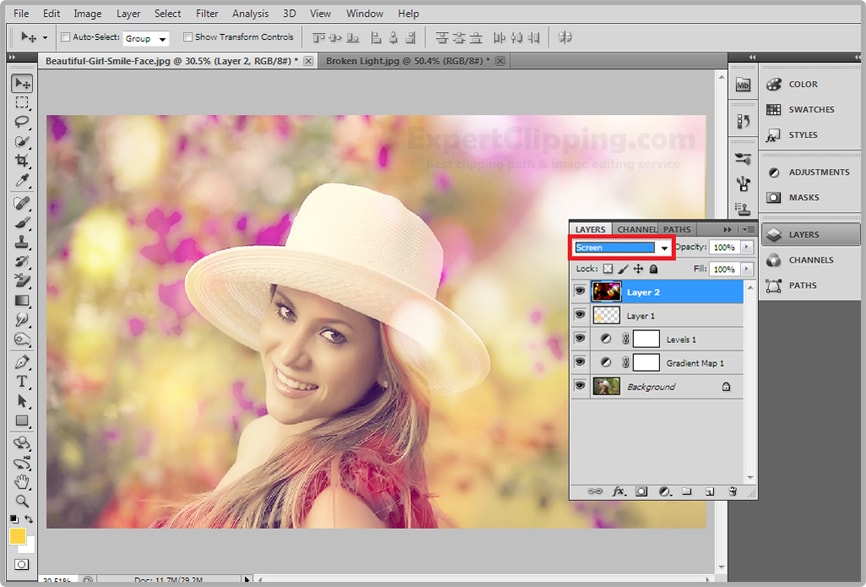
Again change the blend mode to “Screen”
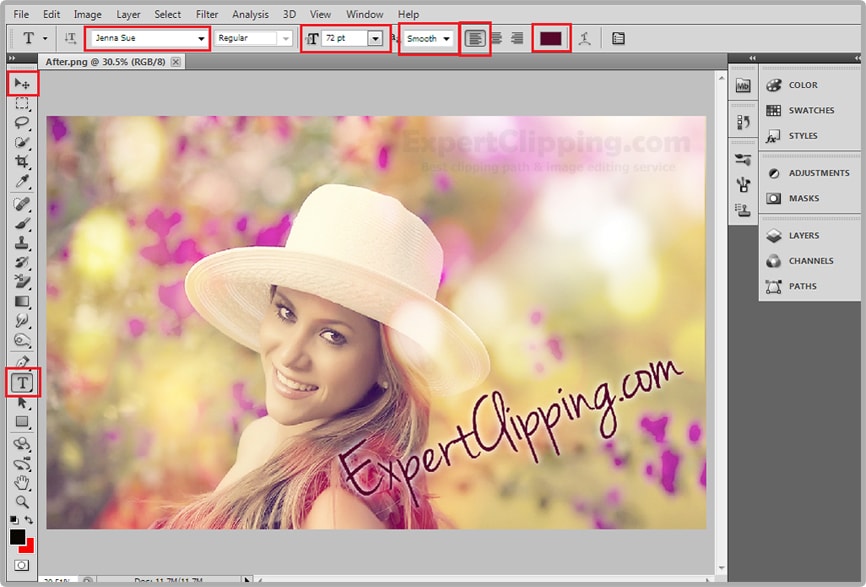
Open your horizontal type tool and pick a handwritten font, check size smood and left
Alignment and choose the color like you. Type out your main text, to reposition it open your move tool and move it.
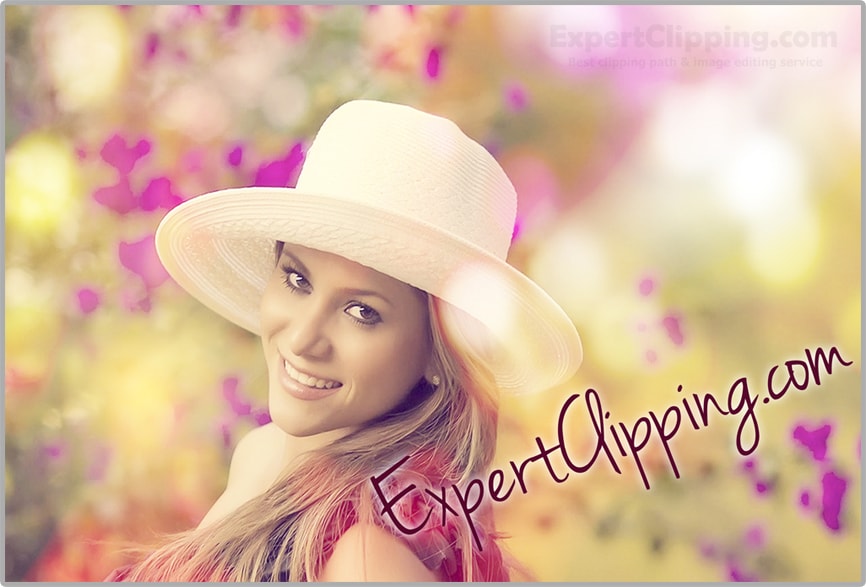
Now You Give Your Photo Dreamy Romantic Effect And Text..
Please Like Us, Comment And Share This
If You Have Any Question About This Please Comment.
We offer our services in every aspect of editing the photos such as Removing Backgrounds, Photo Retouching, Enhancing the Photo,Photo Restoration, Photo Processing, Amazon Photo editing services, Clipping Path services, Photo Collage,Masking, Cropping, Resizing Jewelry retouching, Raw/Jpg color correction and a lot more. In short, we offer any kind of services related to photo editing which you are looking for. The expert and highly professional team of Expert Clipping is confident in saying that we will shape your photo according to your imagination and we will provide you any kind of photo editing service.
Join our Facebook, Youtube, Google+, Twitter page to learn more video


Leave a Reply
Want to join the discussion?Feel free to contribute!