, ,

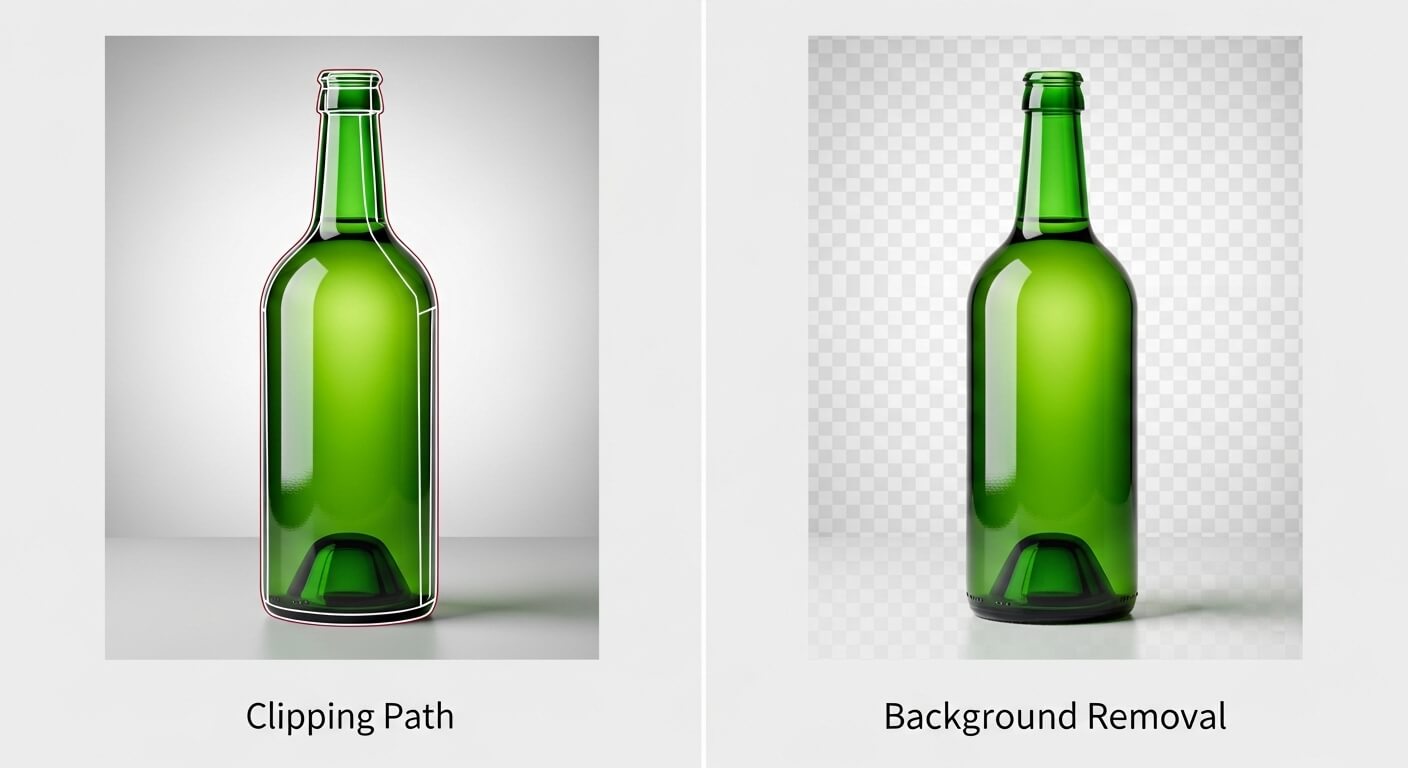
Clipping Path vs Background Removal: What’s the Difference?

clipping path vs background removal with EC

Do you often wonder what separates clipping path from background removal? You’re not alone. Many people use these terms as if they mean the same thing. But they’re actually different — and choosing the right one can change how your image looks.

At Expert Clipping, we help people understand the difference so they can get perfect photos for eCommerce, printing, or marketing.


What Is a Clipping Path?

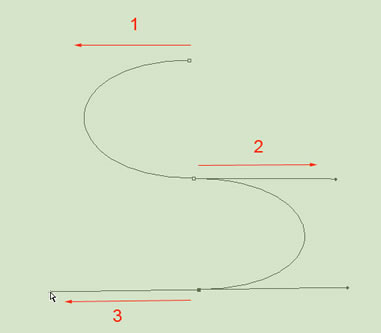
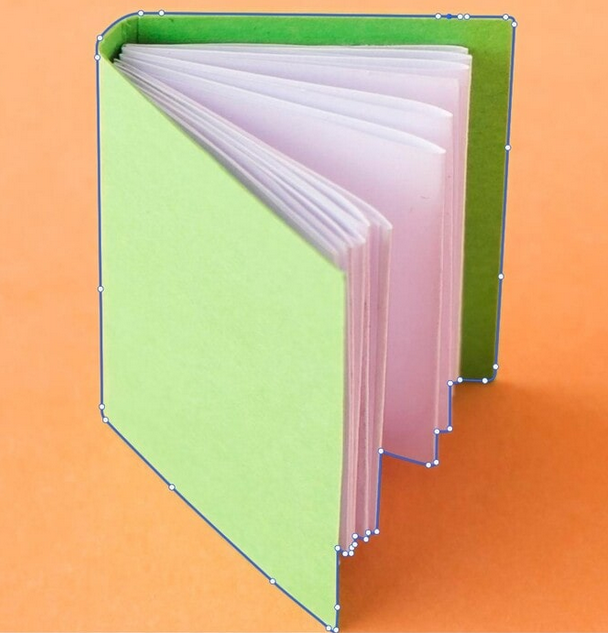
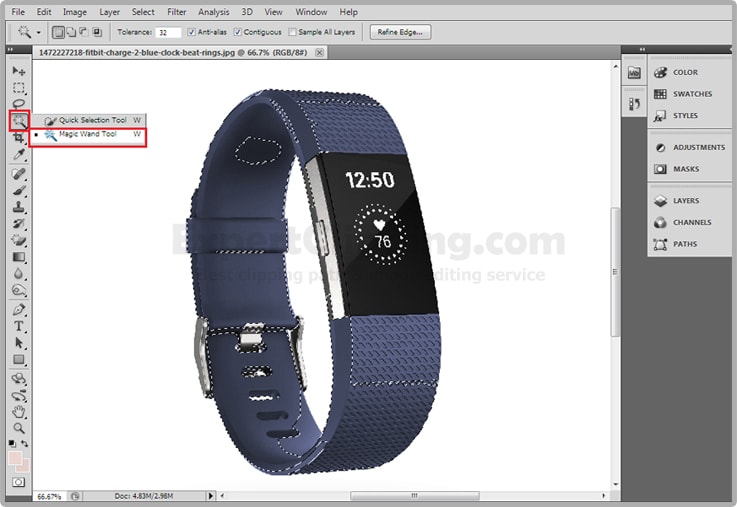
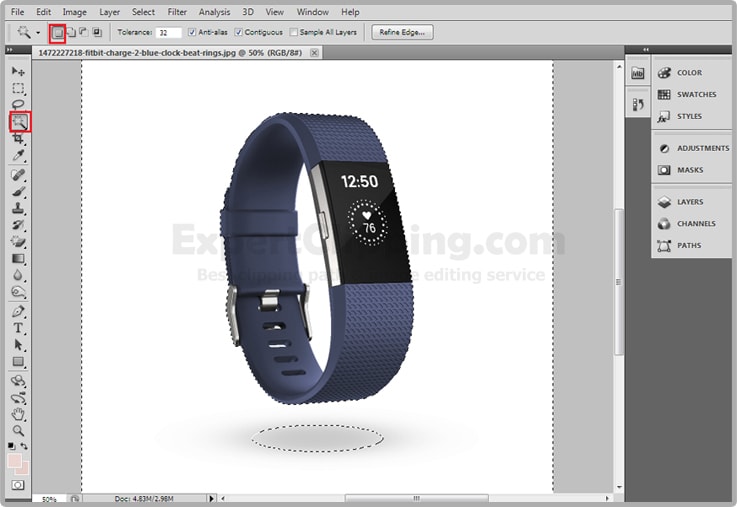
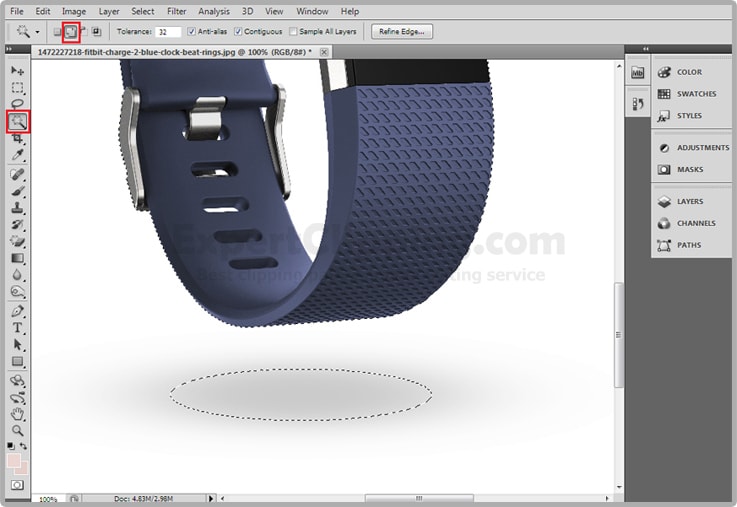
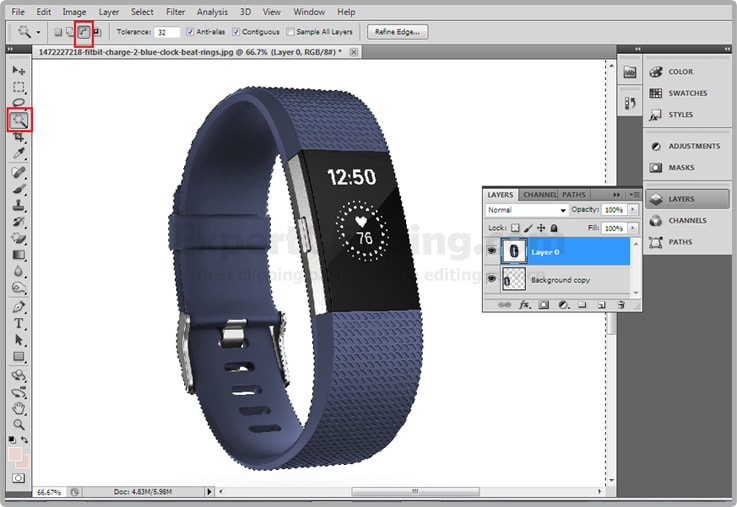
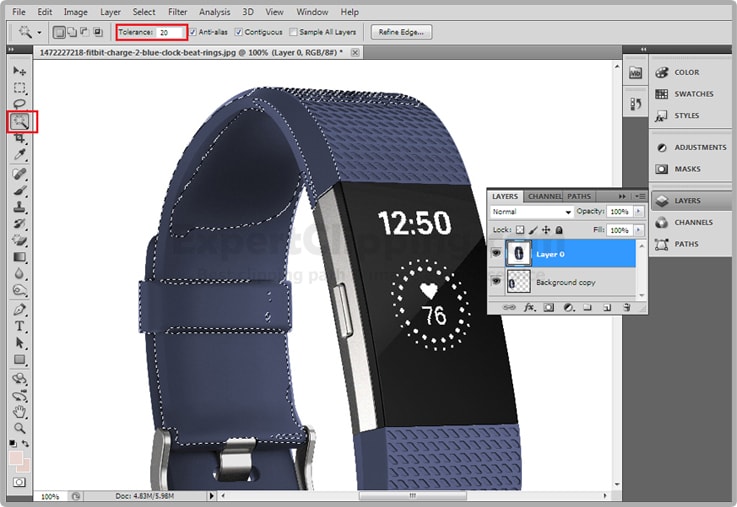
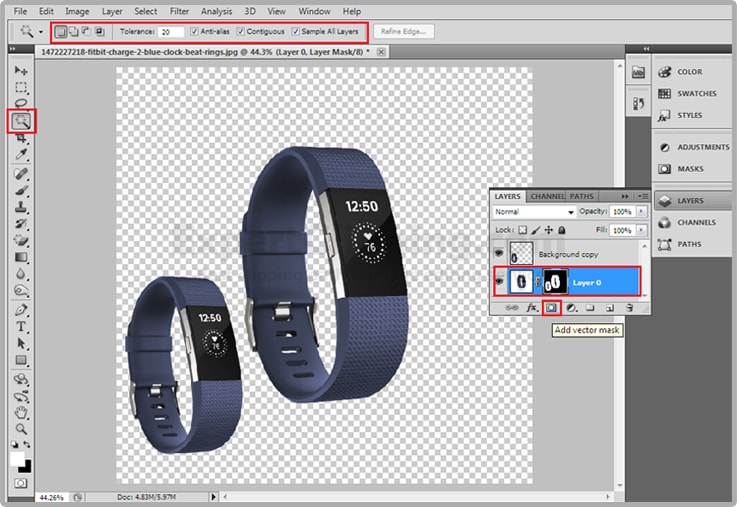
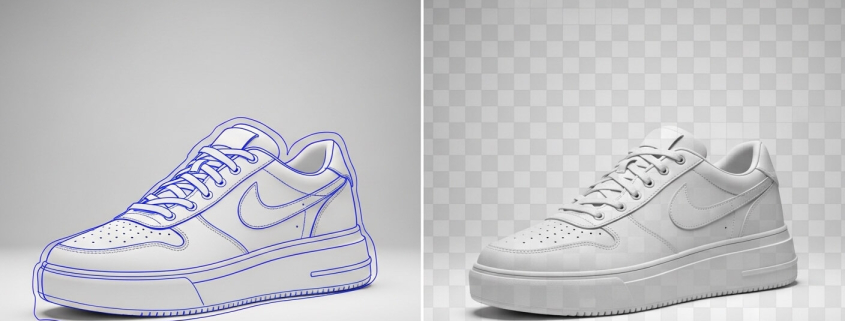
A clipping path is a hand-drawn outline made with the Pen Tool in Photoshop. It works like a digital scissor that cuts an object from its background.

When you save the path, it acts as a vector mask — only the part inside the path stays visible.

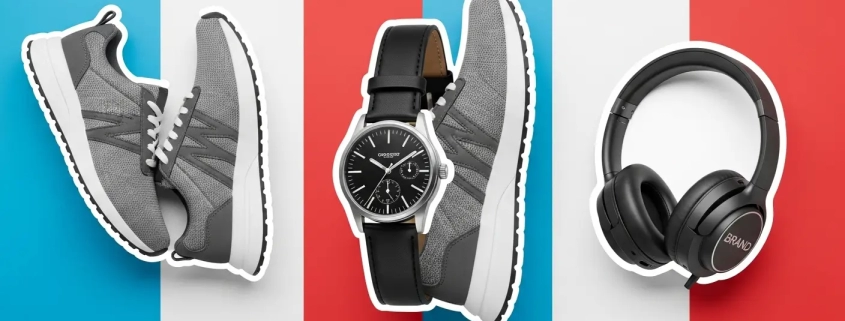
Clipping paths are perfect for sharp-edged objects like bottles, watches, boxes, and electronics. They keep every edge clean and pixel-perfect.

If you’ve seen the term clipping path services, it means experts like the team at Expert Clipping draw these paths manually for high precision.


What Is Background Removal?

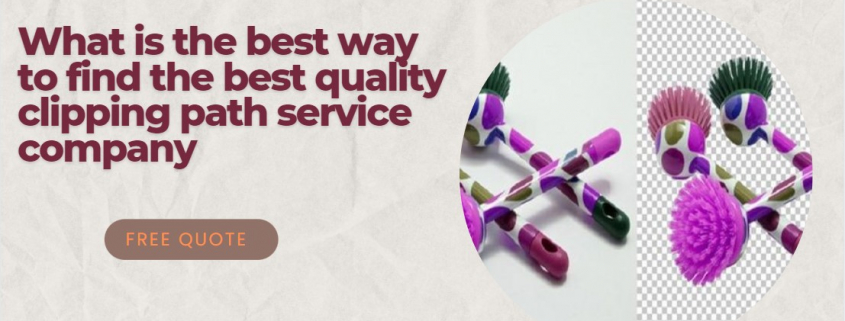
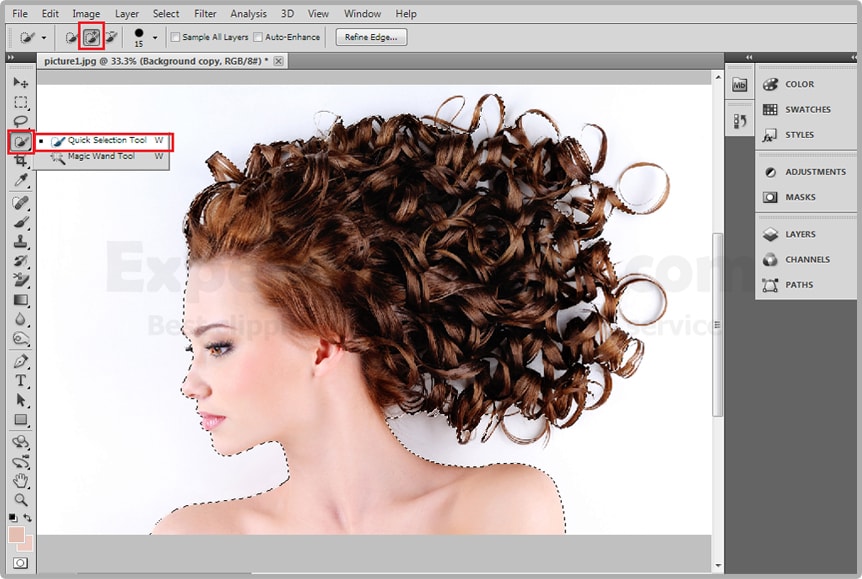
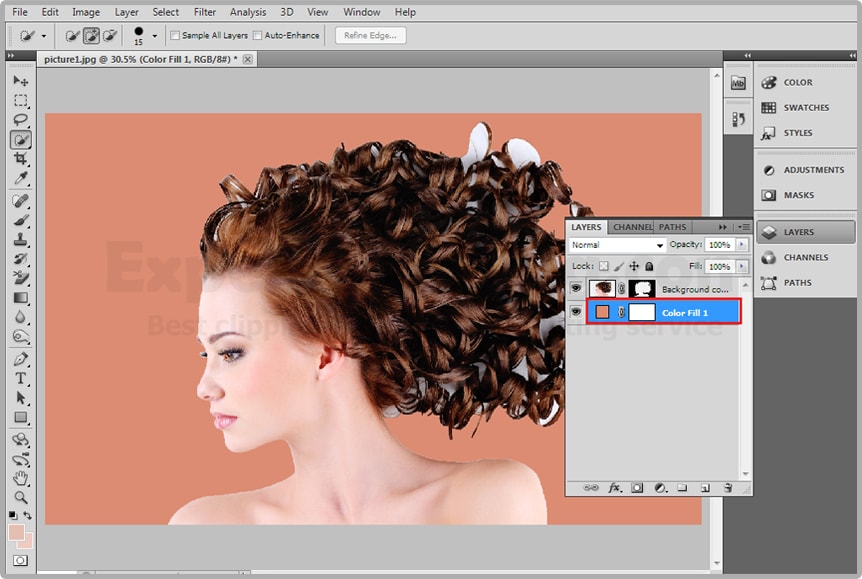
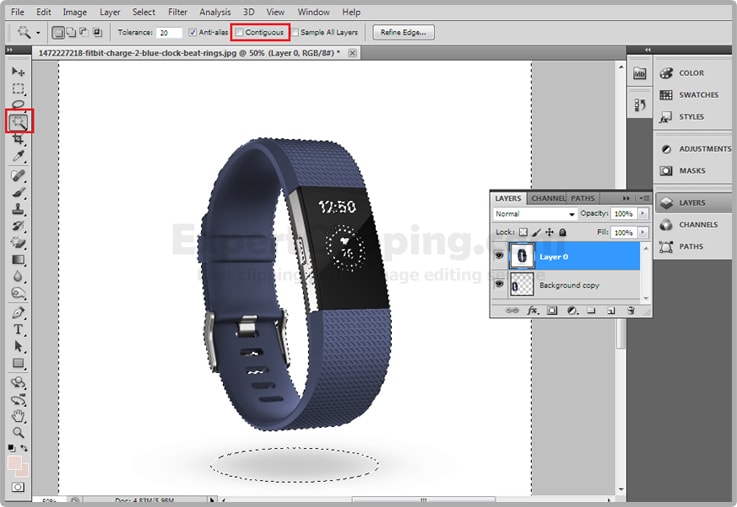
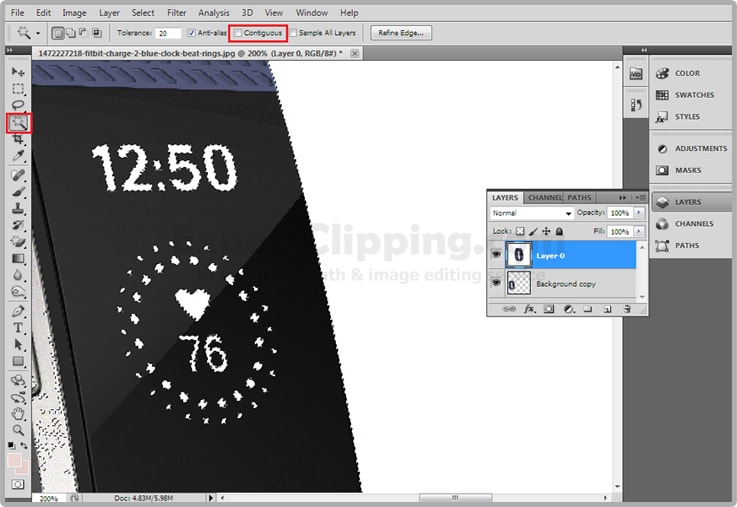
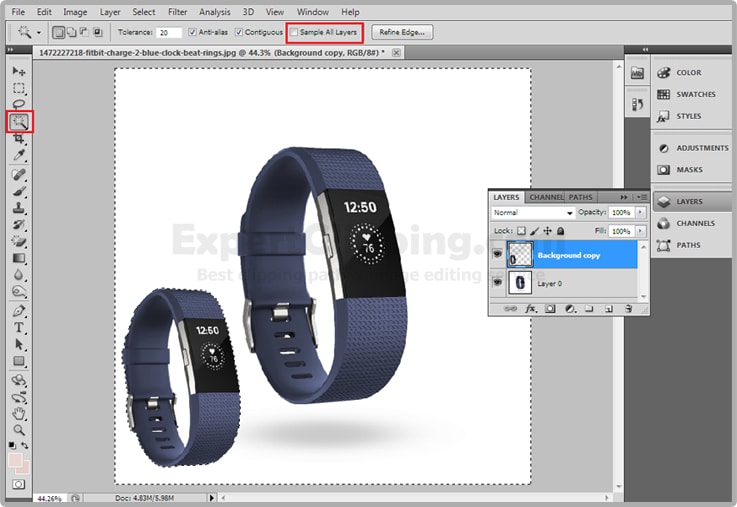
Background removal is a broader process. It means deleting or replacing a photo’s background — either by hand or using AI tools.

Sometimes it uses a clipping path. Other times, automatic tools detect and remove the background in seconds.

It’s fast and great for digital use, but may miss small details like hair or transparent edges.


Clipping Path vs Background Removal

Feature Clipping Path Background Removal
Method Manual, vector outline with Pen Tool Manual or automatic (AI-based)
Speed Slower, hand-drawn Faster, automated
Accuracy High precision, sharp edges May miss fine details
Best For Product images, print media Simple digital images
Skill Needed High Medium to low

When to use each:

  • Use clipping path for perfect product edges and print-ready quality.

  • Use background removal for simple or bulk images.

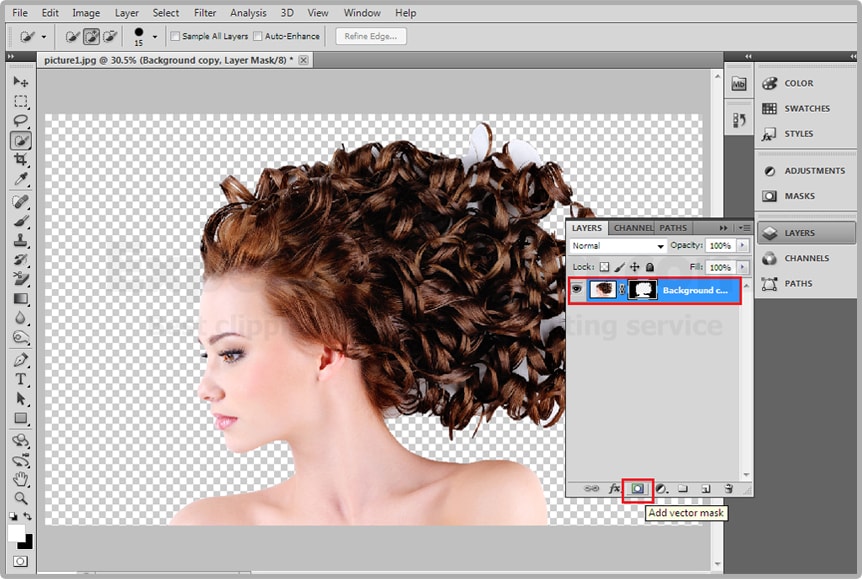
  • Combine both for complex photos — for example, path for edges and masking for hair.


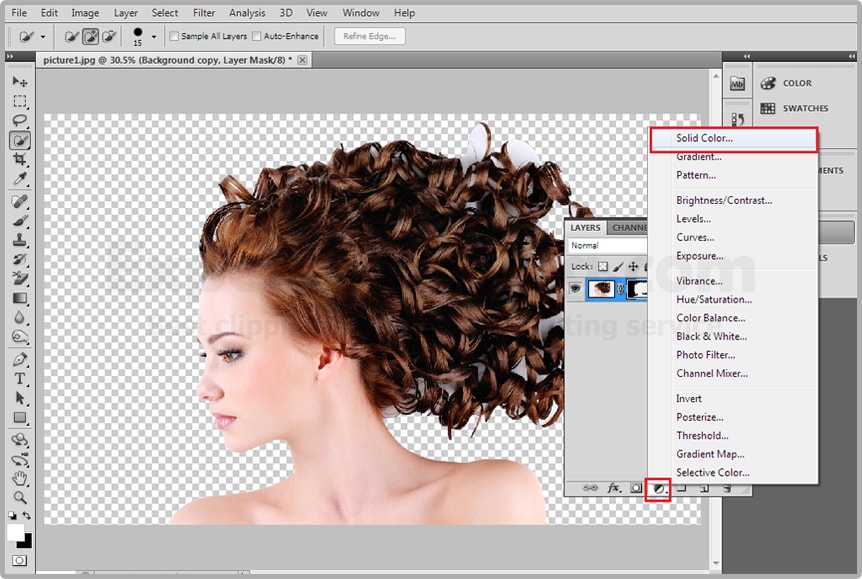
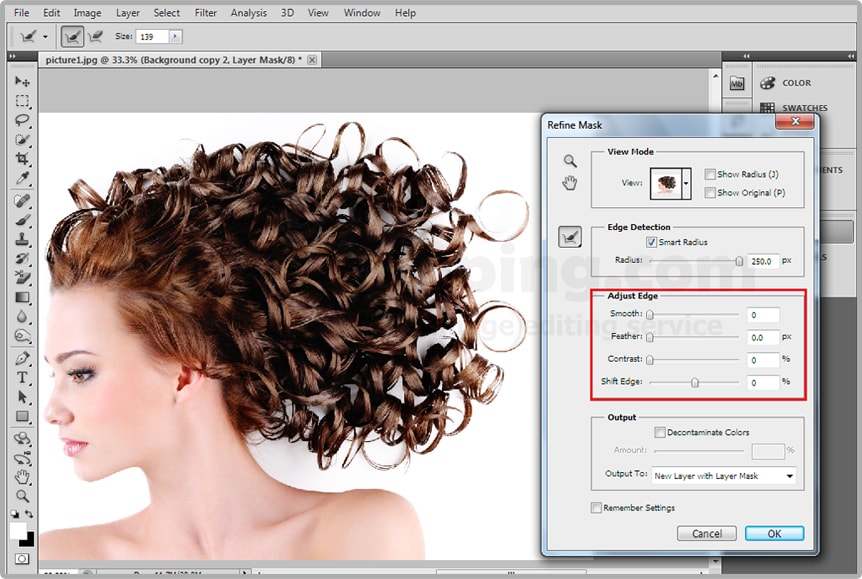
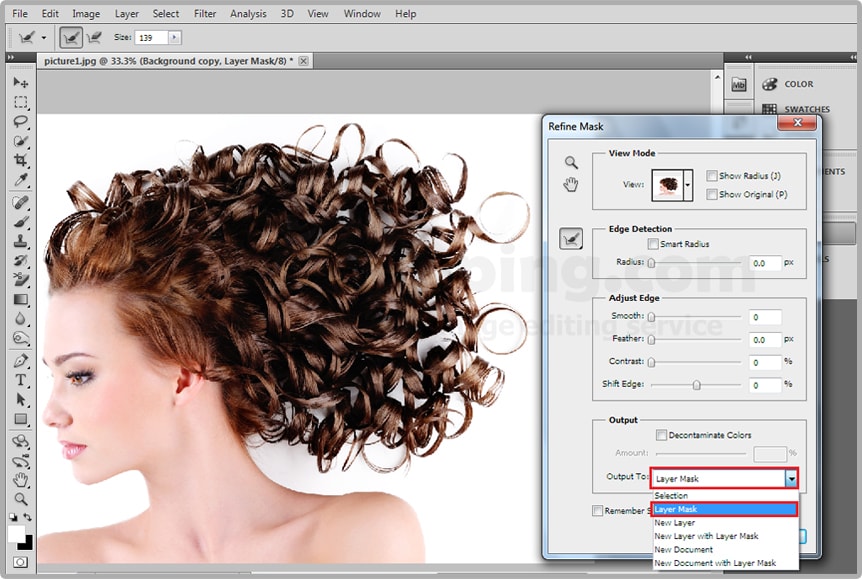
What’s the Difference Between Clipping Path and Mask?

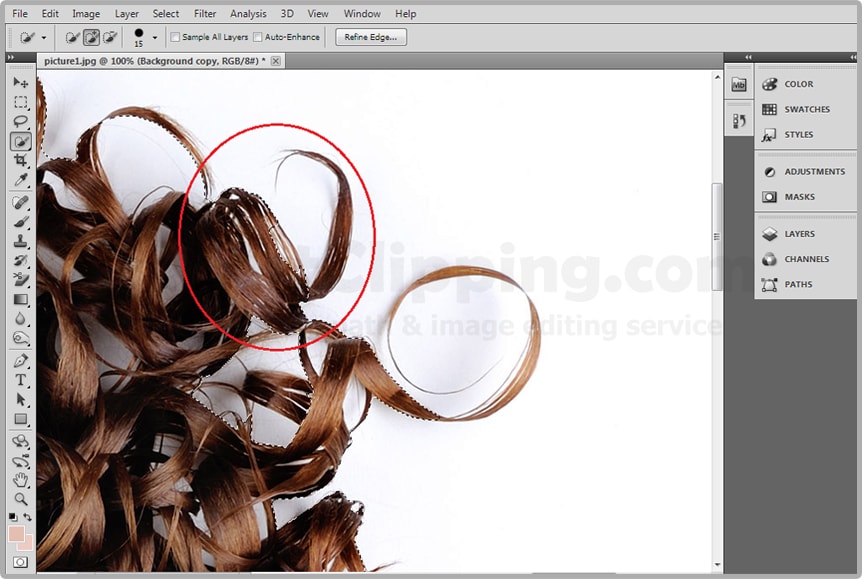
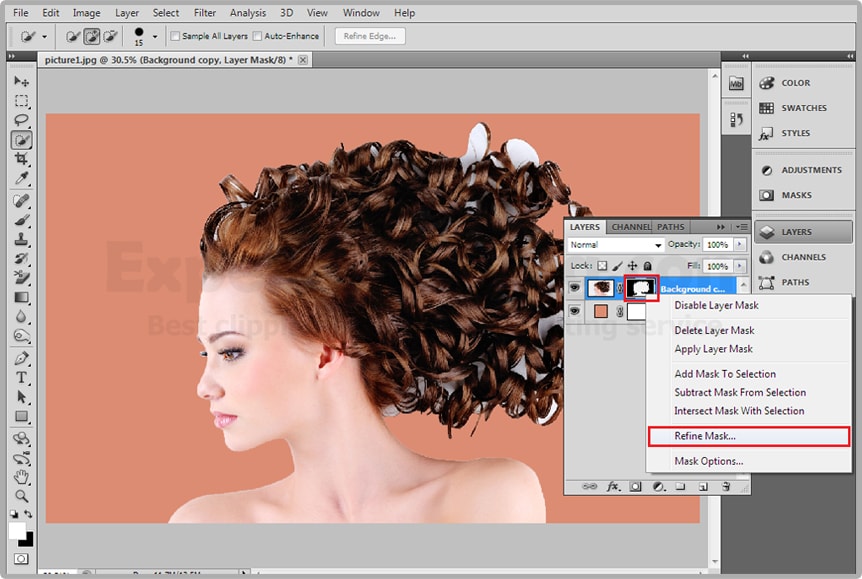
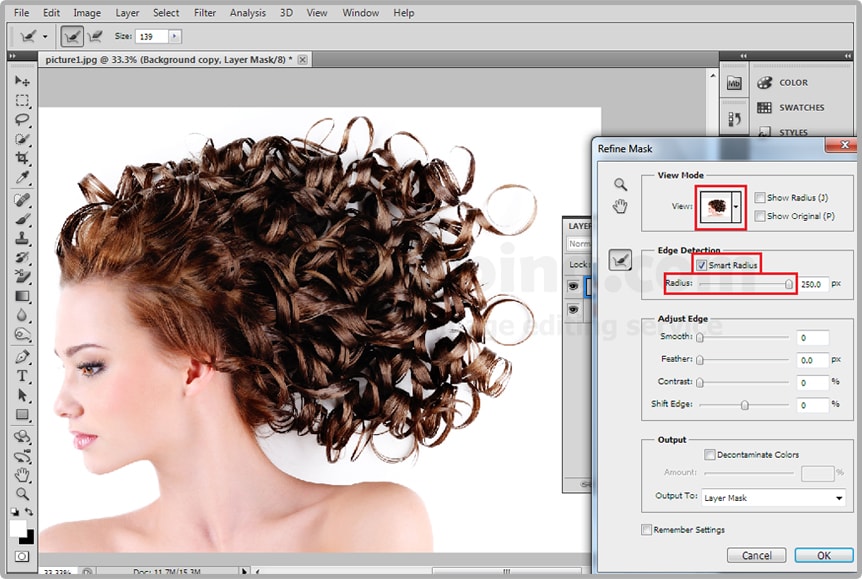
A clipping path is vector-based. A mask is pixel-based.
Clipping paths use anchor points to define edges, while masks control visibility using grayscale values.

In short:

  • Use clipping paths for clean, hard edges.

  • Use masks for soft edges like hair or fur.


What’s the Difference Between a Clipping Path and a Compound Path?

A compound path is used in Illustrator to combine multiple shapes into one.
A clipping path, however, hides or reveals parts of an image using one shape.

So, compound paths work with shape design, while clipping paths work with photo cutouts.


Is Background Removal a Part of Clipping Path Service?

Yes many clipping path services include background removal.
When you order from Expert Clipping, you can request both in one workflow: we clip, clean, and deliver print-ready images.


How to Choose the Best Clipping Path Service Provider

Look for:

  • Hand-drawn quality

  • Fast delivery

  • Affordable pricing

  • Free revisions or trials

Expert Clipping checks all these boxes with professional editors and 24/7 support.


Are You Looking for a Cheap Background Removal Service?

If you’re on a tight budget, Expert Clipping offers one of the lowest rates in the industry without cutting corners on quality.

You can even try a free trial to see the quality before you pay.


Is Clipping Path the Most Effective Way to Remove Backgrounds?

For hard-edged objects — yes, absolutely.
For hair or fabric — you might need a mix of clipping path and masking.
For bulk digital jobs, AI removal can work faster.

At Expert Clipping, we use both manual and AI tools for the best of both worlds.


How Can I Get a Clipping Path or Background Removal Job?

Start by learning Photoshop’s Pen Tool and masking techniques.
You can join freelance platforms or work with agencies like Expert Clipping that hire skilled editors globally.


Final Thoughts

In short:

  • Clipping path = precision and control.

  • Background removal = speed and simplicity.

If you want the perfect balance between the two, trust Expert Clipping. We handle everything — from simple cutouts to complex eCommerce images — fast, accurate, and affordable.

, ,

Why You Need Clipping Path Services for Product Photography

why need clipping path service

Have you asked why product photos online look so sharp and clean? The reason is often clipping path for product photos. It cuts the product from the background and makes the image neat. I have used it myself, and the results looked much better. If you want pro images that build trust and drive sales, you need clipping path service.


Professional & Clean Aesthetics

A clipping path draws a clear line around your product. It removes the extra details in the background and makes the object stand out. I saw this with jewelry photos. Small edges looked smooth and neat. For e-commerce, sharp edges matter. Buyers check every detail before they buy. In short, clipping paths make photos look pro without making them look fake.


Enhanced Visual Appeal

Clipping path services help the product shine. They remove clutter so eyes focus on color, shape, and texture. When I tried it on clothes, the fabric detail was clear. Shoppers noticed it right away. In the U.S., where online shopping is huge, this can mean more sales. To put it simply, clean images attract buyers.


Versatile Backgrounds

A clipped photo is easy to place on any background. I used white for Amazon, bold colors for ads, and lifestyle shots for catalogs. This gave me one photo for many uses. It saved time and money on extra shoots. In short, photo clipping path service makes images flexible for all platforms.


Creative Marketing Opportunities

Clipping path is not just about cutouts. It lets you create collages, bundle shots, or ad layouts. I once merged three product shots into one banner, and it looked like a full shoot. This gave me more freedom for social media. In short, clipping agency support helps you design better ads without big costs.


Consistent Branding

When all product photos share the same background, the store looks neat. I noticed this when I redid my site. A white background gave it a clean and pro style. U.S. shoppers trust brands that look polished. To sum up, a clipping path company keeps your brand image strong.


Improved E-Commerce Performance

Sharp photos build trust. Clean images help buyers feel sure about what they see. After I used clipping paths, I saw more clicks on social posts. My return rate dropped too. Buyers knew what they were getting. To put it simply, clear photos drive sales.


Adaptability Across Platforms

A clipped photo can be used on a site, catalog, or ad. I used the same image for Shopify, Instagram, and a brochure. It saved me time and made my branding more uniform. In short, one clipped photo works for many needs.


What I Like

  • Sharp and smooth edges make the photo look pro.

  • Easy to place on Amazon, Shopify, or Instagram.

  • I can swap colors without a new shoot.


What Could Be Better

  • Jewelry and hair take more time and cost more.

  • Bulk edits can be slow to finish.

  • Photoshop clipping paths are hard for new users.


My Personal Experience with Clipping Path Services

From my own work, I saw real gains:

  • My product photos looked sharper and cleaner.

  • Ghost mannequin edits made clothes look natural.

  • Color edits in Photoshop gave me ad options.

  • My posts got more likes and shares.

  • Clients trusted my work more.

These edits turned simple shots into pro photos.


Comparing With Other Brand

I have also used image masking, ghost mannequin, and color correction in Photoshop. These tools are useful, but clipping path is best for clear edges.

Clipping Path vs Image Masking: Quick Comparison

Feature Clipping Path Photoshop Image Masking in Photoshop
Best For Sharp edges Hair, fur, glass
Accuracy Very high High for soft details
Cost Lower Higher
Popular Use E-commerce items Fashion and glassware

Recommendation

If you sell products with clean edges, clipping path service provider is the best choice. For clothes or items with soft edges, use ghost mannequin or image masking too. In the U.S., where buyers want pro photos, this is a must. My advice: start with clipping paths and add other edits as you grow.


clipping path for product photos

FAQs for Why Need Clipping Path Service

What is clipping path service in Photoshop?

It is a way to cut a product from the background for a clean photo.

Why need clipping path service for product photos?

It makes your product stand out and builds trust with buyers.

Is clipping path better than auto tools?

Yes, manual clipping looks smoother and avoids rough edges.

Who uses clipping path services?

Sellers, designers, and photographers use it for pro images.

Can clipping path work for bulk edits?

Yes, but large orders may take more time to complete.

,

How to Use the Pen Tool

How to Use the Pen Tool

If you’ve ever opened Illustrator or Photoshop and seen that strange ink-pen icon and thought, “What does that even do?”  oh, I’ve been there.

The Pen Tool feels like learning to ride a bike all over again awkward at first, but once it clicks, it’s smooth sailing. So let me break it down in a way that actually makes sense. Like, real-life, “just tell me what to click” kind of help.

What’s the Pen Tool, Really?

In short? It’s your best friend for drawing clean, crisp shapes and lines.

You use it to create paths lines made from anchor points (little dots) that can be straight or curvy. Think of it like playing connect-the-dots, but you get to control the curves between the dots.

This is the tool behind most logos, vector art, and perfect cut-outs in Photoshop. No fuzz, no pixelation. Just clean lines. If you’re planning to make precise selections for background removal or cut-outs, mastering this tool is key.

Answer: The Pen Tool is used to draw precise, scalable vector paths using anchor points in design software like Illustrator or Photoshop.

Why the Pen Tool Feels So Tricky at First

I’ll be honest when I first tried it, I hated it.

It felt like I was battling a robot that wouldn’t listen. But here’s the thing: it’s not broken. It’s just different. The Pen Tool is like using chopsticks for the first time you fumble at first, but then it clicks.

Most people expect it to work like a pencil, but it’s more like a string you’re shaping one point at a time.

Answer: The Pen Tool feels hard at first because it works with anchor points and curves, not like freehand drawing.

Getting Started Without the Overwhelm

Let’s keep it simple. Here’s what to look for.

Where to Find It

In Illustrator or Photoshop, look to the left-side toolbar. It looks like an old-school fountain pen nib. Hit the “P” key for the shortcut.

Answer: You can access the Pen Tool by pressing “P” or clicking the pen icon in your toolbar.

Want to see this in action? Check out our Clipping Path Tutorial.

What It Looks Like

When you hover over your canvas, your cursor becomes a pen tip. Click once to create a dot (that’s an anchor point). Click again to create a line.

If you drag while clicking? You create a curve. More on that soon.

Drawing Basics: Lines, Points, and Curves

Straight Lines Are Just Clicks

Click once for the starting point, click again somewhere else to make a straight line. Keep clicking to continue the path. Easy.

Want to apply these skills for clipping path services? Straight lines come in handy for product edges and geometric shapes.

If you want to stop the path, just press Ctrl (Cmd on Mac) + Click anywhere on the canvas.

Answer: To make straight lines, just click once per point without dragging.

Curves: The Art of Dragging Just Right

This is where people freak out, but hang in there.

Click and drag to make a curve. The direction and length of your drag control the curve’s shape. It’s like stretching a rubber band between two points.

Answer: To draw a curve, click and drag; the direction and distance control the curve.

Anchor Points Explained Simply

Each point tells your path where to go. Straight ones just connect lines. Curved ones have “handles” that control the direction and strength of the bend.

Professionals at our clipping path service company use anchor points to create clean, scalable paths for high-quality image cut-outs.

Think of handles like puppet strings that you can pull to change how the path behaves.

Answer: Anchor points define a path’s direction; handles on them shape curves.

Let’s Talk About Handles

Handles are your superpower once you understand them.

What Are Handles?

When you make a curved anchor point, two little arms pop out those are handles. They control the slope of the curve coming out of that point.

Answer: Handles control the curve direction and strength coming from an anchor point.

How to Move and Adjust Them

Hold down Alt (Option) and drag a handle to move it without messing up the whole curve. It takes some getting used to, but once it clicks, you’ll fly.

Curious about advanced Pen Tool techniques? You’ll love our guide on how to use the Pen Tool in Photoshop.

Answer: Use Alt/Option to adjust one handle independently for fine-tuning curves.

Common Mistakes We All Make

I’ve made them all, so you don’t have to.

Too Many Points Syndrome

People think more points = better shape. Nope. Less is more. The fewer anchor points you use, the smoother your shape will be.

Answer: Using fewer anchor points creates smoother curves and simpler paths.

Overthinking Curves

Don’t try to make the perfect curve in one go. Place a few points, then adjust the handles. Trust me it’s easier that way.

Answer: Place anchor points first, then fine-tune curves using handles afterward.

Real-World Uses for the Pen Tool

So, what can you actually do with it?

Tracing Images for Clean Vectors

Ever had a photo and wanted a cleaner version of a shape in it? Import the image, lower its opacity, and trace it with the Pen Tool.

It’s like digital tracing paper super satisfying.

Answer: Use the Pen Tool to trace over images and create sharp vector outlines.

Making Custom Icons or Logos

This is where it shines. You can draw scalable logos that look crisp no matter the size. No blurry pixels, ever.

Answer: The Pen Tool helps create vector-based icons and logos that stay sharp at any size.

Creating Masks in Photoshop

Want to cut someone out of a background cleanly? Use the Pen Tool to draw around them, then convert the path into a selection. It’s essential in high-end photo retouching services.

Answer: Use the Pen Tool to create precise cut-out masks in Photoshop.

Tips That Changed the Game for Me

Here’s what I wish someone told me sooner.

Practice on Simple Shapes First

Try tracing squares, triangles, circles. You’ll start to “get” how the handles work when the shapes are predictable.

Answer: Practice on basic shapes to learn how paths and curves behave.

Use Zoom Like a Pro

Zoom way in to place anchor points more precisely. The closer you look, the cleaner your work.

Answer: Zoom in while placing points for better accuracy and cleaner paths.

Don’t Fear the Undo Button

Ctrl+Z (Cmd+Z on Mac) is your best friend. I probably hit it 1,000 times a day. It’s part of the process, not a mistake.

Answer: Use undo freely—it’s part of learning and perfecting your design.

Wrapping It Up

Learning the Pen Tool is like learning a new language. It’s awkward at first, but then it starts making sense and suddenly, you can say anything you want with your shapes.

Start slow. Trace easy stuff. Mess up a bunch. But stick with it. One day, you’ll draw something and realize, “Hey, that felt… easy.” That’s when you know you’ve got it.

Bonus: Need Clean Product Edits?

Want to apply your Pen Tool skills professionally or outsource the task? Our team offers multiple clipping path service, ghost mannequin services, and product photo retouching services to meet every eCommerce need.

FAQs
Is the Pen Tool only in Illustrator?
Nope! It’s in Photoshop, InDesign, and most vector tools like Figma and Affinity Designer too.
Can I edit a path after drawing it?
Yes, you can move anchor points, adjust handles, and reshape any path later.
Why won’t my path close?
Make sure you click directly on the first anchor point to close the loop.
What’s the best way to get better with it?
Daily practice—even 5–10 minutes of tracing something can make a big difference.
Can beginners learn the Pen Tool quickly?
Absolutely. Start small, practice often, and use Ctrl+Z like it’s your sketchpad’s eraser.

, ,

The Top Benefits of Choosing a Professional Clipping Path Service Provider

Professional Clipping Path Service Provider

Introduction to clipping path services

In the world of professional photography and graphic design, it’s important to produce high-quality images that stand out from the competition. To achieve this, one essential technique is using clipping paths. A clipping path is a vector shape or outline that is used to separate the subject of an image from its background, allowing you to remove or replace the background as needed. This process is crucial in creating visually appealing images, especially for e-commerce websites, advertisements, and marketing materials.

Clipping path services have become increasingly popular as businesses and individuals recognize the importance of high-quality images in their marketing efforts. These services are provided by professional clipping path service providers, who use advanced software and tools to create precise, clean, and sharp-edged clipping paths for images. In this article, we will discuss the top benefits of choosing a professional clipping path service provider and how it can help streamline your workflow.

Understanding the clipping path process

The clipping path process involves using photo editing software, such as Adobe Photoshop or Illustrator, to draw a vector path around the subject of an image. This path is then used to isolate the subject from its background, allowing it to be easily edited, manipulated, or placed into a new context. The process requires a keen eye for detail, as well as a thorough understanding of the software’s tools and capabilities.

One common use of clipping paths is in product photography for e-commerce websites. By removing the background from product images, businesses can present their products in a clean, consistent, and professional manner, making it easier for customers to browse and make purchasing decisions. Clipping paths can also be used in other industries, such as fashion, advertising, and print media, to create visually striking images that capture the viewer’s attention.

Why choose a professional clipping path service provider?

As with any specialized skill, mastering the clipping path process takes time, practice, and dedication. Many businesses and individuals may not have the necessary resources or expertise to handle their own clipping path needs. This is where a professional clipping path service provider comes in. By outsourcing your clipping path work to an experienced provider, you can save time, reduce costs, and ensure a high level of quality in your images.

Professional clipping path service providers have dedicated teams of skilled photo editors and graphic designers who are well-versed in the latest software, tools, and techniques. They can handle large volumes of work quickly and efficiently, allowing you to focus on other aspects of your business. Additionally, outsourcing to a professional clipping path service provider can often result in cost savings, as you won’t need to invest in expensive software or hire and train in-house staff.

Top benefits of outsourcing to a clipping path service provider

Expertise and skill: Clipping path service providers have teams of skilled and experienced photo editors who are proficient in using advanced photo editing software. They have the expertise to handle complex projects and deliver high-quality results.

Time and resource savings: Outsourcing your clipping path work allows you to focus on your core business activities, while the service provider handles the time-consuming and labor-intensive task of creating clipping paths.

Cost-effective: Hiring a professional clipping path service provider can be more cost-effective than investing in expensive software and training in-house staff. You pay only for the services you need, and there are no overhead costs associated with hiring and maintaining a dedicated team.

Consistent quality: A professional clipping path service provider will ensure that all your images are edited and processed consistently, maintaining a high level of quality across your entire portfolio.

Scalability: Clipping path service providers can easily scale their services to match your needs, whether you have a small project or a large volume of images to process.

Factors to consider when selecting the best clipping path service

When looking for the best clipping path service provider for your needs, there are several factors to consider:

Reputation and experience: Research the provider’s reputation and track record in the industry. Look for customer testimonials, case studies, and examples of their work to gauge their level of expertise and experience.

Quality and accuracy: The quality and accuracy of the clipping paths are crucial for achieving professional results. Ensure that the provider has strict quality control measures in place and offers a satisfaction guarantee or revisions if necessary.

Turnaround time: In fast-paced industries like e-commerce and advertising, quick turnaround times are essential. Choose a provider who can deliver high-quality work within your required timeframe.

Pricing: Compare the pricing of different providers and find one that offers competitive rates while maintaining a high level of quality.

Customer support: Look for a provider that offers excellent customer support and communication, ensuring that you can easily discuss your project requirements and address any concerns that may arise.

Photo clipping path services for various industries

Clipping path services are used across a wide range of industries, including:

E-commerce: Online retailers use clipping path services to create clean, professional product images that showcase their products and entice customers to make a purchase.

Fashion: In the fashion industry, photo clipping is essential for creating eye-catching images for catalogs, lookbooks, and marketing materials.

Advertising and marketing: Companies use clipping path services to create striking visuals for ad campaigns, social media content, and promotional materials.

Real estate: Clipping path services can be used to enhance property images, making them more attractive to potential buyers or renters.

Print media: Magazines, newspapers, and other print publications rely on clipping path services to produce high-quality images for their pages.

Advantages of image clipping path for e-commerce businesses

E-commerce businesses can significantly benefit from using image clipping path services. Some of these advantages include:

Professional product presentation: Clipping path services help create clean, consistent, and professional product images that make it easier for customers to browse and make purchasing decisions.

Enhanced visual appeal: High-quality images with clear, precise clipping paths can make your products stand out from the competition, increasing the likelihood of attracting more customers.

Improved conversion rates: Professional product images can lead to higher conversion rates, as customers are more likely to make a purchase when presented with visually appealing and accurate images.

Easy image manipulation: Clipping path services make it easier to edit, manipulate, and update your product images as needed, allowing you to keep your e-commerce website fresh and up-to-date.

Quality assurance and turnaround time in clipping path services

When selecting a clipping path service provider, it’s essential to consider their quality assurance processes and turnaround time. A reputable provider will have strict quality control measures in place, ensuring that each image is carefully reviewed and edited to meet your specifications. They should also be able to provide a satisfaction guarantee or offer revisions if necessary.

Turnaround time is another critical factor, as fast-paced industries like e-commerce and advertising require quick processing of images. A professional clipping path service provider should be able to deliver high-quality work within your required time frame, without compromising on quality.

Comparing in-house vs. outsourcing clipping path service providers

Many businesses may wonder whether it’s more cost-effective and efficient to handle their clipping path needs in-house or outsource to a professional service provider. Here are some key points to consider when making this decision:

Expertise and skill: A professional clipping path service provider has a team of skilled photo editors with extensive experience in the field. In-house staff may not have the same level of expertise, and training can be time-consuming and costly.

Time and resource savings: Outsourcing clipping path work allows you to focus on your core business activities, while the service provider handles the time-consuming and labor-intensive task of creating clipping paths.

Cost-effectiveness: Hiring a professional clipping path service provider can often be more cost-effective than investing in expensive software and training in-house staff. You pay only for the services you need, and there are no overhead costs associated with hiring and maintaining a dedicated team.

Scalability: Clipping path service providers can easily scale their services to match your needs, whether you have a small project or a large volume of images to process. In-house teams may struggle to keep up with fluctuating workloads.

Conclusion: Streamlining your workflow with a professional clipping path service provider

In conclusion, choosing a professional clipping path service provider can offer numerous benefits for businesses and individuals alike. By outsourcing your clipping path needs to an experienced provider, you can save time, reduce costs, and ensure a high level of quality in your images. Professional clipping path services can help streamline your workflow, allowing you to focus on your core business activities and create visually appealing images that stand out from the competition. So, don’t hesitate to invest in a professional clipping path service provider to enhance your images and boost your business’s success.

,

Clipping Path Service in New York – The Professionals Behind the Best Clipping Paths

Clipping path service, Clipping path service provider, Clipping path services, Clipping path Service Company, Remove background from image, Image editing company, Photo editing company, Photo editing services, Photo retouching services

Clipping Path Service in New York – Professionals Behind Perfect Edits

If you want clean, professional images for your business, a clipping path service is the answer. Our New York-based experts make product photos stand out by removing backgrounds, reshaping objects, and adding realistic shadows. The result? Pixel-perfect images ready for eCommerce, ads, or print.

What is a Clipping Path?

A clipping path is a digital outline that cuts an object from its background. Think of it as a precise “cut-and-paste” tool in Photoshop or Illustrator. With it, you can:

  • Remove or change backgrounds

  • Highlight only the product

  • Create space for text or designs

  • Save time on complex edits

Unlike auto-tools, a manual clipping path gives you clean edges, even around hair, glass, or fine details.

👉 Learn more in our clipping path tutorial.

Why Choose a Clipping Path Service in New York?

Editing images yourself can take hours. Hiring a professional clipping path company saves both time and money.

Benefits include:

  • Cost-effective: Affordable editing without buying expensive software.

  • Reusable: Once created, clipping paths can be used across many designs.

  • High-quality: Clean, detailed results for web shops, ads, or print catalogs.

  • Expert help: Our trained designers guide you from start to finish.

👉 Compare clipping path service providers before choosing the right one.

How Does the Process Work?

  1. Upload your images – send photos or product shots.

  2. Precision editing – we clip out the product and refine edges.

  3. Background replacement – add white, transparent, or custom designs.

  4. Finishing touches – shadows, reflections, or reshaping if needed.

  5. Delivery – get final images by email or cloud storage.

It’s that simple!

Why Are Clipping Paths Important?

For businesses, great images mean higher sales. Clipping paths help you:

  • Create eCommerce-ready product shots

  • Reuse images for ads, catalogs, or social media

  • Save hours of manual editing

  • Ensure consistency across your store

For example, fashion stores use ghost mannequin services to present clothing realistically. Jewelry brands rely on reflection shadow services for polished images.

best clipping path service in New York

Benefits of Using a Professional Service in New York

By working with a trusted clipping path provider, you get:

  • Fast turnaround: Images edited within hours.

  • Affordable pricing: Options starting under $1 per image.

  • Wide services: From background removal to photo retouching.

  • Expert support: Friendly guidance throughout the process.

👉 Get started with a free trial today.

Conclusion

If you’re looking for the best clipping path service in New York, our team has you covered. From product cut-outs to shadow effects and retouching, we provide everything your business needs to showcase images at their best.

💡 Ready to upgrade your visuals? Request a free quote now.

, ,

How To Cut Out Hair From Image In Photoshop

Cut Out Hair From Image In Photoshop

Cut Out Hair From Image In Photoshop

Today i’m going to show you how to cut out every single hair from your image by using this method.

First of all i’d like to use my quick selection tool as you can see the top of your tool palette And make of selection like you.

cutouthairec-1-min

If you made a selection of her body properly, but the hair doesn’t have to accurate like. The basic of the selection would work just fine.

cutouthairec-2-min

Once this thing is has select your Add Vector Mask option for mirror and click bottom of your layer. It will apply a layer mask. 

cutouthairec-3-min

If you actually see the image properly go to and create a solid layer from Create new fill or adjustment layer>Solid Layer And choose a color you like it. Now put this under your layer so now you can see your chosen solid color in your image background

cutouthairec-4-mincutouthairec-5-mincutouthairec-6-min

Now you can see your background color fringing and her hair doesn’t look really good after that you need to select your mask not the image, then right click on that and select refine mask now the refine mask first of all check the option smart radius  after that make the radius full 100% actually it 250% and after that you need to still get rest of the remaining hair’s like you.

cutouthairec-7-mincutouthairec-8-min

Now click this option Decontaminates Color and give it sometime night it doesn’t do anything, to take it right way and you can got rid of that and it’s looks like magic. And now you can hit ok, and you can explore further options.
cutouthairec-9-mincutouthairec-10-min

Now bitter reality and if you don’t how this kind of different layer after hitting OK. Here’s the trick right click refine mask whenever you hit OK make sure this layer mask option selected and then it OK.
cutouthairec-11-min

And you completely remove the every single hair from images like you, and you can delete the solid color layer from your layer bar and you can add another image in your background like you.

cutouthairec-12-min
cutouthairec-14-min

Thanks for seeing it. I’ll show you another tutorial in my next lesson on adobe Photoshop you’re invited to see it,

If you have any question please comment…

How To Cut Out Hair From Image In Photoshop Video

Expert Clipping  is one of the best image editing company & photo editing services which has a large number of professional image editors working specially for it. These image editors have been selected after examining a lot of different images edited by them and it has been noticed that Image background removing  is one of those areas in which these professional image editors of Expert Clipping are extremely good. As it has already been told that Image background removing is not an easy work to do but in fact it is a very complicated process which involves a great attention and concentration along with a great experience.

Clipping Path is a photo editing technique which is done manually. This technique is used to cut out any unwanted background from the image. It is mostly used in image editing when you need to place your image in another context. It is also used to make editorial images. You can read more on clipping path service providers if you want to.

Before you hire any clipping path service provider, make sure you have gone through their portfolio and see samples of their work. This is the only way to see whether or not their work is up to the mark and is of the same quality as their portfolio. This is necessary because having a good portfolio is not always a good indication that they will be able to do excellent work for your business. If they have a good portfolio and can handle your job, then there is nothing stopping you from handing them a job.

Join our FacebookYoutubeGoogle+Twitter page to learn more video

,

Remove background from image Use Magic Wand Tool

Clipping path service, Clipping path service provider, Clipping path services, Clipping path Service Company, Remove background from image, Image editing company, Photo editing company, Photo editing services, Photo retouching services

Remove background from image Use Magic Wand Tool

Today i’m going to show you How to Use Magic Wand tool in adobe Photoshop cs5.

The Magic Wand tool by far one of the simplest,most basic tools in Photoshop for isolating an image.

Remove Background Using Magic Wand Tool Photoshop -Tutorial

The Magic Wand Tool in Photoshop is a selection tool used to replace, remove or edit any part of an image.

If you utilize Photoshop regularly, you may be familiar with the Magic Wand Tool and its functionality.

The Magic Wand Tool allows for quick and efficient selection of specific areas in a photo, including the ability to create a transparent background in a matter of seconds.

The magic wand tool in Photoshop is useful for making selections and replacing or removing backgrounds.

Wand Tool:

I’m gonna introduce you to where it’s at it W on the shortcut key and it’s look like here in your tools palette. Just Click on magic wand will have one magic wand symbol here and you can just clicking around and magically selecting things wherever you like.

removebackwind-1-min

New Selection:

When you click background which isn’t difficult to do it on if you click. you’ll notice that the magic wand has selected all the area you choose with a tolerance have 32 which was preset up in the tolerance box. And it’s done a fairly good job.

removebackwind-2-min

Add To Selection:

If it’s missed few parts and those parts can be added in couple of different ways you add them in by going up Add To Selection in your toolbar, And simply add the new areas you want to add. There’s actually a simpler way of doing it.

And different way is change your option and that would be after you made your main selection just hold on the shift key and click the extra areas that you need to change any option. You’ll notice whenever you’re in an deselected area and you press shift, a little plus sign will appear below the magic won allowing you to add to your selection.
removebackwind-3-min

Subtract From Selection:

Conversely you’re already selection and you press alt key and you’ll be giving a negative sign which is subtraction from the current selection.
removebackwind-4-min

Let’s dig into some of the other functions of the magic wand tool real quick. If you want deselect this for ctrl d.

Up here you’ll noticed several options for the magic tool.most I’ve which never get touched using Photoshop. That is the really useful if you know how to adapt them.

Intersect With Selection:

It’s an interesting option that allows to make two different selections that overlapped in your end result is going to be only were the two overlaps that will be your selection. It’s usually not very useful with the magic wand tool.
removebackwind-5-min

Tolerance:

The Tolerance is going to be the variation the color you’re selecting.
removebackwind-6-min

Contiguous: Contiguous is something you can deselect and try this your own click in there, and you’ll notice that is selected all the color in any image, not just in the area you clicked
removebackwind-7-min

This is a really useful feature but be careful because with it deselected if you were to sample all the color in the image. You’ll get anything that falls within that tolerance which might end up cutting out some of your image.

removebackwind-8-min

Sample All Layers:

It’s useful if you’re on a multi-layered document. It didn’t  even register that this back image was there if you you select your current layer.
removebackwind-9-min

If were to  click sample all layers then click again you would then get a selection love that area on all the layers including the ones below and above the picture you working on.
removebackwind-10-min

Lets mask it out just using the mask tool add a layer mask down here at the bottom. And you’ve isolated it and it’s now on a transparent background and it’s really be dropped over into another image.
removebackwind-11-min

How To Remove Background From Image Video

Expert Clipping  is one of the best image editing companyphoto editing services which has a large number of professional image editors working specially for it. These image editors have been selected after examining a lot of different images edited by them and it has been noticed that Image background removing  is one of those areas in which these professional image editors of Expert Clipping are extremely good. As it has already been told that Image background removing is not an easy work to do but in fact it is a very complicated process which involves a great attention and concentration along with a great experience.

What is the Magic Wand Tool?
The Magic Wand tool is a selection tool commonly found in graphic design and photo editing software. It allows users to select areas of an image based on their color or tone, making it a powerful tool for quick and accurate selections. The tool works by selecting pixels with similar characteristics to the one clicked, making it particularly useful for images with distinct areas of color or tonal variation. The Magic Wand tool often includes options for refining selections, such as adjusting the tolerance level or selecting contiguous or non-contiguous areas. Overall, the Magic Wand tool is an essential tool for designers and photo editors looking to quickly select and edit specific areas of an image.

When to Apply the Magic Wand Tool in an Image?
The Magic Wand tool is an excellent choice for selecting areas of an image based on color or tonal variations. It is particularly useful when you need to select large areas of an image quickly and accurately. For example, if you have an image of a blue sky against a green landscape, you can use the Magic Wand tool to select the sky with just a few clicks. It is also useful for removing unwanted elements from an image, such as a background or a specific object. However, the Magic Wand tool may not be the best option for more complex selections or images with subtle color or tone variations. In such cases, other selection tools may be more suitable.

How To Remove Image Background with Photoshop Magic Wand Tool?
To remove the background of an image with the Magic Wand tool in Photoshop, first select the Magic Wand tool from the toolbar. Then click on the background to select it. Adjust the tolerance level as needed to ensure that the entire background is selected. Once the background is selected, press delete to remove it. Finally, save the image as a PNG file to preserve the transparency of the background. This method works best with images that have a clear contrast between the subject and the background.

Join our FacebookYoutubeGoogle+Twitter page to learn more video