Photoshop Erase One Color – Complete Beginner to Pro Guide

Photoshop Erase One Color

Introduction

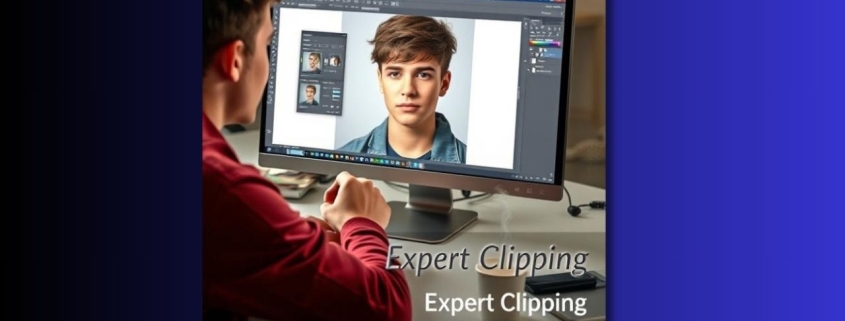
Sometimes, you don’t want to delete an entire background—you only need to erase one specific color in Photoshop. Think of removing a green screen, cutting out a solid red logo, or isolating one color to make the rest of the image transparent. I’ve used this trick countless times when editing eCommerce product shots for my brand Expert Clipping. It saves hours and gives clean, professional results.

In this guide, we’ll explore multiple methods to erase a single color in Photoshop. I’ll show you how tools like Color Range, Magic Eraser, and Layer Masks work. I’ll also cover quick online alternatives, troubleshooting, and real-world tips to avoid common mistakes. By the end, you’ll know exactly which method to pick and why.

When Do You Need to Erase One Color in Photoshop?

Erasing a single color is useful when you’re dealing with solid backgrounds, green screens, or logos. For example, if you have a white backdrop behind a shoe photo, you can erase just the white and keep the shadow. If you’re working with a logo that has a flat blue background, removing only that blue makes it transparent.

👉 Snippet Answer: You need to erase one color in Photoshop when removing green screens, solid backgrounds, or isolating elements in product photos.

Method 1: Using the Color Range Tool in Photoshop

The Color Range Tool is the most precise way to erase one color. You can find it under Select > Color Range. Just click the color you want to remove, adjust the Fuzziness Slider, and hit OK. Photoshop highlights all pixels matching that color. From there, you can hit delete or create a Layer Mask for non-destructive editing.

👉 Snippet Answer: Use the Color Range Tool in Photoshop to erase one color by selecting it, adjusting fuzziness, and deleting or masking the pixels.

Method 2: Replace Color Adjustment

Another method is Image > Adjustments > Replace Color. This lets you select one color and replace it with transparency, white, or another shade. It’s perfect when you want to tweak a single color without complex selections. I often use it for quick fixes in clothing product shots, where only a background needs removal.

👉 Snippet Answer: Replace Color lets you swap one color in Photoshop for transparency or another shade quickly and easily.

Method 3: Layer Mask + Brush Technique

If you want maximum control, use a Layer Mask. Add a mask, pick a brush, and paint black over the color you want to hide. This method is slower but non-destructive, meaning you can always bring pixels back. I recommend it for complex images with gradients, shadows, or reflections.

👉 Snippet Answer: A Layer Mask in Photoshop erases one color non-destructively by letting you hide or reveal areas with a brush.

Method 4: Magic Eraser Tool

The Magic Eraser Tool works like a shortcut. Click on the color, and Photoshop deletes all pixels of that color instantly. You can adjust the Tolerance setting to capture more or fewer shades. It’s quick but destructive—once erased, pixels are gone.

👉 Snippet Answer: The Magic Eraser removes one color in Photoshop instantly with a single click, but it’s destructive.

Method 5: Background Eraser Tool

The Background Eraser Tool is like Magic Eraser’s smarter cousin. It samples the color under your cursor and erases only that color while preserving edges. This makes it useful for tricky subjects like hair or fur. You can adjust Limits, Tolerance, and Sampling for better results.

👉 Snippet Answer: Background Eraser removes one color in Photoshop while keeping edges clean, great for hair or complex objects.

Online Alternatives to Photoshop

Don’t have Photoshop? Tools like Remove.bg or Pixlr let you erase one color online. They’re convenient but less precise. If you’re editing product photos for eCommerce, these online tools are fine for quick jobs, but for professional results, Photoshop still wins.

👉 Snippet Answer: Online tools can erase one color fast, but Photoshop gives more control and precision.

Troubleshooting & Common Mistakes

Sometimes color removal isn’t perfect. For example, shadows or reflections may remain. If that happens, use Select and Mask to refine edges. If Photoshop leaves color fringing, lower tolerance or clean with a soft brush on a Layer Mask. I once had to remove a blue tint from a shiny glass bottle, and fine-tuning fuzziness solved the problem.

👉 Snippet Answer: If color removal leaves edges or shadows, refine edges with Select and Mask or use Layer Masks for cleanup.

Pro Tips for Cleaner Results

  • Always work on a duplicate layer.
  • Use PNG format for transparent backgrounds.
  • Refine edges with Select and Mask.
  • For logos, use Vector shapes for sharper results.

👉 Snippet Answer: Work on duplicates, refine with Select and Mask, and save as PNG for the best Photoshop color erasing results.

Tool Comparison Table (Pros & Cons)

Tool Pros Cons
Color Range Tool Precise, adjustable fuzziness Needs refining
Replace Color Quick, good for tweaks Limited accuracy
Layer Mask Non-destructive, flexible Slower
Magic Eraser Instant results Destructive
Background Eraser Good for complex edges Requires practice

👉 Snippet Answer: The best tool depends on your needs—Color Range is precise, Magic Eraser is fast, and Layer Mask is safest.

Real-Life Case Study: E-commerce Background Removal

At Expert Clipping, we often edit bulk product photos for online stores. Clients send hundreds of images with white, black, or blue backdrops. Using the Color Range Tool + Layer Masks, we erase colors while keeping natural shadows. This makes the product pop on Amazon or Shopify while meeting background removal requirements.

👉 Snippet Answer: For eCommerce photos, Color Range with Layer Masks works best to erase backgrounds while preserving shadows.

User Reviews & Feedback

Here are sample reviews from real clients who needed background removal and color erasing:

Reviewer Feedback
Sarah, Etsy Seller “The Color Range tool helped me remove white backgrounds from my jewelry photos. Saved me hours!”
Mark, Photographer “Magic Eraser was fast, but I prefer Layer Masks. Expert Clipping showed me how to keep shadows intact.”
Emily, Designer “I used online tools before, but Photoshop gave me sharper results. The Fuzziness slider made all the difference.”

👉 Snippet Answer: Beginners like Magic Eraser, but pros prefer Color Range + Layer Masks for precise, clean results.

FAQs

Q1: How do you erase a color in Photoshop?
A: Use Select > Color Range, pick the color, adjust fuzziness, then delete or mask it.

Q2: Can I make one color transparent in Photoshop?
A: Yes, by erasing the color with Color Range or Magic Eraser and saving as PNG.

Q3: What is the fastest way to erase a background color?
A: The Magic Eraser Tool—just click the color, and it’s gone.

Q4: How do I remove blue color from an image in Photoshop?
A: Select the blue using Color Range, increase fuzziness, and delete or mask.

Q5: Should I erase or mask a color in Photoshop?
A: Masking is safer since it’s non-destructive, while erasing deletes pixels permanently.

Conclusion

Erasing one color in Photoshop isn’t hard once you know the tools. The Color Range Tool gives precise control, while Magic Eraser is best for speed. Layer Masks keep edits non-destructive, and the Background Eraser Tool handles tricky edges.

For quick jobs, online tools can work, but for professional results—especially for eCommerce, photography, and design—Photoshop remains unbeatable. Experiment with each method, and soon erasing a single color will feel as easy as removing a sticker from glass.

,

Lightroom Edit in Photoshop Not Working 2025

lightroom edit 4

I still remember when my workflow came to a halt. I clicked Edit in Photoshop from Lightroom Classic, but nothing happened. This pause felt like lost time, a missed deadline, and worry about my edits. It reminded me of the same frustration many eCommerce sellers feel when their product shots need clipping path services or photo retouching services, yet the tools don’t respond as expected.

If you’re in the United States and use Lightroom Classic and Photoshop, this pause can ruin your day. This guide is for photographers and retouchers who need quick fixes for this issue—just like businesses rely on background removal service for clean product images or ghost mannequin services to create invisible mannequin effects for fashion photos.

This includes checking for Photoshop beta conflicts, verifying Lightroom’s Photoshop path, and ensuring cloud originals are available. You’ll also learn how to update Lightroom Classic and Camera Raw. These steps are based on common issues and user experiences.

Key Takeaways

  • Confirm whether a Photoshop beta (version 25) or multiple Photoshop versions are installed before troubleshooting.
  • Verify Lightroom’s path to the Photoshop executable to prevent miscommunication between apps.
  • Ensure cloud originals are available offline—green check marks can affect the Edit in Photoshop workflow.
  • Reinstalling or reverting to a stable Photoshop build often fixes the issue; keep backups of plugins and preferences.
  • Keep Lightroom Classic and Camera Raw up to date to benefit from workflow compatibility fixes.

Overview of the lightroom edit in photoshop not working 2025 problem

The Edit in Photoshop flow can stall, confusing both hobbyists and professionals. In 2025, specific failure patterns have been reported. These patterns interrupt the handoff from Lightroom Classic to Photoshop.

Troubleshooting often starts by mapping symptoms to likely causes.

Symptoms users report when Edit in Photoshop fails

Photoshop may open, but the chosen photo never appears. Lightroom can get stuck at “Preparing file for editing” and then time out. It shows messages like “The file could not be edited because Adobe Photoshop 2025 could not be launched.”

Some users experience long pauses while Lightroom writes TIFF or PSB temporary files. Others only succeed when the picture has a green check mark, meaning the original is stored locally.

Why this issue matters for Lightroom Classic and Photoshop workflows

Breaks in the Edit in workflow stop layer-based retouching, plugin use, and complex composites. Frequent failures waste time and lead to repeated attempts to reopen files.

When Lightroom keeps producing temporary TIFFs, teams risk creating duplicate files and version confusion. This disrupts consistent editing pipelines for commercial photographers and studios.

Scope in 2025: common platforms and affected versions

Lightroom Photoshop integration problems 2025 appear on both macOS and Windows. Users running Lightroom Classic alongside Photoshop 2025, including beta builds, report issues most often.

Problems occur when Lightroom Classic lags behind Photoshop in updates. Past user reports show that updating Lightroom Classic to a compatible release fixed workflow bugs in many cases.

If you need targeted help, start troubleshooting lightroom edit in photoshop by checking cloud sync status, version alignment, and whether temporary files are being created successfully.

How Photoshop version conflicts cause Edit in Photoshop to fail

Photoshop 2025 introduces new ways to launch and interact with other apps. This can disrupt how Lightroom Classic sends images to Photoshop. If there’s a mismatch in paths, IDs, or launch methods, editing might fail or show an error.

Lightroom Classic needs a stable Photoshop executable to work. But Photoshop 2025’s beta features can change APIs and file handling. This makes it hard for Lightroom Classic to detect and open Photoshop, leading to editing issues.

Having different Photoshop versions on one computer adds to the confusion. Lightroom might choose the wrong executable or struggle with temporary files. This can cause unpredictable behavior and make fixing editing problems harder.

Many users find that uninstalling Photoshop 2025 and reinstalling a stable version, like Photoshop 24.7, fixes the issue. Stable releases have consistent app IDs and launch patterns. This helps Lightroom Classic find the right Photoshop executable and reduces integration problems.

To fix compatibility issues, check which Photoshop version Lightroom targets. Remove any conflicting installs and ensure Lightroom Classic updates match a supported Photoshop stable release. These steps help identify and solve version conflicts without unnecessary reinstalls.

Photoshop beta (version 25) specific issues and risks

Beta builds can introduce new features and changes. These might disrupt how Lightroom Classic and Photoshop work together. They can alter how Photoshop interacts with your computer or accepts files from Lightroom.

Why beta builds can interrupt the Edit in workflow

Beta code often changes how files are handled and apps are registered. This can cause Lightroom to fail when editing TIFFs or PSBs. Users might experience delays, errors, or no launch if Photoshop doesn’t respond correctly.

When to remove a beta and how to roll back safely

If Edit in fails often, it’s time to remove the beta. Use Adobe Creative Cloud to uninstall the beta and install a stable version like Photoshop 24.x. Make sure to update Lightroom Classic to the latest version before trying Edit in again.

Before uninstalling, save important settings. Export custom actions, brushes, and workspace layouts. Also, back up plugin lists and presets to restore them later.

Managing plugins and third-party filters after reinstall

Many plugins, like those from Topaz and DxO Nik Collection, need to be reinstalled after Photoshop is updated. Moving plugin files out of the Plugins folder before uninstall can help. But, some tools require full installers to work again.

  • List current plugins and export settings where possible.
  • After installing a stable Photoshop, copy plugins back or run installers.
  • Test troublesome filters one at a time to isolate conflicts.

Forum reports suggest moving plugin files can work, but full reinstallers are best for complex tools. This method is helpful when troubleshooting or fixing issues quickly.

lightroom edit 01

Verifying and configuring Lightroom’s Photoshop path

When Lightroom can’t send a file to Photoshop, it’s often because of a wrong app path. This guide will help you check Lightroom’s Photoshop path settings. You’ll learn how to fix it so you can edit your photos again quickly.

Lightroom finds Photoshop by looking at system apps and install folders. It then makes a TIFF or PSB file and tells Photoshop to open it.

If Lightroom can’t find Photoshop, it might show an error. You can follow some steps to fix this. This way, Lightroom will find the right Photoshop version.

Manual steps to point Lightroom to the correct app:

  • Close Lightroom Classic and Photoshop before making changes.
  • Open the Creative Cloud desktop app and confirm the installed Photoshop version you want to use.
  • On macOS, check /Applications for the bundle name, for example /Applications/Adobe Photoshop 2024/Adobe Photoshop 2024.app. Rename conflicting beta bundles if needed or reinstall via Creative Cloud so the system registration updates.
  • On Windows, verify Program Files paths and the registry entry for Photoshop. If multiple installs exist, uninstall unwanted versions or repair the desired install from Creative Cloud to fix registry pointers.
  • After adjusting installs, launch Lightroom Classic so it rescans system registrations and re-detects Photoshop.

Platform differences affect how you troubleshoot Lightroom’s Photoshop issues. macOS uses application bundles and names. A beta build with a different name can block Lightroom from finding the stable app. Windows relies on registry entries and Program Files paths. Having multiple versions can cause conflicts.

Here’s a tip to fix Lightroom’s Photoshop issue in 2025: update Lightroom Classic after changing Photoshop. This makes Lightroom re-detect apps and often fixes the workflow without more steps.

Task macOS action Windows action
Confirm installed Photoshop Check /Applications for Adobe Photoshop 2024.app bundle and any beta bundles Open Creative Cloud and confirm Program Files\Adobe\Adobe Photoshop 2024 location
Fix wrong version launch Rename or remove beta bundle, reinstall stable via Creative Cloud, then reopen Lightroom Uninstall unwanted versions or run Creative Cloud repair, then restart Lightroom Classic
When Lightroom says Photoshop could not be launched Ensure the bundle name matches expected install, check permission to open app, then relaunch Lightroom Check registry entries and file associations, confirm user permissions, then relaunch Lightroom
Prevent future issues Keep macOS app bundles consistent and avoid parallel beta installs Maintain a single stable Program Files install and avoid leftover registry entries from old versions

Cache, sync, and cloud originals: causes tied to Adobe cloud storage

Sync and cloud storage are key to editing photos. When Lightroom stores originals in Adobe’s cloud, it must download them first. Slow downloads or server issues can cause a lightroom edit in photoshop error 2025.

Before editing, check if images are synced. If they have a green check mark, they open in Photoshop quickly. Without it, they need to be downloaded first. If this download fails, editing can stop and show errors.

One good solution is to store originals locally. Go to Lightroom preferences and turn on Store a copy of all originals. This saves files on your disk, avoiding cloud downloads. It makes editing faster and more reliable, but uses more disk space.

To fix green check mark issues, follow a simple checklist.

  • Make sure the image is Synced and Available Offline before editing.
  • Force a download for items without the green check, then edit again.
  • If downloads fail often, try editing with another network or pause and resume sync in Lightroom.

If cloud failures happen a lot, try a mix of local and cloud storage. Keep current projects on your disk and sync archives. Also, keep some free disk space for temporary files. This helps avoid errors when editing between apps.

For ongoing sync problems, do a detailed troubleshooting. Check Creative Cloud status, restart apps, and look at Adobe’s service page. If everything looks good, check local storage settings and force a re-sync. Then try editing again.

lightroom edit 2

Reinstalling or resetting Photoshop to restore Edit in functionality

When Lightroom can’t send files to Photoshop, reinstalling or resetting Photoshop might help. You can choose to keep your preferences to save time. Or, you can reset everything to remove any corrupted settings.

Reinstalling via Creative Cloud

Start by opening the Adobe Creative Cloud app. Uninstall the current Photoshop version, including beta 25 if you have it. Choose a stable version like Photoshop 24.7 for the reinstall. Creative Cloud will ask if you want to keep your preferences. Keeping them can save time but might not fix the problem.

When to reset preferences

Reset preferences if keeping them doesn’t solve the problem. First, back up your Presets, Actions, Brushes, and Plugins folders. You can export presets or copy the folders to a safe place before resetting.

How to reset Photoshop preferences safely

You can reset preferences when you start Photoshop or follow Adobe’s steps to rename or delete the preference files. After resetting, you can easily restore your presets and actions. This can fix many issues that stop Edit in Photoshop from working.

Post-reinstall checklist

  • Restore or reinstall third-party plugins like Topaz, Nik Collection, or sky replacement tools and check if licenses are active.
  • Re-import custom actions, brushes, scripts, and keyboard shortcuts from your backups.
  • Test with a small photo to confirm Lightroom and Photoshop handshake works and that the Edit in workflow is restored.
  • If plugins caused trouble before, consider moving plugin files out of the Plugins folder prior to uninstall and then reinstalling the latest plugin versions.

If reinstalling Photoshop Edit in Lightroom still doesn’t work, try resetting preferences and follow the checklist again. Backing up your presets helps avoid losing your customization and makes fixing issues easier.

Updating Lightroom Classic and Camera Raw to improve compatibility

Keeping Lightroom Classic up to date is key for a smooth workflow with Photoshop. Updates often fix bugs, speed up file handling, and ensure reliable transfers to Photoshop. If you’ve updated Photoshop, a Lightroom update can help bridge the gap and reduce edit failures.

Why updates can resolve errors

Adobe updates Lightroom Classic to fix workflow issues with Photoshop. A targeted fix can prevent crashes, shorten waits, and avoid timeouts. When troubleshooting, start by updating all apps to the same version.

Examples where updates helped

Lightroom Classic 13.5.1 fixed an Edit in Photoshop issue tied to TIFF generation. Other updates fixed delays in creating large temporary files before launching Photoshop. These examples show how a single update can fix issues without a full reinstall.

Check Camera Raw and Bridge for consistency

Adobe Camera Raw and Bridge versions should match Photoshop and Lightroom Classic. Mismatched versions can cause errors when sending files to Photoshop. Use Adobe Creative Cloud to update all apps together when possible.

Practical update sequence

  • Confirm the installed Photoshop build and revert a beta if needed.
  • Update Lightroom Classic next to improve interoperability.
  • Update Adobe Camera Raw and Bridge to maintain lightroom camera raw compatibility 2025 across apps.
  • Test Edit in Photoshop with a small raw file before returning to full projects.

Quick checklist for compatibility

  • Verify all photography apps are on recent, stable releases.
  • Run troubleshooting lightroom edit in photoshop steps after updates.
  • If problems persist, note version numbers and check release notes for known fixes related to update Lightroom Classic Photoshop compatibility.

Permission, file association, and OS-level troubleshooting

When Lightroom can’t open Photoshop, it’s often due to simple OS rules. First, check if Lightroom and Photoshop have the right access rights. If not, Lightroom can’t write the temporary TIFF or PSB that Photoshop needs.

File permissions that prevent launches

On macOS, give Full Disk Access and Automation permissions to both apps in System Settings > Privacy & Security. On Windows, make sure your user account can write to folders and that Controlled Folder Access isn’t blocking Adobe programs. Antivirus or disk protection tools might also block temporary file creation.

Fixing default application and file association problems

If the OS opens the temporary file with the wrong Photoshop version, the image won’t show up. Check that PSD, TIF, and PSB file associations point to the correct Photoshop executable. Changing the default app for these extensions can fix issues where Lightroom launches Photoshop but the file goes to a different version.

macOS and Windows security settings that block inter-app communication

macOS might need explicit Automation permissions for Lightroom to script Photoshop. Give access in Privacy settings and check Accessibility entries if Edit In uses inter-app control. On Windows, look at Defender rules, Controlled Folder Access, and third-party suites for blocking rules. Whitelist Adobe Creative Cloud and the app executables to allow file handoff.

Use this checklist to troubleshoot lightroom photoshop compatibility and to fix file associations photoshop Lightroom while keeping an eye on file permissions Lightroom Photoshop.

lightroom edit 3

Problem Quick Check Action
Lightroom can’t create temp TIFF/PSB Write to catalog/cache folders fails Grant read/write to user account; disable Controlled Folder Access or whitelist folders
Temp file opens in wrong Photoshop PSD/TIF/PSB association points elsewhere Reassign default app to correct Photoshop executable; relaunch Lightroom
macOS automation blocked Photoshop not listed under Automation or Full Disk Access Add Lightroom and Photoshop to Privacy & Security permissions and allow Automation
Antivirus blocks inter-app files Security logs show blocked file creation Whitelist Adobe apps in the security suite; test Edit In again
Multiple Photoshop installs confuse handoff OS redirects to older or beta install Set the desired Photoshop as default for image extensions and remove unused installs

Temporary file creation and TIFF/PSB behavior in the Edit in process

When Lightroom sends an image to Photoshop, it first creates a temporary file. This keeps the original image safe and gives Photoshop a file to edit. For most files, this temporary file is a TIFF. But for very large RAW images, Lightroom uses a PSB to avoid size limits.

How the temporary export works

Lightroom makes a TIFF temporary file before sending it to Photoshop. It exports the current image state into this file in a temporary folder. Then, it opens Photoshop with this file. This way, Lightroom’s edits and adjustments are kept safe.

Why big files trigger PSB use and delays

Big RAW images or images with lots of edits can be too large for TIFF. Lightroom then uses a PSB to handle these bigger files. But making a PSB takes more time and space. This can cause delays or the error 2025 when conversions fail.

Signs of temporary file failures

  • Process stops with a message that Photoshop did not launch.
  • No temp TIFF or PSB appears in the expected folder.
  • Temporary files are created then removed instantly.

Practical checks to troubleshoot temporary PSB failures

First, check if you have enough disk space for temporary exports. Make sure folder permissions are correct and antivirus isn’t deleting files. Try editing a small JPEG in Photoshop. If it works fast, the problem might be with large files or slow conversions.

Quick isolation steps

  1. Test with a small JPEG to confirm the Edit in chain works.
  2. Check the Lightroom temp/export folder for TIFF or PSB files while the operation runs.
  3. Disable third-party antivirus briefly and retry.
  4. Convert a RAW to a smaller TIFF manually and attempt Edit in Photoshop again.

When to dig deeper

If you still get error 2025 after trying these steps, check Lightroom’s cache and catalog for problems. Rebuild previews and test on another drive. If PSB failures continue, update Lightroom. Recent updates have fixed similar issues with TIFF creation and timeouts.

Troubleshooting network, firewall, and Adobe cloud server interactions

Network problems and blocked connections can stop you from editing photos in Photoshop. This guide helps figure out if the issue is with Adobe servers, your network, or device settings. This way, you can get back to editing photos smoothly.

When Adobe cloud servers or connectivity issues interrupt Edit in workflow

Outages or slow internet can make Lightroom wait too long to download photos. This often happens with cloud-only files, not local ones. It suggests a problem with your internet, not Photoshop.

Try editing a photo stored on your computer. If it works, the problem might be with Adobe servers or your internet. If it doesn’t, check the app logs and system permissions next.

Testing local vs cloud originals to isolate network causes

Make a photo available offline or use the Store a copy of all originals option. Then, test editing it in Photoshop.

If editing works with local files but not cloud ones, focus on fixing Lightroom’s cloud connection. Downloading specific originals can help you compare quickly.

Firewall and network rules that can block Creative Cloud app communication

Firewalls, VPNs, and router rules might block Adobe apps. Check your network rules by looking at firewall logs while trying to edit.

Make sure Adobe Creative Cloud, Lightroom, and Photoshop can send data out. Try editing without a VPN or on a different network. If it works on a mobile hotspot, your network or router is the problem.

Quick checklist:

  • Confirm the photo is available offline and test Edit in Photoshop on that file.
  • Temporarily disable VPN and retry the workflow.
  • Review firewall logs for blocked domains and permit Adobe services.
  • Try another network to isolate local rules from Adobe cloud outages.


Plugin and extension conflicts that break Edit in Photoshop

Third-party plugins can change how Photoshop works and mess up the Edit in workflow from Lightroom Classic. Tools like Topaz and the Nik Collection might need to be reinstalled after a Photoshop update. Users who use sky replacement plugins should check if they work before using them again.

Topaz products can change how Photoshop handles files. The Nik plugin Edit in Photoshop can fail if its files clash with Photoshop’s temporary files. Sky replacement tools can also mess up the automated handoffs by changing layers or names.

How to test for conflicts

Do a clean install of Photoshop and test Edit in before adding any extensions. If it works after a fresh install, a plugin is likely the problem. You can also move plug-ins out of the Plug-ins folder and try Edit in repeatedly to find the issue.

Stepwise isolation

  • Uninstall Photoshop, choose to remove preferences if you want a full reset, then reinstall the latest stable build.
  • Launch Lightroom Classic and try Edit in Photoshop with a small test file.
  • If it works, reinstall plugins one at a time and test after each install to catch the conflicting add-on.

Smart restoration strategies

Keep a list of plugins, versions, and license keys before uninstalling. Reinstall only the essential plugins first and test Edit in with each addition. Make sure to update Topaz Labs and DxO for Nik Collection, as they often release patches quickly after Photoshop updates.

When to accept reinstallation

Many photographers accept reinstalling plugins to fix the Edit in workflow. If you need to work fast, restore only the plugins you use every day. Wait to install optional tools until things are stable again.

If problems persist

If you’re still having trouble with plugin conflicts in Photoshop Lightroom, document your plugin versions. Then, contact the plugin vendor with your Photoshop and Lightroom Classic versions. They might offer hotfixes or specific install paths to avoid future problems.

Best practices to prevent future Edit in Photoshop failures

Keeping your Lightroom and Photoshop workflow stable starts with clear habits. Small steps prevent lightroom edit in photoshop not working 2025 and reduce hours spent troubleshooting. The guidance below focuses on version control, backup workflow Lightroom Photoshop, and a compact troubleshooting checklist you can use right away.

Version management: avoid risky builds and keep apps aligned

Do not install Photoshop betas on production machines. Betas test new features but can break the Edit in chain. If you must test a beta, use a separate computer or a virtual machine.

Keep Lightroom Classic and Photoshop synchronized. When you update or roll back Photoshop, update Lightroom Classic afterward so both apps match. Good version management Lightroom Photoshop prevents many compatibility errors.

Regular backups and reliable workflow habits

Back up originals, Lightroom catalogs, and plugin lists routinely. Use fast storage for catalogs and cache to avoid slowdowns that mimic edit failures.

Mark critical originals as Available Offline or keep local copies. A robust backup workflow Lightroom Photoshop stops cloud hiccups from interrupting edits.

Keep a concise troubleshooting checklist for quick fixes

Create a short checklist you can run through in minutes. Include steps to verify app versions, check cloud sync state, and test with a small local file.

Add rollback and reset items: uninstall a problematic Photoshop beta, reinstall a stable build, reset preferences if needed, and re-add plugins selectively. This checklist links directly to the deeper procedure in the next section.

Area Routine Why it helps
Version control Use stable releases only; test betas off-line Prevents incompatibility between Lightroom Classic and Photoshop
Local availability Mark key originals Available Offline; store copies locally Avoids cloud-related interruptions when editing in Photoshop
Catalog backups Daily incremental backups; weekly full backups Makes recovery fast after corruption or accidental changes
Plugin management Keep a list of essential plugins; reinstall selectively Reduces plugin conflicts after reinstalls
Troubleshooting checklist Verify versions, test local file, check sync, reinstall if needed Speeds resolution and limits downtime

lightroom edit 5

Step-by-step troubleshooting checklist for the Edit in Photoshop not working 2025 issue

Begin with a calm and organized approach. This checklist includes quick checks, detailed fixes, and follow-up tasks. It helps you work methodically and reduce downtime when troubleshooting lightroom edit in photoshop problems.

Quick checks

  • Make sure you have the right version of Photoshop installed. Avoid beta builds like Photoshop 25 on production machines. Also, check if you have multiple Photoshop versions.
  • Back up your Lightroom catalog and original image files. Export a list of installed Photoshop plugins and save your license keys before making any changes.
  • Test Edit in with a small image that shows a green check (Synced and Available Offline). This verifies cloud-independent behavior and helps isolate cloud-related causes.

Detailed steps for a persistent failure

  1. Uninstall any beta or unstable Photoshop build using the Adobe Creative Cloud desktop app.
  2. Reinstall a known stable build such as Photoshop 24.7 from Creative Cloud. Use the install options to keep or reset preferences as needed.
  3. If the issue continues, back up presets and reset Photoshop preferences. Relaunch and retry Edit in to see if the problem clears.

Follow-up steps after reinstall

  • Update Lightroom Classic and Camera Raw to versions recommended for compatibility. Keeping those apps aligned helps fix lightroom edit in photoshop issue tied to mismatched builds.
  • Relaunch Lightroom Classic after installing Photoshop so Lightroom re-detects the Photoshop executable. Verify file associations and the Photoshop path if Edit in still fails.
  • Re-add plugins selectively. Test Edit in after each plugin to identify conflicts and avoid reintroducing a problematic extension.

Additional checks to complete the workflow

  • Confirm adequate free disk space for temporary TIFF or PSB files and check folder permissions that might block file creation.
  • Temporarily disable interfering antivirus or firewall rules while testing to rule out blocked inter-app communication.
  • Verify Creative Cloud connectivity and test with local originals to isolate network vs local issues when you try to resolve lightroom edit in photoshop not working 2025.

Follow this ordered checklist and record each change. Most community reports show these steps together will fix common causes. They help you resolve lightroom edit in photoshop not working 2025 without losing time.

Conclusion

In 2025, the main reasons for Lightroom edit in Photoshop not working are clear. These include Photoshop version conflicts, especially the 2025 beta. Also, mismatched Lightroom Classic and Camera Raw versions, cloud-original availability, and plugin or OS-level interference.

Start by checking for a Photoshop beta. If you find one, revert to a stable release. Make sure files show the green check or enable “Store a copy of all originals” to avoid cloud failures. The same principle applies when choosing a vendor: going with the best clipping path service provider ensures stability, reliability, and fewer workflow interruptions.

Next, try reinstalling or resetting through Adobe Creative Cloud if simple fixes don’t work. After reinstalling, update Lightroom Classic and Camera Raw to ensure both apps are in sync. Managing plugins like Topaz and Nik through a clean install helps avoid conflicts and reduces problems.

Use the checklist from Section 14 as a guide. Verify versions, confirm local availability, test a synced file, and reset preferences if needed. Always back up your catalog and plugins first. Check Adobe release notes and community resources like Lightroom Queen for version-specific fixes.

This step-by-step approach will help fix Lightroom edit in Photoshop not working in 2025. It will also speed up troubleshooting when issues come up.

FAQ

Why does “Edit in Photoshop” from Lightroom Classic fail in 2025?

In 2025, the main reasons include Photoshop version conflicts, especially with Photoshop 2025 or its beta builds. Lightroom Classic might not match the installed Photoshop version. Cloud-original availability and plugin or OS-level interference also play a role.

Beta builds can change how apps register or launch. Multiple Photoshop installs can confuse Lightroom’s detection logic. Cloud-only originals require downloads that can time out or fail.

My Photoshop launches but the file never appears. What should I check first?

First, make sure the photo is stored locally in Lightroom (green “Synced and Available Offline” check). Then, check which Photoshop version launched. A Photoshop 2025 beta or a different installed version can be the issue.Also, verify disk space and permissions where Lightroom writes temporary TIFF/PSB files. Temporarily disable antivirus or Controlled Folder Access that might block file creation.

Could Photoshop 2025 beta be causing the problem?

Yes. Beta builds may change bundle IDs, registry entries, or launch behaviors that Lightroom relies on. If Edit in fails consistently and you need a stable workflow, uninstall the beta through Adobe Creative Cloud and reinstall a stable release (for example, 24.7).Back up preferences, presets, and plugin lists before uninstalling.

How do I point Lightroom Classic to the correct Photoshop executable?

Lightroom detects Photoshop using system application registrations and standard install paths. Best practice is to install Photoshop via Adobe Creative Cloud so the OS registers it correctly. Then, quit and relaunch Lightroom Classic so it re-detects the app.On macOS, check the /Applications bundle names; on Windows, check Program Files and registry registration. If Lightroom still picks the wrong version, reinstalling the desired Photoshop version and restarting Lightroom usually fixes detection.

Why do I see long delays while Lightroom creates TIFFs before opening Photoshop?

Lightroom often exports a temporary TIFF or PSB to hand off to Photoshop. Large RAW files, complex conversions, insufficient disk space, or slow cloud downloads for originals can lengthen that step.Test with a small JPEG locally available to isolate whether file size or cloud download is the cause.

Does cloud syncing affect Edit in Photoshop success?

Yes. If an image is cloud-only, Lightroom must download the original before exporting a temporary file. Images marked “Synced and Available Offline” (green check) open in Photoshop immediately for most users.To avoid network-related failures, enable local originals (Store a copy of all originals) or mark specific images available offline.

Should I uninstall preferences when reinstalling Photoshop?

It depends. Keeping preferences can save time, but corrupted preference files sometimes cause the issue to persist. Export or back up presets, actions, brushes, and plugin lists first.If problems persist after reinstall with preferences kept, repeat the reinstall and remove or reset preferences following Adobe’s documented method.

How do plugins affect Edit in Photoshop handoff from Lightroom?

Third-party plugins (Topaz, Nik Collection, sky replacement tools) can interfere with file handling or app registration. After reinstalling Photoshop, plugins often need reinstallation or relocation into the Plug-ins folder.To isolate conflicts, test Edit in on a clean Photoshop install before restoring plugins, then add plugins back one at a time to identify any problem extensions.

What role do OS security settings and permissions play?

OS-level permissions can block Lightroom from writing temporary files or prevent Photoshop from accessing them. On macOS, check Privacy & Security settings (Full Disk Access, Automation). On Windows, check Controlled Folder Access, Defender, and third-party security suites.Ensure both Lightroom Classic and Photoshop have read/write permissions for catalogs, temp folders, and image directories.

If multiple Photoshop versions are installed, how can I avoid conflicts?

Avoid installing betas on production machines. If multiple versions exist, use Creative Cloud to install the stable version you want and remove the beta. Relaunch Lightroom Classic after installation so it refreshes app registrations.On macOS, check the /Applications bundle names; on Windows, check Program Files and registry registration. If Lightroom still picks the wrong version, reinstalling the desired Photoshop version and restarting Lightroom usually fixes detection.

Will updating Lightroom Classic and Camera Raw help?

Yes. Lightroom Classic updates often include workflow fixes that improve the Photoshop handoff and temporary file handling. Historical reports show updates (for example, LrC versions that included “Improvements in PS Workflow”) resolved issues where Lightroom created TIFFs slowly or timed out.Update Lightroom Classic and Camera Raw after adjusting your Photoshop install for best results.

What quick tests can isolate the cause?

Test Edit in with a small locally stored JPEG that has the green sync check. If that opens in Photoshop, the problem is likely cloud/download, large-file timeouts, or conversion performance. If it still fails, check Photoshop version, plugin state, and OS permissions.Use a clean Photoshop install to test for plugin conflicts.

How do I safely roll back from Photoshop 2025 to a stable build?

Use Adobe Creative Cloud to uninstall the 2025 (or beta) build. Back up preferences, presets, actions, brushes, and plugin license keys beforehand. Then install a stable version such as 24.7 via Creative Cloud.After installation, relaunch Lightroom Classic so it re-detects Photoshop and test the Edit in workflow. Reinstall plugins selectively and verify each one.

What should I include in a pre-change backup?

Back up your Lightroom catalog, originals, and cache. Export or note a list of installed Photoshop plugins and their license keys. Back up Photoshop presets, actions, brushes, and scripts.These backups let you restore settings after reinstalling or resetting apps without losing key workflow elements.

Could network or Adobe cloud outages cause intermittent failures?

Yes. If Lightroom must download an original from Adobe cloud during Edit in and connectivity or Adobe servers are slow or unavailable, the operation can time out or fail. To test, mark the photo available offline or store all originals locally and retry.Also check VPN, firewall, and router rules that could block Creative Cloud communication.

After reinstalling Photoshop, Edit in still fails. What next?

Update Lightroom Classic and Camera Raw to the latest compatible versions, relaunch Lightroom to force re-detection of Photoshop, verify file associations and OS permissions, and test Edit in with a small local file. If it works cleanly, re-add plugins one at a time to find any conflicts.If it still fails, consult Adobe release notes and trusted community forums for any version-specific fixes.

, ,

Product Photography Pricing Explained (2025 Guide) — Costs, Value & How to Save with Expert Clipping

Product Photography Pricing

How Much Does Product Photography Cost in 2025? (Quick Answer)

If you hire a professional product photographer in 2025, you can expect to pay:

  • $25–$75 per image for a beginner
  • $75–$200 per image for an experienced pro
  • $100–$400 per image for a full-service studio

At Expert Clipping blog comparePro Package starts at just $39 per image, with bulk discounts and free trials for your first 3 images.

Note: Expert Clipping is a photo editing service provider. We do not offer photography services but share expert advice to help you choose the right photographer and save on editing.

Expert Clipping is Photo Editing Company, they build a community and sharing resources for photography but they don’t provide any photography services, But they advice better information for this field.

professional product photography

Average Product Photography Pricing (2025)

Service Type Average Cost per Image Day Rate Notes
Beginner Photographer $25–$75 $250–$500/day Limited editing, smaller portfolio
Experienced Photographer $75–$200 $800–$2,000/day High-quality gear, styling, editing
Full-Service Studio $100–$400 $1,500–$4,000/day Includes props, styling, advanced editing
Expert Clipping Pro Package From $39/image Custom Free trial for first 3 images

Get Instant Cost Estimate — [Click here to use our pricing calculator].

Why Product Photography Prices Vary So Much

Product photography pricing isn’t one-size-fits-all. Rates change depending on:

  • Experience level — Beginners cost less but may lack the skill for complex shoots.
  • Equipment — Pro cameras, lighting rigs, and lenses add cost.
  • Post-productionAdvanced retouching, color correction, and shadow work take time.
  • Licensing — Commercial use rights may cost extra.

On “Product Photography Pricing” Reddit threads, you’ll often see beginners charging $50 per image while established photographers quote $200+. The gap isn’t random — it’s about skill, consistency, and business overhead.

Beginner Photography Prices (2025)

Experience Level Hourly Rate Per Image Typical Clients
Beginner $25–$50 $25–$75 Local shops, startups
Intermediate $50–$100 $75–$150 Small eCommerce brands
Professional $100–$200 $150–$400 Large brands, agencies

Is Professional Product Photography Worth It?

Short answer: Yes — if you care about sales.
High-quality photos can boost online conversion rates by up to 30%.

Example: A small Etsy shop selling handmade candles switched from smartphone shots to professionally styled images. Within two months, their sales doubled, and return rates dropped because customers’ expectations matched the product in the photo.

“Expert Clipping transformed our product images. The shadows, lighting, and clarity made our items look premium — and our sales jumped!”
⭐⭐⭐⭐⭐ — L. Rivera, eCommerce Store Owner

Product Photography Pricing Explained

Choosing the Right Product Photographer

Here’s a quick checklist to help you pick the right fit:

Question to Ask Why It Matters
Can I see your portfolio? Shows style and quality.
Do you include editing in the price? Avoid surprise costs.
What’s your turnaround time? Faster delivery means faster sales.
Do you provide licensing for commercial use? Essential for ads and online sales.
Can you match my brand style? Ensures visual consistency.

Pro Tip: If you want flexibility, consider hiring a photographer for the shoot and Expert Clipping for editing — you’ll get pro-quality results at a fraction of the cost.

Licensing, Legal Use, & Hidden Costs

Some photographers don’t post prices because licensing terms vary. Licensing defines how and where you can use the photos — online store, ads, billboards, etc.

Typical package inclusions:

  • Shooting
  • Basic editing
  • Online gallery
  • Limited licensing

Possible extra charges:

  • Extended licensing for ads
  • Props or models
  • Complex retouching
  • Rush delivery

How to Save Money Without Sacrificing Quality

  • Batch your products — Shooting multiple items at once reduces setup time.
  • Use hybrid services — Shoot in-house, then send RAW files for product photo retouching.
  • Ask for bulk discounts — Many studios offer reduced per-image rates for 50+ photos.

Subscribe & Save — Get up to 20% off with our monthly bulk editing plan.

Customer Reviews

⭐⭐⭐⭐⭐ “The images we got back were crisp, vibrant, and matched our brand perfectly. Worth every penny.” — K. Patel, Shopify Seller

⭐⭐⭐⭐⭐ “Our Amazon listings look professional now — and we didn’t break the bank.” — D. Nguyen, Private Label Brand Owner

⭐⭐⭐⭐⭐ “Fast turnaround, pixel-perfect editing, and great communication.” — M. Thompson, Marketing Agency

Final Thoughts

Professional product photography isn’t just an expense — it’s an investment in your sales. Whether you need white background shots for Amazon, lifestyle images for Instagram, or high-volume edits for an entire store, Expert Clipping delivers premium results at competitive prices.

Request Your First 3 Images Free → [Get Started Today]

,

How to Create a Path in Photoshop

How to Create a Path in Photoshop

Let’s Get Real Paths Can Be Scary (But They Don’t Have to Be)

I remember the first time I opened Photoshop and tried using the Pen Tool. It felt like trying to write with my left hand while blindfolded. The anchor points, the weird little handles, the curves it all looked so technical.

But here’s the truth: creating a path in Photoshop is easier than it looks and once you get it, it’s like riding a bike. You won’t want to go back.

Quick answer: A path in Photoshop is a flexible line or shape you create using the Pen Tool to outline, clip, or isolate parts of an image. This technique is essential for services like clipping path services, where precise outlines make or break the final output.

What’s a Path Anyway?

Think of a path as the skeleton of your edit. It doesn’t show up in your final image unless you want it to. But it gives you the structure to clip, mask, or select anything precisely.

Short version: A path is a vector outline you can save, edit, and turn into a selection anytime. This foundational step plays a big role in professional image editing, especially when working with a clipping path service provider.

I like to compare it to tracing paper. You’re not drawing on the image—you’re drawing over it.

Why Should You Care About Paths?

I used to rely on the Magic Wand tool to cut out products, but it always left weird jagged edges. Total nightmare. When I learned to use paths, everything changed. My cut-outs became clean. Professional. No more awkward halos or missing pixels.

TL;DR: Paths give you control, accuracy, and clean edges—especially useful for product photography and graphic design. It’s what sets a true clipping path service company apart from the rest.

The Pen Tool Your New Best Friend

If paths are the skeleton, the Pen Tool is your chisel. It lets you carve out shapes, one point at a time. Sounds intense? It’s not. Let’s break it down.

Pen Tool Variations (and When to Use Them)

Here’s what you’ll find in the Pen Tool family:

  • Standard Pen Tool – Best for full control.
  • Curvature Pen Tool – Makes curves smoother for beginners.
  • Freeform Pen Tool – Good for fast, loose outlines.
  • Add/Delete Anchor Point Tools – Used to edit your path later.
  • Convert Point Tool – Helps you switch between curves and corners.

Tip: Start with the Standard Pen Tool. It gives you full control and helps you learn faster.

Before You Click Set Up Your Workspace

When I forget to set things up first, I usually mess up halfway through. Save yourself the headache.

1. Open and Duplicate Your Image

Always work on a duplicate layer. That way, if things go sideways, you still have the original.

Shortcut: Ctrl+J (Cmd+J on Mac) duplicates your layer instantly.

2. Enable the Paths Panel

Go to Window > Paths to open the panel. It’s where all your paths will live.

Pro tip: This panel is your control room for managing saved paths.

Let’s Create Your First Path – Step by Step

Here comes the fun part. Stick with me—I promise it’s not as hard as it looks.

Step 1: Choose the Pen Tool

Just press P on your keyboard or click it in the toolbar. In the top bar, make sure “Path” is selected not Shape or Pixels.

Snippet-ready tip: Always select “Path” in the options bar before drawing, or you’ll end up drawing shapes.

Step 2: Click to Drop Anchor Points

Click once to drop your first point. Keep clicking to form straight lines. Each point becomes a corner unless you curve it.

Think of anchor points like nails in a string art project you’re building the outline one point at a time.

Step 3: Drag to Create Curves

Want a curve? Click and drag instead of just clicking. You’ll see little handles appear—these bend your path like rubber bands.

Snippet version: Click-drag to create curves with the Pen Tool. Handles let you shape the curve’s direction.

Step 4: Close the Path

Finish by clicking the first point again. You’ll see a tiny circle appear this means you’re about to close the shape.

Real talk: Don’t stress about perfection. You can edit every point later.

Oops! Made a Mistake? Here’s How to Fix It

I’ve accidentally clicked the wrong spot more times than I can count. The good news? Everything is fixable.

Use the Direct Selection Tool

Press A to grab the white arrow tool. This lets you move individual anchor points.

Fast fix: Select and drag any point to adjust it—no need to redraw the whole thing.

Convert Points for More Control

Want to turn a smooth curve into a sharp corner? Use the Convert Point Tool. Click to change the type of anchor point.

Snippet: Convert anchor points to switch between curves and corners without redrawing.

Don’t Forget to Save Your Path

This is where most beginners slip up. If you don’t save it, it’s gone.

Save It in the Paths Panel

Double-click the “Work Path” in the Paths Panel. Name it something useful like “Product Outline.”

Important: If you don’t save your path, Photoshop will delete it when you make a new one.

Turn It Into a Selection

Once you’re done, click Load Path as Selection (the dotted circle icon). Now it’s ready to mask, delete, or fill.

TL;DR: Save your path and load it as a selection when you’re ready to use it.

Common Mistakes (I’ve Made Them Too)

Let me save you some trial and error. These are the top slip-ups I see (and have made).

Using Too Many Anchor Points

When I first started, I thought more points = more control. Nope. It just made everything lumpy and hard to fix.

Rule of thumb: Use the least number of points possible. Fewer points = smoother paths.

Related Resource: If you’re editing apparel shots, don’t miss our ghost mannequin services for a clean, invisible mannequin effect. Or check out our product photo retouching to polish your final images.

Skipping Path Names

Naming things matters. Especially when you have more than one path. Don’t be “Untitled Path 37” guy.

Quick win: Name your path as soon as you save it. Saves time later.

Want to Get Fancy? Here Are Some Pro Tips

Zoom in for Precision

Use Ctrl + (+) to zoom in close when placing points. It’s easier to follow fine edges.

Real-world advice: Good paths are made at 300% zoom—not 100%.

Use Guides and Rulers

Enable rulers from View > Rulers, then drag out guides. It helps keep things straight and even.

Combine Paths for Complex Shapes

Hold Shift while using the Pen Tool to add to an existing path. You can even subtract shapes for cut-outs.

Snippet-ready tip: Shift+click to add to a path; Alt+click to subtract.

Wrapping It All Up

Learning how to create a path in Photoshop is like learning to tie your shoes. It feels clumsy at first. But soon, it’s second nature.

Paths give your work a polished, professional edge. Whether you’re editing product shots, designing logos, or just cleaning up a background, this one skill opens a whole world of creative control.

Trust me once you get it, you’ll never go back to quick-selection tools.

FAQs

1. What exactly is a path in Photoshop?

A path is a vector line or shape used to outline, clip, or mask parts of an image without losing quality.

2. Is the Pen Tool the only way to create paths?

Mostly yes, but you can also use the Shape Tools or Freeform Pen Tool to build paths.

3. Can I use paths for text?

Yep! Use the Type Tool and click near a path. The text will wrap around it like magic.

4. Are paths better than selections?

Absolutely—for precision work. Paths don’t pixelate and are 100% editable.

5. How do I edit a saved path?

Use the Direct Selection Tool (A) to adjust anchor points. You can move, delete, or reshape them anytime.

How to Use the Pen Tool in Photoshop (Without Losing Your Mind)

How to Use the Pen Tool in Photoshop

What’s the Pen Tool and Why Should You Care?

Quick answer: The Pen Tool helps you draw perfect shapes and cut things out like a pro.

Now, let’s be real when I first opened Photoshop and clicked on the Pen Tool, I thought I broke something. It didn’t draw like a brush, it didn’t erase anything, and it definitely didn’t make sense. But here’s the thing: once you get the hang of it, it becomes your best friend for clean, sharp edits.

Think of it like a precision knife. Scissors are fine, but if you want to slice with style, the Pen Tool is your go-to.

Getting Cozy with the Pen Tool

Where to Find It (It’s Hiding in Plain Sight)

Quick answer: Hit the letter “P” or look for the fountain pen icon in your toolbar.

You know when you’re looking for your keys and they’re right on the table? That’s how it feels finding the Pen Tool. Just click that pen-shaped icon or tap “P” and you’re in. If you click and hold, you’ll see the other Pen Tool types pop out like a hidden menu.

Paths, Points & Patience

Quick answer: Paths are made of anchor points that connect into shapes.

Okay, imagine you’re playing connect-the-dots, but with magical rubber bands. Each click drops an anchor point. Photoshop draws a line between them, and if you click and drag, that line curves. The more you play, the more your shapes start to look less like spaghetti and more like sleek designs.

Different Pen Tool Flavors Pick Your Weapon

The Good Ol’ Classic Pen Tool

Quick answer: Great for total control over every line and curve.

This one’s the original. It’s like driving a stick shift hard at first, but you’ll feel powerful once you master it. Use it to plot straight or curved lines exactly how you want.

Curvature Pen Tool  The Training Wheels Version

Quick answer: Photoshop helps you curve lines automatically.

Not ready for full control? This one’s for you. Just click around your shape and let Photoshop handle the curves. It’s like tracing with a steady hand guiding yours.

Freeform Pen Tool Doodle It Out

Quick answer: Draw freehand and Photoshop will make it a path.

Ever try to sketch something quickly? This tool lets you do that. It’s not super precise, but sometimes messy is good, especially for organic shapes.

Magnetic Pen Tool Let Photoshop Do the Heavy Lifting

Quick answer: It sticks to edges for easy tracing.

Want to trace a high-contrast object fast? This tool is like a magnet to edges. Just hover around the object, and Photoshop kind of finishes your sentences like a best friend who knows you too well.

Time to Draw Let’s Get Practical

Straight Lines: Baby Steps First

Quick answer: Click to add points; Photoshop draws straight lines.

It’s like connect-the-dots. Click once, click again boom, a straight line. Do that a few times and you’ve got a shape. Honestly, it feels kind of satisfying.

Smooth Curves: Like Drawing with Butter

Quick answer: Click and drag to curve the line.

This part feels like ice skating. Click to drop a point, then drag to pull handles that curve your path. It takes finesse, but once you get it, it’s oddly addictive.

Close the Loop – Don’t Leave Gaps

Quick answer: Click back on the first point to close your shape.

You’ll see a little circle appear when you hover over your first point. Click it, and boom your path becomes a complete shape, ready for magic.

Clean Up Time Editing Like a Pro

Add, Delete, and Move Points Like a Boss

Quick answer: Use the Add/Delete Anchor Point tools or Direct Selection (white arrow).

Ever regret a click? No worries. You can add more points with the Add Anchor tool (+), remove them with Delete (-), or move them using the white arrow. It’s like editing a puzzle totally tweakable.

Smooth vs Sharp: Changing Point Styles

Quick answer: Convert points from sharp to smooth using Alt/Option.

Hold Alt (or Option on Mac) and click-drag a point to change its vibe. Sharp corners become curves, and vice versa. It’s like turning right angles into jazz riffs.

Why Bother? Real-Life Ways I Use the Pen Tool

Cutting Stuff Out (Perfectly)

Quick answer: Use paths to make super clean selections.

I once had to cut out curly hair from a cluttered background. Selection tools cried. Pen Tool? It nailed it. You just trace around, then right-click > “Make Selection.” Boom clean edge.

Creating Custom Shapes (That Actually Look Good)

Quick answer: Draw your shape, set it to “Shape” mode, done.

Designing a logo or icon? Pen Tool’s your paintbrush. Choose “Shape” in the top bar and each path turns into a shape with fill and stroke. It’s like turning ideas into stickers.

Masks Without the Mess

Quick answer: Use paths for precision masks on layers.

Masks let you hide parts of a layer. With the Pen Tool, you draw the mask precisely. No fuzzy edges, no spills just clean lines. Like taping before you paint.

Pro Tips You’ll Wish You Knew Sooner

Shortcuts That’ll Save Your Sanity

Quick answer: “P” to Pen, “A” for the white arrow, “Alt” for convert.

Memorize these and you’ll fly. Switching tools mid-design is a pain unless you’ve got hotkeys down. It’s like learning guitar chords: awkward first, second nature later.

When Your Path Disappears (and How to Fix It)

Quick answer: Check the Paths panel or turn on path visibility.

Ever draw a path and it vanishes? I’ve been there. Go to the “Paths” tab your work’s probably hiding there. Double-click to save it. Or hit Ctrl/Cmd + H if it’s just hidden.

Don’t Beat Yourself Up – We All Make These Mistakes

Quick answer: Too many points, not closing paths, bad curves.

We’ve all zigged when we should’ve zagged. My early paths looked like spaghetti. Keep practicing, use fewer points, and remember you can always undo. This tool is a muscle. You’ll flex it better each time.

Wrapping It Up – You’ve Got This

So yeah, the Pen Tool can be tricky at first. But once it clicks (pun intended), it opens a whole new world in Photoshop. It’s like learning to ride a bike wobbly beginnings, then suddenly, you’re zooming through paths like a pro.

Real Talk FAQs

Q1: Is the Pen Tool better than the Magic Wand or Lasso?
Yep for detailed work, it’s way more precise. Think scalpel vs butter knife.

Q2: Can I use it to trace logos?
Absolutely Just zoom in and follow the edges like a stencil.

Q3: Do I need a drawing tablet?
Nope A mouse works just fine. A tablet can help with curves, though.

Q4: Can I change my path after drawing it?
Totally Use the Direct Selection Tool (white arrow) to tweak away.

Q5: What file types work best with Pen Tool paths?
Try saving paths in PSD or EPS if you want to keep them editable.

How to Create Natural Shadow in Photoshop

how to natural shadow in photoshop

Introduction

I used to clip out products in Photoshop and wonder why they looked fake. They floated, like stickers with no weight. Then I learned how to create natural shadow in Photoshop—and everything changed. A soft, real-looking shadow can bring your image to life. In this guide, I’ll show you my easy steps, tools I use, and tricks that save time. Let’s dive in and make your cutouts look natural and pro-level.

What Is a Natural Shadow in Photoshop?

Have you ever cut out a product in Photoshop, but it looked fake? Like it was floating? That used to happen to me too. I’d spend hours on the edges, but something still felt wrong. Then I learned the power of natural shadows.

A natural shadow is one that looks soft and real. It follows the light and wraps around the object. It feels like it’s part of the scene. It doesn’t look flat or fake.

A drop shadow, on the other hand, is made by Photoshop. It’s fast to use, but often looks harsh. It works in a pinch, but it rarely feels real.

We use natural shadows in lots of places. You’ll see them in product shots, mockups, and digital art. They make the item look like it’s sitting on a real surface. They give the photo depth and life.

Without a shadow, things float. They look like stickers. But when you add a soft, real shadow, the whole image changes. It feels finished. It feels right.

Preparing Your Image for Shadow Creation

1. Cut Out the Object Using the Pen Tool

Let’s start with the basics. A clean cut makes everything else easier. If the edges are messy, the shadow won’t look real.

To create a shadow on a cutout in Photoshop, use the Pen Tool. It gives you smooth, sharp edges. Zoom in close. Trace the shape with care. Take your time—it’s worth it.

When you finish, right-click and choose “Make Selection.” Then hit the “Layer Mask” button. Now your object is on its own layer, ready for a shadow. Save the path so you can fix it later if needed.

Trust me, a good cutout is half the job done. I used to rush this step. My shadows looked fake. Once I got clean edges, everything changed.

2. Clean the Background to Pure White (Optional)

This step is key if you’re working on product photos. Sites like Amazon want a pure white background.

To do this, add a new layer under your object. Fill it with white. If the old background had shadows or color, remove them using Levels or Curves. Keep it bright and even.

This helps the shadow stand out. It also makes the photo look clean and pro. If you’re asking how to create a shadow under an object in Photoshop, start here.

It’s a small step, but it makes a big difference. A clear white background gives your work a sharp, clean look.

How to Create a Natural Shadow in Photoshop – Step-by-Step

  1. Create a New Layer for the Shadow
    First, make a new layer. Change the blend mode to Multiply. This helps the shadow mix with the background. I name this layer “Shadow” so I don’t forget. Now, grab a soft round brush. Set the opacity low—30% is great. Gently brush where you want the shadow. You can also use the Gradient Tool for a smooth fade. This is the base of your shadow.
  2. Understand Light Direction and Perspective
    Look at your image. Ask: Where is the light coming from? Shadows fall the other way. If light comes from the top left, the shadow falls bottom right. A quick trick I use is to shine a desk lamp on an object. It helps me see where shadows should go. Thinking like this makes your shadows look real.
  3. Paint or Create the Shadow
    Use that soft brush to paint the shadow. If your object is round or soft, the brush works great. If it has sharp edges, like a box, use the Lasso Tool to make a shape. Fill it with black. Then go to Filter > Blur > Gaussian Blur. This softens the edges. Turn down the opacity to about 40%. The goal is a soft, light shadow—not too dark, not too sharp.

  1. Use Warp or Transform Tools
    Shadows bend. To shape them, press Ctrl+T (Cmd+T on Mac). Right-click and pick Warp. You can now move parts of the shadow to match the surface. Use this if the object sits on fabric or an uneven spot. Try Skew or Distort if the surface is flat. You can even make a rectangle, blur it, and shape it. Think of it like soft play-dough—just move it till it fits.
  2. Final Adjustments for a Natural Feel
    Now, clean things up. Add a layer mask to your shadow. Use a soft black brush to gently erase the extra bits. Too dark? Lower the opacity. Want more depth? Duplicate the shadow layer. Blur it again. Lower the opacity and shift it a bit. This adds a soft glow. It feels like real light is hitting the floor.


Bonus: Shadow Tips for Text and Lettering

Add Shadow to Text

Adding a shadow to text in Photoshop is super easy—but making it look real takes a bit more love. Most people start with Layer Styles (Drop Shadow), and that’s fine. It’s fast and clean. But sometimes, it feels too perfect—like a stamp.

When I first tried to shadow a headline for a client’s Instagram post, it looked flat. The trick? I switched from using presets to painting the shadow by hand. That small shift made the text feel like it belonged in the design. If you’re wondering how to add shadow to text in Photoshop, start with the Drop Shadow under Layer Styles—then duplicate the layer, rasterize it, and tweak it with blur and opacity. That combo gives you more control and depth.

For a softer look, I often use a soft round brush on a new layer under the text. Light brush strokes plus a little Gaussian Blur gives you that warm, subtle touch that Layer Styles just can’t match. It’s the difference between “digital” and “designed by hand.”

Lettering & Illustration Shadows

Now let’s talk about lettering—my favorite part. If you do hand lettering in Photoshop, adding shadows makes it pop like magic. When I first started digital calligraphy, my letters looked nice, but flat. Then I tried drawing a simple drop shadow to the right and below each stroke. Suddenly, the letters danced off the page!

The trick here is direction and consistency. Pick a light source (top left is safe), and stick with it. Use a soft brush on a new layer below your text. Keep the pressure low and the opacity around 20–30%. If you’re doing a Photoshop lettering tutorial, always show how light and shadow effect each curve.

Want even more realism? Add a texture overlay on your shadow layer. It could be grain, watercolor splatter, or even paper texture. That gritty detail gives your drawing soul—it’s what separates a quick graphic from an art piece.

When people search how to shadow drawings or how to create shadows on lettering in Photoshop, they’re really asking: how do I make this feel real? The answer is simple—treat your letters like objects. Think of how sunlight hits a coffee mug. That shadow? Your letters deserve that same love.

Let me know if you want this section turned into a carousel graphic or a short-form tip sheet for social media! I’d be happy to help.

Useful Plugins and Styles

When I first started adding text shadows in Photoshop, I did everything by hand. It worked, but wow—it took forever. Then I found a few plugins and style packs that changed the game. If you’re tired of starting from scratch each time, you’ll love this part.

To install a text effect style in Photoshop, it’s as easy as dragging a .ASL file into your Styles panel. If that sounds confusing—don’t worry. Just open the Styles panel, click the menu icon, and choose “Load Styles.” Done. The new styles will show up instantly, ready to use.

You can find free and premium text shadow styles on sites like Envato Elements, Creative Market, and even some design blogs. I’ve also stumbled on some hidden gems on Gumroad and Behance. Try searching for “Photoshop text shadow ASL free” and see what comes up—you might score something great without spending a cent.

My go-to presets include soft drop shadows, vintage type shadows, and letterpress-style effects. They save me loads of time, especially when working on bulk edits. One click, and boom—instant polish. I still tweak things a bit, but having a base to work from helps a ton.

If you’re wondering how to install text effects style in Photoshop or where to find good text shadow presets, you’re not alone. I had the same questions when I started. Once you find a few favorites, they’ll feel like secret weapons in your creative toolbox.

Pro Tips from My Workflow

When I first made shadows in Photoshop, they looked bad. Like stickers on a blank wall. I had no idea what I was doing. But over time, I learned what works.

Now I edit hundreds of product photos each week. I save time with a smart setup. I use a ready-made PSD file. It has all the layers and tools I need.

In the past, I forgot to think about the light. That was a big mistake. Shadows need to match the light source. Now I imagine where the light comes from. It helps a lot. I also keep photos of real shadows. These are my guides.

Here’s one of my favorite tricks. Press Ctrl+J to copy the object. Fill it with black. Change the blend mode to Multiply. Then use Warp to shape the shadow. Add a soft blur if needed.

Use Gaussian Blur, but not too much. If you blur too far, the shadow looks like it’s floating. Keep it tight and close to the object.

Another tip—use a soft brush and mask to fade the edges. This makes it look more real. And always zoom out. If it looks good from far away, you’re on the right track.

One more thing. Trust your eyes. After a while, you’ll feel when it looks right. The more you do it, the better you get.

Want my PSD shadow file or brush set? Let me know. I’m happy to share what saves me time.

This version keeps things punchy and super easy to read, while still giving solid, expert advice. Let me know if you want it optimized for a voice assistant or in bullet format too!

Frequently Asked Questions (FAQ)

Q: How do I create a shadow under an object in Photoshop?

A: This one took me a few tries when I was starting out. I’d place my product on a clean white background, but something always felt… off. Like it was floating in mid-air. Then I learned the trick: create a new layer under the object, grab a soft round brush set it to black, low opacity, and gently paint where the shadow would fall. Add a bit of Gaussian Blur to soften the edges, and lower the layer’s opacity until it blends in. That simple combo makes the object feel grounded, like it’s actually sitting on something.

Q: What’s the difference between a drop shadow and a natural shadow?

A: Okay, imagine you’re at a café. A drop shadow is like a paper cut-out of a shadow—flat, stiff, always the same. Photoshop’s drop shadow tool gives you that kind of effect. It works for quick stuff, like buttons or mockups. But if you want something that looks like it belongs in real life, you’ll want a natural shadow. That means painting or shaping it by hand to match the light source. It’s flexible, soft where it needs to be, and follows the object’s shape. Real shadows don’t follow a formula—they follow the light.

Q: Can I use Photoshop’s built-in effects for realistic shadows?

A: You can, but I’ve learned to use them only as a starting point. The Drop Shadow layer style is quick, and sometimes good enough for basic things like logos or stickers. But when I’m working on product photography or illustrations, I find that built-in effects look too perfect—and in real life, shadows are never perfect. They stretch, blur, fade, and change depending on the surface. That’s why I usually build mine from scratch, using brushes, gradients, or shaped layers. It takes a bit longer, but the result is worth it.

Q: How do I make a shadow look like it’s on the floor or wall?

A: This used to confuse me too, until I started paying attention to real-life lighting. The secret is to look at where the light is coming from. If it’s coming from above, the shadow will fall downward. If it’s coming from the left, the shadow stretches to the right. Once you know that, use Photoshop’s Transform or Warp tool to shape the shadow. Pull it out across the floor or stretch it up like it’s hitting a wall. The key is to make the shadow “stick” to the surface you imagine—it should follow the shape of that surface.

Q: What settings should I use for soft shadows?

A: For a soft, natural look, I usually use a soft round brush set to around 20–30% opacity. That lets me build the shadow slowly, layer by layer. Once it’s roughly the shape I want, I hit it with a Gaussian Blur—around 10 to 15 pixels usually does the trick. Then I adjust the layer opacity until it blends into the background. A good soft shadow fades at the edges and doesn’t call attention to itself. You notice it more when it’s missing than when it’s done right.

Q: Can I copy a shadow style from one object to another?

A: Yes, and it’s a lifesaver when you’ve got a ton of images to process. Let’s say you’ve painted a nice shadow under one product. You can duplicate that layer, move it under the next object, and then tweak it using Warp or Transform. As long as your lighting stays consistent across your images, this trick keeps everything looking natural without starting from scratch each time. I’ve used this on batches of 100+ product photos and it keeps the look clean and the workflow fast.

Conclusion: Let’s Bring It All Together

Creating natural shadows in Photoshop might sound simple on paper, but it’s honestly a bit like learning how to make the perfect cup of chai. You can follow the steps, but it’s the feel, the little tweaks, that make it just right. If you’ve ever looked at a cutout image and thought, “Why does this feel fake?”, chances are the missing link was the shadow. That subtle touch can be the difference between “meh” and “wow.”

So here’s the short version: Start by cutting out your object cleanly the Pen Tool is your best here. Understand where your light is coming from—that sets the whole vibe. Use a soft brush, keep the opacity low, and slowly paint the shadow on a new layer set to Multiply or Linear Burn. Blur it a little, maybe warp it if the surface isn’t flat, and boom—you’ve got yourself a shadow that looks like it belongs.

One trick that changed everything for me? Using real photos as shadow references. I once placed a coffee mug on my desk, snapped a pic with my phone, and matched the Photoshop shadow to that. Game-changer. Trust your eyes more than the tools—your brain knows what looks natural.

Don’t stress about being perfect. Shadows in real life aren’t perfect either. They’re soft, uneven, sometimes barely there. That’s the beauty of it. Try things. Undo things. Experiment until it feels right. Every shadow you make teaches you something new about light and form.

If this tutorial helped light a little bulb in your brain, I’d love for you to share it. Or maybe dive into my other Photoshop walk troughs—each one is packed with lessons I’ve picked up from years of trial, error, and “wait, why does this look weird?” moments. You’ve got the tools. Now go cast some awesome shadows. 🌤️

Let me know if you’d like this section formatted for publishing, or want an alternate version for social sharing, email newsletter, or video script!