What is Clipping Path in Photoshop
Contents
- 1 Ever wondered how people get those clean product photos with no background?
- 2 What Exactly Is a Clipping Path?
- 3 Why Is It Such a Big Deal?
- 4 Who Actually Uses Clipping Paths?
- 5 The Tool That Makes It Happen: The Pen Tool
- 6 Different Types of Clipping Paths (Yes, There’s More Than One)
- 7 Clipping Path vs. Masking—What’s the Difference?
- 8 Let’s Walk Through the Process (Step-by-Step)
- 9 Common Mistakes to Avoid (I’ve Made Them All)
- 10 Tips for Clean, Pro-Level Cutouts
- 11 Why Not Just Use Magic Wand or Quick Selection?
- 12 Why Clipping Path Matters for E-commerce
- 13 Helpful Tools to Speed Things Up
- 14 So, Should You Learn It or Outsource It?
- 15 Final Thoughts: It’s Worth Learning
- 16 FAQs
Ever wondered how people get those clean product photos with no background?
Here’s the short answer: It’s done using something called a Clipping Path in Photoshop.
If you’re like me, the first time you opened Photoshop, it probably felt like walking into a spaceship. So many tools, buttons, panels—it’s a lot. But over time, you pick up tricks that change everything. The clipping path is one of those game-changers, especially if you work with photos, design, or e-commerce.
Let me break it down like I would for a friend.
What Exactly Is a Clipping Path?
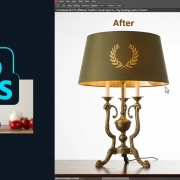
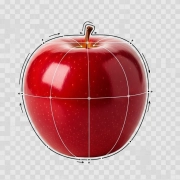
A clipping path is a way to cut out part of an image using the Pen Tool in Photoshop.
Imagine tracing around a sticker with a craft knife. That’s what you’re doing—digitally. You draw a path around the subject, then tell Photoshop, “Only show me what’s inside this line.” The rest? Gone like magic.
I remember my first clipping path. It took me 45 minutes to outline a coffee mug. Now, it takes five. Like anything, practice makes perfect.
Why Is It Such a Big Deal?
In simple terms: Clipping paths make images look clean and professional.
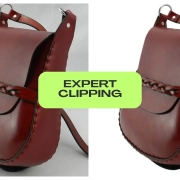
If you run an online store, your products need to shine. No messy backgrounds. No distractions. Clean, clear, and focused. That’s where clipping paths come in. They isolate the product, letting it speak for itself.
I once edited 200 images for a client’s Shopify store. Same white background. Same clean crop. Sales went up. Not magic—just better visuals.
Who Actually Uses Clipping Paths?
Here’s a quick answer: Photographers, online sellers, designers, and anyone who works with images.
I’ve worked with clients from all over—wedding photographers, Amazon sellers, even artists. They all need one thing: clean cutouts. Whether it’s for prints, catalogs, or digital ads, clipping paths are part of the process.
If you’ve ever thought, “This image would look better without the background,” you’re already halfway there.
The Tool That Makes It Happen: The Pen Tool
To create a clipping path, you’ll use the Pen Tool in Photoshop.
Don’t let it scare you. At first, it feels like using chopsticks with your non-dominant hand. But it’s surprisingly powerful. Each click adds an anchor point. Drag a little? You’ve got a curve.
Just remember: The fewer points, the smoother the path.
Pro tip: Zoom in to at least 200%. Your path will thank you.
Different Types of Clipping Paths (Yes, There’s More Than One)
Basic Clipping Path is for simple shapes—think boxes, books, or anything with straight edges.
Complex Clipping Path handles curves and holes, like a bike wheel or a necklace with loops.
Compound Paths involve multiple outlines, perfect for editing cutouts with holes (like inside letters “O” or “A”).
Multi-layer Clipping Path lets you separate different parts of the image—great if you want to edit colors or shadows individually.
Each one serves a different purpose. But the idea stays the same: isolate, clean, and control.
Clipping Path vs. Masking—What’s the Difference?
Here’s a quick way to remember:
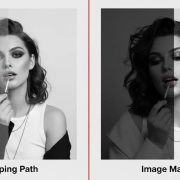
Use clipping paths for sharp edges. Use masking for soft edges.
When I edited a model with flyaway hair, the clipping path didn’t work. It made her look like she had helmet hair. But with masking, I could blend the hair into a new background seamlessly.
So, if you’re cutting out a wine bottle? Clipping path. A person with curly hair? Go for masking.
Let’s Walk Through the Process (Step-by-Step)
Here’s how to create a clipping path like a pro:
1. Open Your Image
Simple. Open the photo you want to edit in Photoshop.
2. Select the Pen Tool
Press P on your keyboard. Make sure the top menu says “Path,” not “Shape.”
3. Start Drawing
Click to add anchor points around the subject. Click and drag for curves. It’s like connect-the-dots, but cooler.
4. Close the Path
Make sure your last point connects to your first. That completes the loop.
5. Convert the Path to a Selection
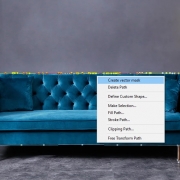
Go to the Paths panel, right-click the path, and select “Make Selection.” Boom—you’ve isolated your object.
Common Mistakes to Avoid (I’ve Made Them All)
- Too many anchor points = jagged lines.
- Not zooming in = sloppy edges.
- Forgetting to feather = harsh cutouts.
- Using auto tools when precision is key.
Trust me, we’ve all been there. But every mistake teaches you something.
Tips for Clean, Pro-Level Cutouts
- Use fewer, smarter anchor points.
- Always zoom in while tracing.
- Work slowly—speed comes with experience.
- Use a graphic tablet if you can. Total game-changer.
And if something looks off? Undo and try again. No shame in that.
Why Not Just Use Magic Wand or Quick Selection?
Short answer: They’re fast but not accurate.
Magic Wand is okay for solid backgrounds, but it often leaves weird edges. Clipping paths take longer but give you pixel-perfect control.
It’s the difference between fast food and home-cooked.
Why Clipping Path Matters for E-commerce
Product photos sell. That’s a fact.
If your item has a messy background, people won’t trust it. I’ve seen this firsthand. After switching to clipping paths and white backgrounds, a client saw their conversion rate jump 30%.
Clean photos build trust. Trust builds sales.
Helpful Tools to Speed Things Up
- Wacom Tablets – Great for smoother hand tracing.
- Photoshop Actions – Save your steps and repeat them with one click.
- Plugins like GuideGuide – Helps with alignment and symmetry.
You don’t need fancy gear, but the right tools save time and stress.
So, Should You Learn It or Outsource It?
If you do it occasionally, learning is worth it. But if you have hundreds of images to edit, consider outsourcing.
There are tons of professional services (like this clipping path service provider) that offer pixel-perfect clipping paths—often within hours and at low cost.
Final Thoughts: It’s Worth Learning
At the end of the day, clipping path isn’t just a Photoshop skill—it’s a tool that gives you control over how your visuals look and feel.
It’s one of the first things I learned when I got into image editing. And even now, after a thousand cutouts, I still love how satisfying it is to isolate an object cleanly.
So if you’re curious, go ahead and try it. You might just fall in love with the process.
FAQs
1. What is a clipping path used for in Photoshop?
A clipping path is used to isolate an object from its background, giving you full control over how the image appears.
2. Is the Pen Tool hard to use?
At first, yes—but with practice, it becomes second nature. Just take your time.
3. Can I use auto tools instead?
You can, but they often leave rough edges. For clean, professional cutouts, the Pen Tool and manual clipping paths are better.
4. What’s better: Clipping path or masking?
Use clipping paths for solid objects with sharp edges. Use masking for soft or fuzzy edges like hair.
5. Do I need expensive tools to do clipping paths?
Nope! All you need is Photoshop and a mouse. A graphic tablet helps, but it’s not a must-have.






Leave a Reply
Want to join the discussion?Feel free to contribute!