What Is Macro Photography?
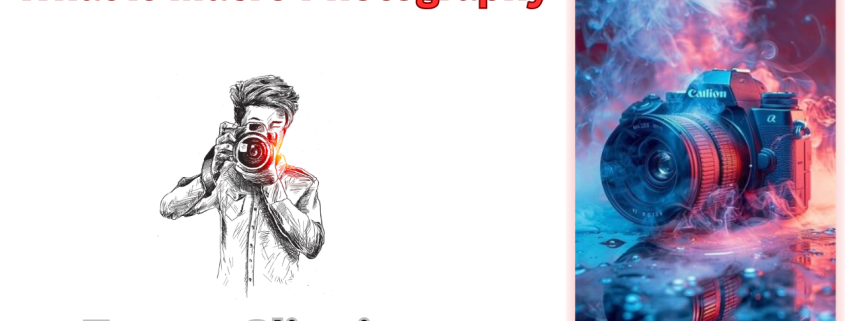
Introduction to Macro Photography
Imagine stepping into a whole new world where tiny things suddenly look huge and magical. That’s what macro photography is all about getting up close to the little wonders we usually miss. Simply put, macro photography is snapping photos of small things so close that they look life-size or even bigger in your picture. It’s like zooming in with your eyes and a camera to reveal secrets that are invisible to the naked eye.
Macro photography means taking super close-up photos that show tiny things in amazing detail.
When I first tried macro photography, I was stunned. I took a photo of a ladybug, and it looked like a tiny spaceship with textures and colors I had never noticed before. That moment hooked me forever.

Understanding the Basics
Definition and Reproduction Ratio
In photography, the term “macro” usually means capturing a subject at a 1:1 ratio or larger. This means what you see on the camera sensor is the same size or bigger than the actual subject. So, if you photograph an ant, it might appear as big as your thumb in the final image.
Macro means the subject looks life-size or bigger in your photo.
Macro vs. Close-Up Photography
You might wonder isn’t close-up photography the same as macro? Well, not quite. Close-up shots bring things nearer, but macro photos push that boundary to reveal extreme detail. Think of close-up like zooming in with a telescope, while macro is more like using a microscope.
Macro photos show much more detail than regular close-ups.
Essential Equipment for Macro Photography
Macro Lenses
The first tool I got was a macro lens, and it changed everything. These lenses are specially designed to focus super close and keep tiny subjects sharp. They come in different sizes, from 50mm to 200mm the bigger the number, the farther you can stand from your subject and still get a great close-up.
A macro lens helps you take sharp close-up photos.
Extension Tubes and Bellows
If you’re on a budget, you don’t have to buy a macro lens right away. Extension tubes and bellows are cheap and clever tools you can add between your camera and lens. They let your lens focus closer by increasing the distance to the sensor.
Extension tubes let regular lenses focus closer for macro shots.
Tripods and Stabilization Tools
Here’s a little secret: macro photography needs rock-steady hands. Since you’re shooting tiny subjects up close, even a slight shake blurs your image. Using a tripod or any stable surface is like giving your camera a strong handshake steady and sure.
Tripods help keep your camera steady for sharp macro photos.
Lighting Equipment
Lighting can make or break your macro shot. I learned this the hard way when my first bug shots looked dull. Adding a ring light or using natural diffused light makes textures pop and colors come alive without harsh shadows.
Good lighting shows the fine details in your macro photos.
Camera Settings and Techniques
Manual Focus and Focus Stacking
Auto-focus? Forget it for macro. When you’re inches from your subject, auto focus gets confused. Switching to manual focus gives you control and precision. Also, when the depth of field is razor-thin, taking several photos at different focus points (called focus stacking) and blending them in software creates stunning, sharp images all over.
Short answer: Use manual focus and focus stacking for sharp macro images.
Depth of Field Considerations
Ever noticed how little of your macro shot is in focus? That’s because the closer you get, the thinner your depth of field becomes. To get more of your subject sharp, use a smaller aperture (like f/11 or f/16). Just watch out for diffraction too small an aperture can make things soft.
Smaller apertures help keep more of your subject in focus.
Shutter Speed and ISO Settings
Fast shutter speeds freeze motion essential when your tiny subjects wiggle or when the wind moves your flowers. I usually balance shutter speed with ISO; I keep ISO low to avoid grain but bump it up if light is scarce.
Use fast shutter speeds and low ISO for sharp, clean macro shots.

Creative Approaches in Macro Photography
Composition and Background
One thing I love about macro is that you can turn even a dull background into art by blurring it out. Using a wide aperture creates a creamy, soft background that makes your subject pop, almost like a spotlight on a stage.
Blurred backgrounds make tiny subjects stand out beautifully.
Using Patterns and Textures
Macro photography is like a treasure hunt for textures. I’ve spent hours photographing the veins on leaves or the rough skin of insects. These details tell stories and make photos look abstract, like modern art.
Macro shows off cool patterns and textures invisible to the eye.
Experimenting with Perspectives
Don’t just shoot straight on. Try shooting from below, side, or even upside down. I once shot a flower from beneath and got a shot that looked like a colorful umbrella — unexpected and fresh.
Changing angles reveals new details and adds interest.
Common Challenges and Solutions
Dealing with Movement and Wind
Tiny subjects don’t stay still, and the wind loves to mess with your shot. I learned to shoot early mornings when the air is calm. Another trick: place a windbreaker or even your jacket to shield your subject.
Shoot in calm weather and use windbreaks to reduce movement.
Overcoming Lighting Issues
Sometimes natural light just won’t cut it. When that happened, I used small LED panels or ring lights to brighten the scene. Diffuses help soften harsh light and stop ugly shadows from ruining the shot.
Artificial light and diffuses fix tough lighting problems.
Post-Processing Tips
Enhancing Details and Sharpness
Editing can bring your macro shots to life. I like using sharpening tools carefully too much and the photo looks fake, but just enough highlights the textures I worked hard to capture.
Post-editing sharpens details but avoid overdoing it.
Color Correction and Contrast
Sometimes, colors don’t look quite right straight out of the camera. Adjusting white balance and contrast makes your subject look natural and vibrant. Keep it subtle for a realistic feel.
Adjust colors and contrast for natural, eye-catching photos.
Conclusion
Macro photography is like unlocking a secret door to a tiny world full of wonder. It’s challenging but so rewarding when you see the invisible details come alive in your photos. If you love exploring, storytelling, and seeing beauty in the small things, macro photography will become your new best friend.
Trust me, once you start, you’ll find yourself staring at everyday objects with fresh eyes because suddenly, everything has its own tiny universe waiting to be discovered.
FAQs
Q1: Do I need a special lens to do macro photography?
Nope! While a macro lens is best, you can start with extension tubes or close-up filters on your existing lens.
Q2: What is focus stacking, and should I try it?
Focus stacking means combining several photos focused on different parts to get the whole subject sharp. It’s great for very detailed shots.
Q3: How do I avoid blurry macro shots?
Use a tripod, manual focus, and a fast shutter speed to keep things sharp.
Q4: What lighting works best for macro photos?
Natural diffused light or ring lights work well. Use diffuses to soften harsh light.
Q5: Can macro photography be done indoors?
Absolutely! Many macro photographers shoot indoors using artificial lights, perfect for controlled settings.