,

How to Make a Drop Shadow in Photoshop (Explained with Tables, Reviews & Pro Tips)

Make a Drop Shadow in Photoshop

Looking to add some visual depth to your images? Whether you’re editing product photos or creating stunning graphics, learning how to make a drop shadow in Photoshop can level up your design game. In this guide, we’ll walk you through every step, answer the most common questions, and even show you how Expert Clipping can help.

What is a Drop Shadow in Photoshop?

A drop shadow is a visual effect that gives the illusion of depth by placing a shadow behind an object or layer. It helps your design pop off the screen and makes images feel more lifelike.

Snippet answer: A drop shadow in Photoshop is a layer style effect that creates a shadow behind an object to give it depth and dimension.

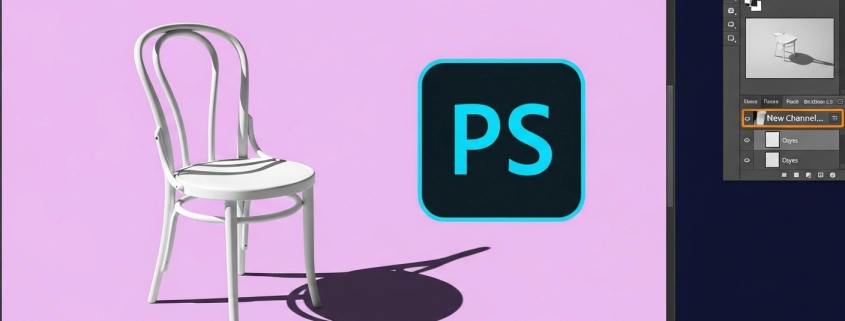
How to Create a Drop Shadow in Photoshop (Step-by-Step)

Adding a drop shadow is easy if you follow these simple steps:

  1. Open your image in Photoshop.
  2. Select the layer you want to apply the shadow to.
  3. Click the FX icon at the bottom of the Layers panel.
  4. Choose Drop Shadow from the list.
  5. Adjust settings like opacity, distance, spread, and size.
  6. Click OK to apply.

Quick tip: For a softer, more natural shadow, reduce the spread and increase the size.

Setting Recommended Value Purpose
Opacity 40%–70% Controls shadow transparency
Distance 5px–25px Determines how far the shadow is
Spread 0%–10% Increases edge hardness
Size 10px–50px Blurs the shadow for realism

Request Your First 3 Images Free – Test our drop shadow editing service at Expert Clipping.

Why Can’t I See My Drop Shadow in Photoshop?

Sometimes, shadows just won’t show up. Here’s why:

  • Your layer might be hidden.
  • The layer’s opacity is too low.
  • The blend mode isn’t working with the background.
  • Layer order might be incorrect.

Snippet answer: Drop shadows may be invisible if layer visibility, opacity, or blending settings are incorrect.

🛠 Pro tip: Make sure your background isn’t pure black, which hides the shadow.

Box Shadow vs. Drop Shadow: What’s the Difference?

Feature Box Shadow (CSS) Drop Shadow (Photoshop)
Used in Web design Graphic/photo editing
Flexibility Limited to HTML/CSS Fully customizable in UI
Layers No layer support Layer-based, more control

Snippet answer: A drop shadow in Photoshop offers more visual control than a CSS box shadow.

How to Add Drop Shadows to Shapes and Objects

You can add drop shadows to shapes by:

  • Selecting the shape layer.
  • Clicking FX > Drop Shadow.
  • Adjusting settings as needed.

🎯 Want it done right? Compare our pricing and get an Instant Cost Estimate.

Are Drop Shadows Outdated?

Not at all! When done right, shadows bring depth and professionalism to your visuals—especially in eCommerce, advertising, and social media designs.

Snippet answer: Drop shadows aren’t outdated—they enhance depth and realism in modern design.

Types of Drop Shadows Used in Photo Editing

Shadow Type Use Case
Natural Shadow Mimics real lighting
Reflection Shadow Used for glossy surfaces
Cast Shadow Projects shape to surface
Soft Drop Shadow Smooth transition, subtle depth

💡 Expert Clipping offers all types of shadow creation services tailored to your product image needs.

Common FAQs Answered

What is the Best Color for Drop Shadow?

Dark gray works best—it’s softer than black and looks more natural.

How Do I Make Multiple Drop Shadows in Photoshop?

  • Convert the layer to a Smart Object
  • Apply a second drop shadow via Layer > Layer Style

How Do I Move a Drop Shadow in Photoshop?

In the Layer Style dialog, drag the shadow or adjust angle/distance.

How Long Does It Take to Add Drop Shadows in Bulk?

With Expert Clipping, we can edit up to 1,000+ images within 6–12 hours, depending on complexity.

Real Customer Reviews ⭐

“Expert Clipping gave our Amazon product images a professional edge. The shadows look real, and turnaround was super fast!” – Emily R., USA

“We tried their free trial and were impressed. The drop shadows looked clean and natural. Definitely subscribing for our bulk edits.” – Omar K., UK

“Quick, affordable, and reliable. Our images now pop with depth thanks to Expert Clipping!” – Lina M., UAE

Subscribe & Save on Bulk Editing – Perfect for studios, sellers, and agencies.

Why Use Expert Clipping for Drop Shadows?

  • 💼 15+ years of experience in photo editing services
  • 🧠 Manual & AI-enhanced workflow
  • 🔁 Unlimited revisions for your peace of mind
  • 🕒 Fast turnaround – as little as 3 hours
  • 🏷 Pricing starts at just $0.29 per image

🚀 Get Instant Cost Estimate | ✅ Request Your First 3 Images Free

Final Thoughts

Adding a drop shadow in Photoshop might seem small, but it makes a huge difference. It brings images to life, guides the viewer’s eye, and makes your product look professional. Whether you’re doing it yourself or outsourcing it, knowing the hows and whys helps you make better design choices.

If you want pixel-perfect shadows without the hassle, Expert Clipping has your back.

Let your images stand outRequest a Quote today.

How Light and Shadow Photography Can Transform Your Images

Light Shadow Photography Transformation

Introduction to Light and Shadow Photography

As a photographer, you are always looking for ways to transform your images and create something unique. One technique that can help you achieve this is light and shadow photography. This style of photography focuses on the interplay between light and dark, and the way shadows can enhance the mood and composition of a photograph.

Understanding the Importance of Light and Shadow in Photography

Light and shadow are essential elements of photography. They can add depth, texture, and contrast to your images, and help you create a more dynamic composition. Understanding how to use light and shadow effectively can take your photography to the next level.

One way to think about light and shadow is to consider the direction of the light source. Front lighting, where the light comes from behind the photographer, can create a flat image with little depth or contrast. Backlighting, where the light comes from behind the subject, can create a dramatic silhouette effect. Side lighting, where the light comes from the side of the subject, can create interesting shadows and highlights.

Techniques for Capturing Shadow Pictures

One of the most effective ways to capture shadow pictures is to use natural light. Look for interesting patterns of light and shadow, such as the way light filters through leaves or reflects off a surface. You can also experiment with artificial light sources, such as lamps or flashlights, to create unique shadow effects.

Another technique for capturing shadow pictures is to play with the exposure settings on your camera. Adjusting the aperture, shutter speed, and ISO can help you create a more dramatic or subtle effect with the shadows in your image. You can also use post-processing techniques, such as dodging and burning, to enhance the shadows in your photograph.

Creative Ideas for Incorporating Shadows in Photography

Light Shadow Photography Transformation

There are many creative ways to incorporate shadows in your photography. For example, you can use shadows to create interesting patterns or textures in your image. You can also use shadows to frame your subject, or to add a sense of mystery or drama to your photograph.

One idea for incorporating shadows in your photography is to experiment with negative space. Negative space refers to the area around your subject, and using shadows to create negative space can help draw the viewer’s eye to the main focus of your image. You can also use shadows to create interesting reflections or to add depth to your photograph.

Tips for Creating Stunning Shadow Headshots

Shadow headshots can be a unique and creative way to capture a portrait. To create a stunning shadow headshot, start by finding a light source that creates interesting shadows on your subject’s face. You can experiment with different angles and positions to find the most flattering effect.

Another tip for creating stunning shadow headshots is to use a reflector or fill light to balance out the shadows. This can help prevent the shadows from being too harsh or unflattering. You can also use post-processing techniques, such as selective color or black and white, to enhance the mood and composition of your shadow headshot.

Light and Shadow Photography Ideas for Beginners

If you’re new to light and shadow photography, there are many ideas and techniques you can experiment with. One idea is to start by practicing with natural light, such as the way light filters through a window or reflects off a surface. You can also experiment with different lighting setups, such as using a flashlight or lamp to create interesting shadows and highlights.

Another idea for beginners is to start with simple compositions, such as using shadows to frame your subject or create negative space. As you become more comfortable with light and shadow photography, you can start to experiment with more complex compositions and techniques.

Advanced Techniques for Mastering Light and Shadow Photography

For more advanced photographers, there are many techniques you can use to master light and shadow photography. One technique is to experiment with different light sources, such as using colored gels or multiple light sources to create unique effects. You can also experiment with different lenses and filters to create interesting distortions and patterns.

Another advanced technique for mastering light and shadow photography is to use multiple exposures. This involves taking multiple images with different exposure settings, and then blending them together in post-processing to create a more dynamic and dramatic image.

Equipment Recommendations for Light and Shadow Photography

To get started with light and shadow photography, you don’t need a lot of equipment. A camera with manual exposure settings and a basic lens is sufficient. However, there are some additional tools that can help you create more dramatic and creative images.

One essential tool for light and shadow photography is a tripod. This can help you stabilize your camera and take sharp images, even in low light. You may also want to invest in a reflector or fill light to balance out the shadows in your image.

Editing Tips for Enhancing Light and Shadow in Your Images

Post-processing can be an important part of light and shadow photography. Editing can help you enhance the mood and composition of your image, and bring out the details in the shadows.

One editing tip for enhancing light and shadow in your images is to use the Levels or Curves tool in your editing software. This can help you adjust the brightness and contrast of your image, and bring out the details in the shadows. You can also experiment with selective color or black and white to enhance the mood and composition of your image.

Conclusion: How Light and Shadow Photography Can Transform Your Work

Light and shadow photography can be a powerful tool for transforming your images and creating something unique. By understanding the importance of light and shadow in photography, and experimenting with different techniques and compositions, you can take your photography to the next level. Whether you’re a beginner or an advanced photographer, there are many ideas and tools you can use to master light and shadow photography and create stunning images.