Les meilleures alternatives à Fotor pour retoucher vos photos en 2025

Meilleures alternatives à Fotor

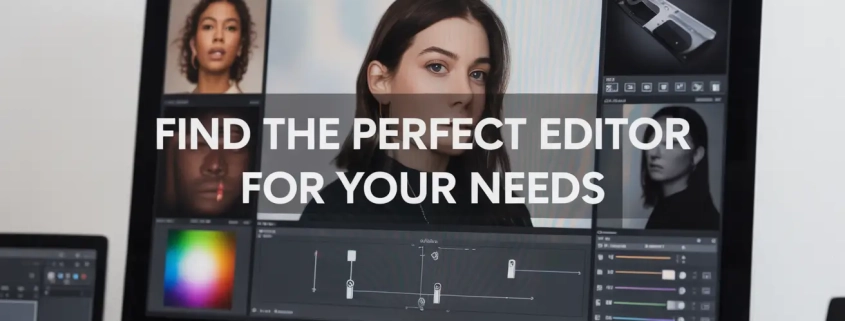
pourquoi chercher une alternative à Fotor ?

Fotor est un éditeur de photos en ligne connu pour sa simplicité. Il permet de créer des collages, de retoucher des images et même de concevoir des graphiques pour les médias sociaux. Pourtant, comme je l’ai expérimenté dans mes projets, il reste limité dès que l’on cherche une qualité professionnelle ou des fonctionnalités avancées.

En clair, si vous voulez un logiciel de retouche photo facile à utiliser mais plus puissant que Fotor, il existe de nombreuses alternatives gratuites ou premium qui offrent plus de flexibilité, plus d’outils et une meilleure personnalisation.

Adobe Photoshop Express – L’édition rapide et professionnelle

Adobe Photoshop est souvent considéré comme le meilleur éditeur de photos au monde. Sa version simplifiée, Photoshop Express, répond aux besoins des débutants et des utilisateurs mobiles.

Avec Photoshop Express, j’ai pu corriger les couleurs, redimensionner des images et appliquer des filtres en quelques secondes, sans avoir besoin de maîtriser toutes les fonctions complexes de la suite complète.

  • Compatible avec Android, iOS et Windows.
  • Retouche photo gratuite avec options premium.
  • Interface claire, idéale pour les débutants.

Canva – L’outil de conception graphique pour les réseaux sociaux

Canva n’est pas seulement un outil de retouche photo. C’est une plateforme de conception graphique complète qui permet de créer des publications sur les réseaux sociaux, des présentations, des logos et même des infographies.

Lorsque je prépare du contenu pour mes clients, Canva me fait gagner un temps précieux grâce à son système de glisser-déposer et sa bibliothèque de modèles prêts à l’emploi.

  • Éditeur d’images en ligne gratuit.
  • Export de fichiers haute qualité.
  • Collaboration en temps réel.

You can also combine it with background editing tools like our background removal services to make your designs clean and professional.

Pixlr – Une alternative à Fotor en ligne et gratuite

Pixlr est un éditeur de photos en ligne gratuit, accessible depuis n’importe quel navigateur. Il prend en charge les calques et masques, ce qui le rapproche d’outils professionnels comme Photoshop.

Personnellement, je le recommande aux utilisateurs qui veulent un logiciel rapide et sans téléchargement. J’ai testé son outil de suppression d’arrière-plan, et il est particulièrement efficace grâce à l’IA intégrée.

  • Disponible en version gratuite et premium.
  • Compatible multiplateforme.
  • Idéal pour la retouche photo en déplacement.

If you want to try professional-level tools, you can explore photo cut-out services for precise background work.

GIMP – L’alternative open source puissante

GIMP est souvent présenté comme la meilleure alternative gratuite à Photoshop. C’est un logiciel open source qui fonctionne sur Windows, macOS et Linux.

Je l’utilise régulièrement pour des retouches avancées, comme l’édition de fichiers RAW ou la création de visuels vectoriels. La communauté active propose aussi des centaines de plugins gratuits.

  • Licence gratuite et illimitée.
  • Fonctionnalités avancées (calques, filtres, masques).
  • Idéal pour les photographes et designers confirmés.

Luminar Neo – L’intelligence artificielle au service de la photo

Luminar Neo est un logiciel basé sur l’IA qui simplifie la retouche d’image.

J’ai testé son outil de correction automatique de l’éclairage et sa fonction de suppression des objets, et le résultat est bluffant : on obtient un rendu naturel sans passer des heures en édition manuelle.

  • Disponible sur Windows et macOS.
  • Outils de retouche IA.
  • Conçu pour améliorer rapidement les photos.

For professional ecommerce photos, check out how clipping path services can isolate products perfectly on a white background.

PhotoScape X – Le couteau suisse des éditeurs

PhotoScape X est un éditeur d’images en ligne et hors ligne polyvalent. Il combine des outils de retouche, de collage et de conception graphique.

Pour mes tutoriels, je l’utilise souvent car il permet de créer des GIFs, des collages et des présentations sans effort.

  • Gratuit avec une version Pro abordable.
  • Idéal pour les débutants comme pour les intermédiaires.
  • Large éventail de fonctionnalités.

Affinity Photo – La solution premium sans abonnement

Affinity Photo est un logiciel professionnel qui rivalise avec Photoshop, mais sans abonnement.

Dans mes projets, j’ai apprécié son rendu fluide même sur des fichiers lourds et ses outils avancés comme le HDR et le panorama.

  • Paiement unique, pas d’abonnement.
  • Compatible Windows, macOS et iPad.
  • Qualité professionnelle assurée.

Comparatif visuel des alternatives à Fotor

graph TD

A[Fotor] –> B[Photoshop Express]

A[Fotor] –> C[Canva]

A[Fotor] –> D[Pixlr]

A[Fotor] –> E[GIMP]

A[Fotor] –> F[Luminar Neo]

A[Fotor] –> G[PhotoScape X]

A[Fotor] –> H[Affinity Photo]

comment trouver la meilleure alternative à Fotor ?

Si vous voulez un éditeur de photos gratuit et en ligne, Pixlr ou Canva sont d’excellentes options.
Pour une retouche d’image avancée, GIMP ou Affinity Photo sont de véritables références.
Pour gagner du temps grâce à l’IA, Luminar Neo est un choix idéal.

En fin de compte, la meilleure alternative à Fotor dépend de vos besoins : rapide, gratuit, collaboratif ou professionnel. Après avoir testé plusieurs de ces outils dans mon travail quotidien, je peux affirmer qu’il existe aujourd’hui des solutions bien plus puissantes et adaptées que Fotor pour créer, retoucher et partager vos visuels.

How to Photograph White Products on a White Background for eCommerce

white product photography

Photographing white products on a white background sounds simple… until you try it. Everything looks too bright, too dull, or just blends into one big washed-out blob. I’ve been there. The first time I tried this setup, I felt like I was trying to photograph a snowman in a snowstorm. But with the right steps, you can get crisp, clean, professional eCommerce product photos without frustration.

In this guide, I’ll walk you through the entire process from lighting and camera settings to composition and editing. Whether you’re shooting for Amazon, Shopify, Etsy, or your own store, this breakdown will help you get consistent, studio-quality results even with a simple setup.

Introduction to White-on-White Photography

White-on-white photography is exactly what it sounds like: shooting white products against a white background. It looks minimal, clean, and professional perfect for eCommerce. But because the product and background are the same color, the camera struggles to tell them apart. That’s why you need to use lighting and exposure carefully to make the product stand out.

Why White Product Photography Matters

White product photography isn’t just an aesthetic choice. It’s the industry standard for eCommerce because:

  • It highlights the product clearly without distractions.
  • It creates trust—clean photos make your brand look reliable.
  • It blends well with most website designs.
  • Marketplaces like Amazon require pure white backgrounds (RGB 255,255,255).

If your product photos look dark or grayish, you risk losing sales before shoppers even click your listing.

Learn how white backgrounds boost conversions in our guide on background removal services.

Essential Gear You Need

You don’t need a high-end studio. Here’s a simple list of essentials:

● Camera (DSLR, mirrorless, or high-end smartphone)

Any modern camera works as long as you can control exposure.

● Tripod

Keeps your shots sharp and consistent.

● Lighting

Use softbox lights, LED panels, or daylight.

  • Softbox lights
  • Continuous LEDs
  • Natural light from a large window

● White backdrop

Choose paper, vinyl, or fabric—but avoid textured surfaces.

● Reflectors

To bounce light and reduce shadows.

● Diffusers

For softening harsh light.

Think of these tools as the paintbrushes you need to “sculpt” your product with light.

Choosing the Right White Background

Not all white backgrounds are equal. Here are your best options:

● White Seamless Paper

Best for smooth, wrinkle-free backgrounds.

● White Acrylic Sheet

Gives a glossy reflection effect.

● White Cloth

Budget-friendly but needs steaming or ironing.

● Lightbox

Perfect for small products.

The key is consistency—stick with one type so your catalog looks uniform.

Understanding Light for White Backgrounds

To make white products stand out, you need controlled lighting. The goal is to light the background enough to make it white, but not so much that it overwhelms the product.

You want:

  • Soft light (so shadows aren’t harsh)
  • Even light (no dark patches)
  • Separate background and product lights

For extra tips, see our product photo retouching guide.

Setting Up the Perfect Lighting Arrangement

Here’s a simple, effective setup:

● Two lights facing the background

These ensure the backdrop becomes pure white.

● One or two soft lights angled toward the product

This brings out shape, texture, and detail.

● Reflectors placed on the sides

To fill shadows.

If you only have one light, place it at a 45° angle and use reflectors on the opposite side.

Camera Settings for White-on-White Shots

You don’t need complicated settings. Start with:

  • ISO: 100–200
  • Aperture: f/8–f/11 for clarity
  • Shutter speed: 1/125 or as needed
  • White Balance: Set manually or use “Daylight”
  • Shoot in RAW: Gives more flexibility in editing

Your camera might want to darken the scene, so be prepared to correct exposure.

How to Expose White Products Properly

Exposure is tricky because your camera thinks everything is too bright.

Here’s what to do:

● Use Exposure Compensation (+1 to +2 EV)

This brightens the whites correctly.

● Check the histogram

Aim for a gentle curve toward the right, not spiking.

● Make sure details don’t blow out

You still want to see shape, texture, and edges.

Positioning Your Product

Placement affects how clean your final image looks.

● Center the product

Keeps your layout consistent.

● Keep some distance from the background

This reduces unwanted shadows.

● Adjust angles

Some products look better slightly tilted; others need a straight-on shot.

For more tips on presentation, check out our photo cut-out service.

Avoiding Color Casts and Shadows

Sometimes the product picks up blue, yellow, or green tones from lights or surroundings. You can fix this by:

  • Using lights with the same color temperature
  • Avoiding mixed lighting (window + bulb)
  • Adding diffusion to soften shadows
  • Using white foam boards as reflectors

Clean color means your product looks true to life.

Shooting Different Types of White Products

● Glossy Products (ceramics, plastics, bottles)

Use larger diffusers to soften reflections.

● Matte Products (fabric, paper, food items)

Increase contrast slightly to keep details visible.

● Transparent Products (glass, acrylic)

Add backlighting and dark edges to define shape.

● Textured Products

Use side lighting to bring out patterns.

Each category needs slight adjustments, but the foundation remains the same.

Using Reflectors and Diffusers

Reflectors bounce light back onto the product, reducing shadows and adding dimension.

Diffusers soften the main light so the product looks smooth and natural.

This combo helps prevent the product from blending into the white background.

Step-by-Step Shooting Workflow

Here’s a simple workflow you can follow every time:

Step 1: Set up background

Make sure it’s clean and wrinkle-free.

Step 2: Position lights

One or two for the product, two for the background.

Step 3: Place your product

Keep some distance from the backdrop.

Step 4: Dial in camera settings

Start with ISO 100, f/8, +1 EV.

Step 5: Take test shots

Check exposure, shadows, and color.

Step 6: Adjust lighting

Fix shadows, remove color casts, tweak angles.

Step 7: Shoot from multiple angles

Front, side, 45°, overhead.

Step 8: Review images

Zoom in for dust, scratches, and details.

Step 9: Move to editing

Enhance brightness, contrast, and edges.

Once you follow this workflow a few times, it becomes second nature.

Editing White Product Photos for eCommerce

Editing is where everything comes together.

● Increase brightness slightly

Make the background pure white.

● Adjust contrast

To make the white product stand out.

● Use the brush tool

Brighten only the background when needed.

● Fix imperfections

Remove dust, scratches, or fingerprints.

● Export in high resolution

Most stores require at least 1500–2000 px on the long side.

If editing feels tricky, you can always try our photo retouching services trusted by eCommerce brands.

Final Tips for White Background Consistency

  • Always shoot with the same lighting setup.
  • Save your camera settings as a preset.
  • Use the same background material for every product.
  • Keep your editing style consistent across the entire catalog.

Consistency builds brand trust and makes your store look more professional.

Conclusion

White product photography may seem intimidating at first, but once you understand lighting and exposure, everything becomes easier. Think of it as learning to “paint with light.” With the right setup, your white-on-white images will look clean, bright, and perfect for eCommerce—helping your brand shine and your products stand out.

If you want to level up your visuals, explore our clipping path services — perfect for creating pure white backgrounds and professional product edges.

FAQs

1. Why is white product photography so challenging?

Because the product and background blend together, making it hard for the camera to capture detail without overexposure.

2. Do I need expensive gear for white-on-white photography?

Not at all. A simple light setup, a tripod, and a white background are enough to get professional results.

3. How do I keep the background pure white?

Light the background separately using two lights or increase brightness selectively during editing.

4. Should I use natural or artificial light?

Both work, but artificial light gives more consistency. Natural light is great if you have a large window with soft daylight.

5. Can I fix a grayish background in editing?

Yes, you can brighten the background using the brush tool, curves adjustment, or levels, but make sure it still looks natural.

,

Jewelry Photography Setup | Full-Depth Journal simple, practical, and printable

Jewelry Photography Setup

This is a clear, step-by-step journal you can use to learn, teach, or make a printable PDF. Sentences are short. Words are simple. Read time: long but easy to scan.

Quick summary (TL;DR)

  • Use soft light. Use a tripod. Use low ISO. (Orbitvu)
  • A light tent or small lightbox helps a lot. (Picup Media)
  • You can shoot with an iPhone. Macro mode helps. (SANDMARC)
  • Clean the piece. Remove dust and prints. Expert Clipping can help with edits.
  • Expert Clipping can help with edits.

Journal

Day 1: Goals & plan

Goal: make clean, sale-ready photos.
Make a simple list. Follow it each shoot.

Checklist (printable)

  1. Clean jewelry.
  2. Pick background.
  3. Set up light tent or lights.
  4. Mount camera on a tripod.
  5. Set low ISO (100–200).
  6. Pick aperture for enough depth (see camera settings).
  7. Shoot multiple frames for focus stacking.
  8. Edit or send to Expert Clipping for retouching.

Day 2: Gear & tools (what you need)

Short list. Buy if you can. Or DIY.

Must-haves:
Camera or phone with macro mode, tripod, soft light, diffuser or light tent, clean cloth, and white cards.
These make a basic product photography setup.

Optional gear (Pro):
Macro lens (100mm), focus rail, turntable, or lightbox.

For pro shots, check the Best Camera Settings for Product Photography.

Must-haves (basic)

  • Camera or phone with macro.
  • Tripod or stand.
  • Light source (LED panels or desk lamps).
  • A diffuser or light tent.
  • Clean cloth and blower.
  • Small props or white cards (for fill).
    These items form a simple jewelry photography setup. (Orbitvu)

Optional gear (pro)

  • Macro lens (100mm or similar). (Orbitvu)
  • Focus rail for stacking.
  • Turntable for 360 shots.
  • GemLightbox or similar lightbox for fast, repeatable shots. (Picup Media)

What equipment is needed for jewellery photography?
Short answer: clean piece, camera or phone, tripod, soft light, diffuser, and a plain background. Add a macro lens and a lightbox for pro work. (Picup Media Blog)

Day 3: Lighting — the heart of the setup

Use soft light. Hard light makes hot spots. Soft light shows shape. Use two lights at 45° if you can. Use a diffuser in front. This makes even light. A reflector adds fill where you want less shadow. (Orbitvu)

Light tents and boxes
Light tents cut reflections. They give clean white or black backgrounds. GemLightbox and similar boxes are built for jewelers. They speed the shoot and keep color steady. (Picup Media)

Tip: move lights slowly. Watch reflections. Small moves change the look.

See how background removal services can help refine your shots.

Day 4: Backgrounds & styling

Keep it simple. White, black, or light grey work best for e-commerce. Use textured surfaces for mood shots. For white background shots, use a seamless white card or a lightbox. This helps clipping and edits later. (Packshot Creator)

Jewelry product photography ideas:

  • Pure white for catalog shots.
  • Black or grey for drama.
  • Stone or wood for craft or rustic feel.
  • Model shots for scale and context.

For jewelry, a white background is ideal — it makes editing easier with clipping path services.

Day 5: Camera gear & settings (simple)

What camera settings should I use to shoot jewelry?

  • ISO: keep low (100–200). Low ISO keeps images clean. (Orbitvu)
  • Aperture: mid to small (f/8–f/22). Use focus stacking if needed. (Packshot Creator)
  • Shutter speed: use tripod. Shutter speed can be slow. Use remote or timer.
  • White balance: match your light source. Set custom WB or use a gray card.

What ISO is best for jewelry photography?
Use ISO 100 or ISO 200. This cuts noise and keeps color true. (Orbitvu)

What is the best camera for jewelry photography?
Any camera with a macro lens or good close focus will do. Mirrorless or DSLR with a 100mm macro lens is ideal. But phone macro mode can work for web shots. (Orbitvu)

Quick pro tip: bracket and shoot multiple frames. Merge for depth if needed.

You can learn more about focus stacking in photo retouching tutorials.

Day 6: Smartphone setups (iPhone and others)

You can shoot with your phone. Use macro mode. Use a steady mount or tripod. Use soft light. Gem Light box and similar devices work with phones. Some phone apps let you lock ISO and WB for consistency. (SANDMARC)

Product photography setup with iPhone steps:

  1. Turn on Macro mode (if available).
  2. Mount phone.
  3. Use a small LED panel and diffuser.
  4. Set exposure and lock it.
  5. Shoot RAW (if phone supports it).
  6. Edit or send to Expert Clipping for pro retouch.

Then send your shots to Expert Clipping for retouching.
See also: DIY product photo editing.

Day 7: DIY light box and budget setups

DIY box in five steps:

  1. Use a cardboard box.
  2. Cut out three sides.
  3. Tape tissue or white cloth over cutouts.
  4. Place white card inside as a sweep.
  5. Add two LED lamps outside the box.

This gives a cheap product photography setup at home. Many pros start this way. It is easy and cheap. (Picup Media Blog)

Product photography setup box price:

  • DIY box: <$10.
  • Small pro lightbox: $50–$300.
  • GemLightbox or pro solutions: $1,000–$4,000. (Picup Media)

This is a budget product photo editing setup anyone can build at home.

Day 8: Shooting techniques for sparkle and shine

To get sparkle:

  • Add a tiny bright light as a spec light.
  • Use a hard light at low power for highlights.
  • Combine soft light for shape and hard light for spark.
    This creates a depth and pop on gemstones. (Packshot Creator)

You can use shadow and reflection services to give more depth to metal pieces.

For rings and flat pieces:

  • Use pins or holders.
  • Use mirror plates to catch subtle reflections.
  • Shoot multiple angles.

Day 9: Focus stacking & depth control

Jewelry is small. Depth of field is shallow. Use focus stacking to get all parts sharp. Take a series of shots. Shift focus a little between each shot. Merge in software later.

Many pro guides suggest focus stacking for rings and brooches. (Orbitvu)

See how to reshape product photos for more advanced edits.

Day 10: Editing & retouching

Clean dust and add contrast. Fix scratches if you must. Keep metal tones true. Add sparkle in the highlights. If you want fast, clean edits, Expert Clipping can help with clipping and retouching. Mention this in your workflow. Expert Clipping can do bulk edits too.

Jewelry photo retouching steps:

  1. Remove dust.
  2. Straighten and crop.
  3. Clean halos and reflections.
  4. Balance color and contrast.
  5. Add final sharpness and export.

There are many tutorials and courses for deeper retouching. Search for “jewelry retouching photoshop tutorial” for step-by-step lessons. (Picup Media Blog)

Expert Clipping can handle bulk retouching or background removal.

For advanced steps, try this photo retouch guide.

Day 11: Marketplace needs (Amazon, Etsy, Daraz)

Market rules vary. For Amazon or big sites, white background is key. For Etsy, lifestyle shots help. For Daraz or local marketplaces, use clear photos and show scale.

Product photography setup for Amazon usually needs:

  • Plain white background.
  • No props that distract.
  • True color and high resolution.
    Cover these in your shoot checklist. (Picup Media Blog)

Use photo cut-out services to meet eCommerce standards.

Day 12: Pricing & kits

Estimate cost tiers:

  • Budget DIY kit: $30–$150.
  • Mid tier (LED panels + tripod + lightbox): $150–$800.
  • Pro kit (macro lens, studio lights, lightbox): $800–$4000+. (SEP Tools)

Product photography kit amazon: many sellers offer full kits. Read reviews. Pick one with dimmable LED lights and a tripod.

If you’re unsure what to invest in, check product photography pricing explained.

Day 13: Local services & pros

You can find local studios for jewelry photography.
If you use Expert Clipping, share before-and-after samples to build trust.

Read more about clipping path providers for outsourcing work.

Day 14: Advanced moves & workflow

  • Use a column stand for precise macro shots. (Orbitvu)
  • Use a remote trigger to avoid shake.
  • Keep a repeatable setup. Save notes for each product.
  • Use a naming system for files so you can batch edit.

Try image manipulation services for creative looks.

Examples & case notes (short entries)

Case note: small ring on white sweep

  • ISO 100. Aperture f/11. Tripod. Two soft LEDs. One spec light. 5-shot focus stack. Edit: dust clean, color correct.

Case note: pendant on model

  • Use soft window light. Fill with reflector. Use 50mm lens. Low ISO.

Case note: budget phone shoot

  • iPhone macro mode. DIY tent. LED panel. Shoot RAW. Edit in phone app.

Common mistakes (and how to avoid)

  1. Dirty jewels. Clean first.
  2. Wrong white balance. Set custom WB.
  3. Too high ISO. Keep ISO low.
  4. No tripod. Use a tripod.
  5. Bad reflections. Use diffusers and change angle.

Blurry Sports Shots? Here’s How to Get Sharp, Action-Packed Photos

Blurry Sports Shots

How to Fix Blurry Sports Photos and Capture Sharp Action Shots

If you’ve ever looked back at your sports photos only to find them blurry, you’re not alone. Whether it’s a soccer match, basketball game, or your kid’s first race, capturing sharp action shots can be tricky. The good news? You can fix blurry sports photos and also use editing help from a trusted clipping path service to make your images stand out.

With the right camera settings, techniques, and tools, you can turn blurry sports pictures into sharp, dynamic memories.

How to Fix Blurry Action Shots?

Blurry action shots usually happen because of slow shutter speeds. To fix this:

  • Use a fast shutter speed: At least 1/500s, or even 1/1000s for faster sports like racing.

  • Switch to continuous auto focus (AF-C/AI-Servo): This keeps your subject in focus while moving.

  • Enable burst/continuous shooting: Capture multiple frames per second to increase your chances of getting a sharp shot.

👉 Short answer: Fix blurry action shots by using a fast shutter speed, continuous auto focus, and burst mode.

How Do I Get My Sports Pictures Sharp?

Sports move fast, so your camera needs to keep up. Here’s how:

  • Shutter speed: The most important setting.

  • ISO adjustments: Raise ISO when light is low but watch for noise.

  • Lens choice: A lens with a wide aperture (f/2.8 or f/4) helps capture light.

👉 Short answer: To get sharp sports pictures, prioritize shutter speed, adjust ISO carefully, and use a wide-aperture lens.

How to Get Blurry Sports Photos (On Purpose)?

Sometimes blur can be beautiful. Want to show speed or motion? Try this:

  • Slow down shutter speed: Use 1/30s–1/60s.

  • Pan with the subject: Move your camera smoothly while following the subject. The background will blur, but the athlete stays sharp.

👉 Short answer: Use a slower shutter speed and pan with the subject for creative blurry sports photos.

How to Get Blurry Movement Photos?

Movement blur isn’t always bad. It creates drama and shows action.

  • Set shutter to 1/15s–1/60s.

  • Keep ISO low to balance exposure.

  • Experiment with moving subjects like running, skating, or cycling.

👉 Short answer: To capture movement blur, slow your shutter speed and let motion create artistic streaks.

Advice on How to Get Clearer & Less Grainy Sports Photos

Grain often comes from high ISO. Here’s how to avoid it:

  • Shoot in good light whenever possible.

  • Lower ISO and balance with aperture and shutter speed.

  • Use noise reduction tools in editing. Professional photo retouching services can also help reduce grain.

👉 Short answer: Reduce ISO, shoot in good light, and use editing tools to avoid grainy photos.

How to Avoid Blurry Photos When Shooting with Auto focus?

Auto focus can sometimes misfire. To reduce that:

  • Always use continuous AF (AF-C/AI-Servo).

  • Lock focus on your subject before they move.

  • Use focus points: Set them manually instead of letting the camera decide.

👉 Short answer: Use continuous auto focus and set manual focus points to avoid blurry shots.

A Question for Sports Photographers

Why do pros get sharp shots while beginners struggle? The difference is settings + experience. Professionals know their gear, anticipate action, and practice timing.

👉 Short answer: Pros succeed by knowing their gear, predicting motion, and practicing often.

Sports Photography Settings for Sharp Images

Here’s a quick cheat sheet:

  • Shutter speed: 1/500s or faster

  • Aperture: Wide (f/2.8–f/4) for light and depth

  • ISO: Adjust for lighting but keep as low as possible

  • Focus mode: AF-C/AI-Servo

  • Drive mode: Continuous/burst shooting

👉 Short answer: Use fast shutter, wide aperture, and AF-C mode for sharp sports photos.

Photo Sharpness: How Can This Be Improved?

  • Stabilize your camera with a tripod or monopod.

  • Keep lenses clean.

  • Use editing tools like sharpening filters or AI deblurring. Services like background removal can also help refine details in your sports shots.

👉 Short answer: Improve sharpness with steady shooting, clean lenses, and sharpening tools.

How to Improve Action Sports Photography Images to Make Them Stand Out

Editing is where good shots become great:

  • Crop for composition.

  • Adjust contrast and colors.

  • Sharpen edges.

  • Use services like ghost mannequin or advanced retouching for professional polish.

👉 Short answer: Improve action photos by editing for sharpness, contrast, and composition.

How to Get Focused Pictures for Action Shots?

  • Pre-focus where you expect action.

  • Use back-button focus for faster control.

  • Track movement with AF-C.

👉 Short answer: Pre-focus, use back-button focus, and track subjects with continuous AF.

Aperture or Shutter Mode for Sports Photography?

  • Shutter Priority (Tv/S mode): Best for freezing action.

  • Aperture Priority (Av/A mode): Works when lighting changes quickly.

👉 Short answer: Use shutter priority for action, aperture priority for changing light.

Blurry Sports Shots 2

Beginner’s Mistake: Shooting Sports for the First Time

Many beginners shoot with auto mode. The result? Blurry shots.

👉 Short answer: Beginners should avoid auto mode and learn shutter + aperture priority.

Shooting Under Floodlights – Settings to Try

Floodlights can cause motion blur if not handled right:

  • Shutter speed: 1/500s or faster

  • ISO: 1600–3200 depending on light

  • Aperture: f/2.8–f/4

👉 Short answer: Under floodlights, use high ISO, wide aperture, and fast shutter speed.

Final Takeaway

Capturing sharp sports photography isn’t just about expensive gear—it’s about knowing how to use it. Use fast shutter speeds, continuous auto focus, and burst shooting to nail the action. And when your photos still come out blurry, editing services like clipping path company can rescue them with professional sharpening and retouching.

👉 Short answer: Freeze action with fast shutter + AF-C, then enhance clarity with editing tools like Expert Clipping.

,

A Complete Guide to Sports Photography – Styles, Price Ranges & Examples

Sports Photography Guide

Sports photography in 2025 is more exciting than ever. From fast action shots to dramatic portraits, it mixes skill, new gear, and creativity. If you’re a parent at a youth game, a pro athlete, or a brand planning a shoot, this guide will help. We’ll cover styles, prices, quotes, and inspiring examples that define the field today.

What is trending in sports photography in 2025?

Sports photography trends show how fast the industry is changing.

  • Drone shots give new angles.
  • Cinematic portraits show athletes in dramatic light.
  • AI tools make editing faster and sharper.

Many photographers also use background removal services and photo retouching services for clean, polished edits. Partnering with a trusted clipping path service provider also ensures pixel-perfect results.

👉 Quick Answer: Drone shots, cinematic portraits, and AI edits are the top trends in 2025.

How much does sports photography cost in 2025?

The cost depends on the event, the client, and the photographer’s skill. Here’s a guide:

  • Local events: $200–$500 per event
  • Professional events: $1,000–$5,000 per event
  • Hourly rates: $150–$180 per hour (about $333 after edits)
  • Team/studio sessions: $300–$1,500 per session
  • Commercial projects: $3,000–$10,000+ per project

👉 Quick Answer: Costs range from $200 for local games to $10,000+ for commercial jobs.

For those hiring editors, companies often add costs for drop shadow services or ghost mannequin services when preparing photos for ads.

What are the different types of sports photography?

Sports photography comes in many forms. These are the main four:

  1. Action Photography
    • Captures peak moments like a slam dunk or dive.
    • Uses fast shutters, burst mode, and telephoto lenses.
  2. Sports Portraits
    • Focus on athlete personality.
    • Trending: cinematic setups with dramatic lighting.
  3. Commercial Photography
    • For ads, sponsorships, and brand deals.
    • Involves heavy planning and editing.
    • For ads, sponsorships, and brand deals. Involves heavy planning and editing. Editors often use image masking services to isolate details.
  4. Aerial Photography
    • Drone views of stadiums, marathons, or races.
    • Requires FAA certification to fly for business.

👉 Quick Answer: The four main types are action, portraits, commercial, and aerial.

What is the quote for sports photography?

Quotes vary with the job. Youth sports often use packages:

  • Per-photo price: $25–$75
  • Team sessions: $200–$500
  • Bundles: Prints + digital files at custom rates

👉 Quick Answer: Quotes range from $25 per photo to $500+ for team sessions.

Sports Photography

Charging for Sports Photography: A Guide

Photographers set prices using a few key points:

  • Event level (local vs. national)
  • Time spent (shooting and editing)
  • Usage rights (personal, editorial, or commercial)
  • Final files (raw, edited, or printed)

👉 Quick Answer: Charges depend on event type, editing time, usage rights, and deliverables.

If editing is included, many pros send work to a clipping agency for faster turnaround.

What drives success in sports photography?

Success comes from more than good gear. Timing, emotion, and storytelling matter most. A shot that shows raw passion will stand out more than one that’s just sharp.

👉 Quick Answer: Success comes from timing, emotion, and strong storytelling.

What are the biggest challenges for photographers in 2025?

Today’s photographers face new problems:

  • High gear costs (lenses and drones).
  • Drone rules (permits and limits).
  • Fast delivery needs (social media demand).

👉 Quick Answer: The biggest 2025 challenges are costs, rules, and fast delivery needs.

Many solve delivery challenges by outsourcing edits to a clipping path company for quick, pro-level results.

What inspires sports photographers?

Many say it’s the athletes. Their grit, energy, and drive inspire great shots. Others love freezing a moment that fans may never see again.

👉 Quick Answer: Passionate athletes and rare moments inspire sports photographers.

For creative ideas, check out the Expert Clipping blog where editing guides and photography tips are shared.

, ,

5 Secrets to Beautiful Ecommerce Product Photography

Want your online store to stand out? The secret is simple: beautiful product photography. Customers can’t touch or feel your products, so photos do all the selling. In fact, clear and professional-looking images build trust, boost conversions, and reduce returns.

If you’ve ever wondered how to take great product photos for your online store or how to make e-commerce photos look professional without a studio setup, you’re in the right place. In this guide, I’ll share 5 secrets for product photography in e-commerce that you can apply at home even with just your phone. And yes, we’ll also look at editing services like Expert Clipping that can polish your shots to perfection.

1. Master Your Lighting

Lighting is the heart of product photography. It decides whether your photo looks professional or amateurish.

Quick Answer: To take great product photos, always focus on good lighting—either natural or artificial.

  • Natural light: Perfect for lifestyle products and outdoor-related items. Shoot near a window but avoid harsh direct sunlight.
  • Artificial light: More reliable for consistency. A simple setup with two daylight lamps at 45-degree angles works wonders.
  • Diffusers & reflectors: Use a white sheet, foam boards, or reflector cards to soften shadows. For a dramatic look, try black foam boards.
  • Turn off other lights: Mixed lighting causes strange colors, so stick to one source at a time.

If your product photos look dull, the problem is usually bad lighting. Fix that first before worrying about editing.

2. Use a Clean, Consistent Background

A cluttered background distracts from your product. A clean setup keeps customers’ focus where it should be—on the item you’re selling.

Quick Answer: Use a plain, consistent background for all main product shots.

  • Seamless sweep: A white paper roll or poster board curved behind the product removes harsh lines.
  • Pure white backgrounds: Light the background separately to make it bright. Fine-tune later in editing.
  • Consistency matters: Stick to the same style across all products for a professional-looking store.

For creative shots, try wood, fabric, or outdoor settings—but keep the product as the star. Need help creating pure white backgrounds? Check out our background removal services.

3. Show Multiple Angles & Lifestyle Shots

Since buyers can’t hold the product, they rely on visuals to judge size, details, and usability.

Quick Answer: Always provide multiple angles and lifestyle shots to help customers understand the product better.

  • Angles to capture: Front, side, back, 45-degree, top-down, and close-ups for details.
  • Lifestyle images: Show your product in real-world use—a coffee mug on a breakfast table, a bag styled with an outfit.
  • Scale & context: Add props or a model so buyers can understand the size at a glance.

This not only answers common customer questions but also reduces returns.

4. Enhance Photos with Editing

Even with great lighting and backgrounds, editing is what turns a good photo into a professional one.

Quick Answer: Edit your product photos to ensure accuracy, consistency, and polish.

  • Color correction: Make sure product colors match reality to avoid customer disappointment.
  • Remove distractions: Dust, scratches, or background flaws can easily be fixed.
  • Add realistic shadows: A soft drop shadow or reflection makes products look grounded.
  • Batch processing: Save time and maintain uniformity across product collections.

If editing feels overwhelming, services like clipping path editing can handle background removal, color correction, and retouching for you.

5. Optimize Images for SEO & Performance

A photo that looks good but slows down your site won’t help sales. Optimization is key.

Quick Answer: Compress and label your product images properly for faster load times and better search rankings.

  • Compress file size: Tools like TinyPNG reduce size without killing quality.
  • Use descriptive file names: Example: red-leather-wallet.jpg instead of IMG_1234.jpg.
  • Add alt text: Helps search engines understand your product and improves accessibility.
  • Check mobile responsiveness: Most shoppers browse on phones—make sure images load fast and look sharp.

Want more tips? See our guide on optimizing product photos for e-commerce.

Product Photography

Final Thoughts

Great e-commerce product photography isn’t about expensive studios—it’s about applying the right techniques. Remember these 5 secrets:

  1. Master your lighting.
  2. Use clean and consistent backgrounds.
  3. Show products from multiple angles.
  4. Enhance with editing.
  5. Optimize for web and SEO.

With these tips, even a smartphone can deliver professional results. And when you need expert help, Expert Clipping is here to make your photos shine.

Better photos mean happier customers and happier customers mean more sales.

Dad and Newborn Photography – 7 Heartwarming Poses That Capture Precious Moments

Dad and Newborn Photography

There’s something incredibly moving about a father holding his newborn baby. As a photographer who has captured thousands of these precious moments, I’ve seen how dad and newborn photography creates some of the most treasured images in a family’s collection. These photos capture not just a moment in time, but the beginning of a lifelong bond that deserves to be preserved with care and artistry.

In this guide, I’ll share the seven most heartwarming dad and newborn photography poses, along with expert tips for lighting, props, and helping new dads feel comfortable during their session. Whether you’re a photographer looking to expand your skills or a parent wanting to capture these fleeting moments, these insights will help you create images that families will cherish for generations.

Why Dad and Newborn Photography Matters

The powerful bond between father and newborn creates timeless photographs

While mothers are often the focus of newborn photography, the connection between fathers and their babies creates equally powerful images. Dad and newborn photography captures a unique perspective that many families treasure above all others. These photos show strength and tenderness together a combination that creates visual magic.

As one client told me after her session, “I didn’t realize how much I needed these photos until I saw them. Watching my husband with our daughter was the most beautiful thing I’d ever seen.” This sentiment echoes what many mothers express when they see professional photos of their partner with their little one.

The newborn stage passes incredibly quickly. Within just a few weeks, your baby will change dramatically. Capturing these early moments between dad and baby preserves memories that would otherwise fade with time. These images become family heirlooms that tell the story of where your journey together began.

Preparing Dads for Newborn Photo Sessions

Many new fathers feel awkward in front of the camera, especially when handling a delicate newborn. The key to successful dad and newborn photography is creating a comfortable, relaxed environment. When dads feel at ease, the resulting photos capture authentic moments rather than stiff poses.

Before the session, I always recommend dads wear solid, neutral colors like gray, cream, or navy. These colors photograph beautifully and keep the focus on the connection rather than clothing. Avoid logos, bright colors, or busy patterns that can distract from the emotional impact of the images.

Timing is everything with newborn photography. The ideal window is between 5-14 days after birth, when babies are still sleepy and naturally curl into those adorable poses. Schedule your session during this period for the best results, and try to time it when baby has recently fed and is content.

Planning Your Newborn Session?

The newborn period passes quickly. Book your consultation today to discuss your vision for these precious dad and baby photos.

Schedule Your Consultation

7 Heartwarming Dad and Newborn Photography Poses

After photographing hundreds of dads with their newborns, I’ve identified seven poses that consistently create powerful, emotional images. These poses work well because they feel natural while showcasing the special bond between father and child.

1. The Protective Hold

This classic pose shows the contrast between dad’s strength and baby’s delicate nature. Dad holds the newborn securely in his hands, highlighting just how tiny and precious the new arrival is. This pose works beautifully in black and white, emphasizing the textural contrast between dad’s hands and baby’s soft skin.

For the best results, have dad sit comfortably and support baby’s head and body completely. Safety is always the priority in newborn photography. This pose creates multiple opportunities—dad can look at the camera, gaze at his baby, or share a moment with mom who can join the frame.

2. Face-to-Face Connection

There’s something incredibly tender about a father leaning in to touch his nose to his newborn’s tiny nose. This intimate pose captures the beginning of a lifelong conversation between dad and child. It’s a simple pose that creates powerful images full of emotion and connection.

To achieve this pose naturally, have dad hold baby securely at chest level, then slowly bring his face close to the baby’s. The key is patience—wait for a moment when baby is calm and content. This pose often brings out genuine emotion in dads, creating authentic images that families treasure.

3. Shoulder Rest

This pose captures the natural way many dads comfort their newborns. With baby resting against dad’s shoulder or chest, you’ll capture both security and tenderness. This pose works wonderfully for babies who prefer to be upright and often results in peaceful, content expressions.

For the best angle, shoot slightly from above to capture both baby’s face and dad’s profile. This pose works beautifully with dad standing or sitting, and can include mom in the frame for a complete family moment. The shoulder rest pose often becomes a favorite because it feels so natural and comfortable for both dad and baby.

4. The Gentle Kiss

A father’s gentle kiss on his newborn’s forehead, cheek, or tiny hand creates an image overflowing with emotion. This pose captures pure love and tenderness in a way that resonates with everyone who sees it. It’s often the image that brings tears to mom’s eyes when she first views the gallery.

For this pose, encourage dad to hold baby securely while leaning in for a natural kiss. The key is not to rush—allow dad to have a genuine moment with his child rather than just positioning for the camera. These authentic interactions create the most powerful images.

5. Hands and Details

Detail shots that capture the size difference between dad and baby create powerful visual stories. A newborn’s tiny hand wrapped around dad’s finger or tiny feet resting in dad’s palm emphasizes just how small and precious this new life is. These images work beautifully in black and white to highlight texture and contrast.

Use a macro lens if available to capture the incredible details of baby’s tiny features. Position dad’s hands naturally, and be patient waiting for baby to relax their hands or grasp dad’s finger. These detail shots complement the wider portraits and help tell the complete story of this special relationship.

6. Reading Together

Capturing dad reading to his newborn creates images that tell a story about their future together. Though baby won’t understand the words yet, this pose represents the beginning of countless bedtime stories and shared moments to come. It’s a forward-looking pose that families particularly treasure as their child grows.

For this setup, choose a meaningful book—perhaps a childhood favorite or one specifically purchased for the baby. Position dad comfortably in good natural light, with baby cradled in one arm and the book visible. This pose works wonderfully in a lifestyle setting at home.

7. Over-the-Shoulder Peek

For slightly older newborns with some neck control, the over-the-shoulder peek creates adorable images with personality. With baby resting on dad’s shoulder, capture the moment when they lift their head slightly, creating a “peeking” effect. These images often capture surprising alert expressions and wide eyes.

This pose works best for babies at least 2-3 weeks old who have developed some neck strength. Always ensure dad keeps a secure hold while the photo is taken. This pose is perfect for dads who feel shy about being photographed directly, as it focuses on baby while still including dad in a meaningful way.

“The photos of my husband holding our son for the first time are priceless. I never realized how much I needed to see that connection captured until I had these images in my hands.”

— Sarah, mother of 3-week-old James

Lighting Tips for Dad and Newborn Photography

The right lighting transforms good dad and newborn photography into exceptional images. Natural light creates the most flattering, gentle illumination for these tender moments. Position dad near a large window with indirect light for a soft, dimensional effect that highlights the connection without harsh shadows.

For the most flattering angle, have light coming from the side rather than directly in front. This creates gentle shadows that add depth and dimension to the images. Early morning or late afternoon light tends to be softest and most flattering for newborn photography.

If natural light isn’t available, use a large soft box positioned at a 45-degree angle to mimic window light. The key is creating soft, diffused illumination that wraps around dad and baby without creating harsh contrasts or shadows. Remember that simple lighting often creates the most timeless images.

Meaningful Props for Dad and Newborn Photography

While the connection between dad and baby should always be the focus, thoughtfully chosen props can enhance the storytelling in your images. Consider incorporating items that have personal significance—perhaps dad’s childhood teddy bear, a family heirloom blanket, or a gift specially chosen for the baby.

Professional dad and newborn photography often includes simple props like soft wraps, small baskets, or textured blankets that add visual interest without distracting from the main subjects. Keep props minimal and meaningful to create timeless images that won’t look dated as trends change.

For a truly personal touch, consider incorporating elements that tell dad’s story—perhaps a token from his profession, hobby, or heritage. These thoughtful details add layers of meaning to the images and create photographs that truly represent this unique relationship.

Ready to Capture These Fleeting Moments?

The newborn stage passes in the blink of an eye. Let’s create beautiful dad and newborn photography that your family will treasure forever.

Book Your Session Today

Preserving Precious Beginnings Through Dad and Newborn Photography

The relationship between a father and his newborn is extraordinary filled with wonder, tenderness, and profound love. Dad and newborn photography captures these emotions in images that families will treasure for generations. These photographs preserve not just how everyone looked, but how this special time felt.

Whether you’re working with a professional photographer or capturing these moments yourself, focus on creating a relaxed environment where natural interactions can flourish. The most powerful images come from authentic moments rather than rigid poses.

Remember that these photographs aren’t just for today they’re for years from now when your baby has grown and these earliest days are distant memories. They’re for your child to see how they were loved from the very beginning. And they’re for dad, who often doesn’t realize how beautiful these moments are until he sees them captured forever.

Don’t Let These Moments Slip Away

Newborns change daily. The ideal time for dad and newborn photography is within the first two weeks. Contact us today to reserve your session and create heirloom images your family will cherish forever.

Schedule Your Newborn Session

Frequently Asked Questions About Dad and Newborn Photography

When is the best time for dad and newborn photography?

The ideal time for newborn photography, including poses with dad, is between 5-14 days after birth. During this period, babies are typically sleepier and more flexible, making it easier to position them for those adorable curled-up poses. After two weeks, babies tend to be more alert and may develop baby acne or become more sensitive to being positioned.

What should dad wear for newborn photos?

Dads should wear solid, neutral colors like gray, cream, navy, or black. Avoid bright colors, patterns, or logos that can distract from the emotional connection in the images. Short-sleeved t-shirts or button-downs with sleeves rolled up work well, as they allow for skin-to-skin contact which creates beautiful, intimate photos. The focus should be on the connection, not the clothing.

How can I help dad feel comfortable during the photo session?

Many dads feel awkward in front of the camera, especially when handling a delicate newborn. Create a relaxed environment by keeping the room warm and comfortable. Demonstrate poses clearly and provide guidance on safely holding the baby. Reassure dad that the most beautiful images come from genuine moments, not perfect poses. Having dad sit rather than stand can help him feel more secure handling the baby.

Do I need special equipment for dad and newborn photography?

While professional equipment can enhance your images, beautiful dad and newborn photography is possible with basic gear. The most important elements are good natural light (near a large window), a simple background (a bed with neutral bedding works well), and a comfortable setting for dad and baby. If possible, use a lens that allows for a shallow depth of field (like a 50mm f/1.8) to create that beautiful blurred background effect.

, , ,

Best Camera for Concert Photography in 2025 – Expert Guide

Best Camera for Concert Photography

If you’ve ever tried taking photos at a concert, you already know the struggle. The lights change every second, the stage is dim, the crowd is moving, and your favorite singer never stays still. That’s why choosing the best camera for concert photography is more than just a gear decision—it’s the difference between a blurry mess and a photo that feels alive.

I’ve been there standing in the pit, fumbling with settings, wishing my camera could see in the dark. Over the years, I’ve tested everything from budget point-and-shoots to high-end mirrorless beasts. In this guide, I’ll share what works, what doesn’t, and which cameras are truly worth your money in 2025. Whether you’re a beginner, a student, or a pro aiming for magazine covers, this guide has you covered.

And yes, if you need help editing those shots to look pixel-perfect, my team at Expert Clipping can handle the post-production magic for you.

The Importance of Choosing the Right Camera for Concert Photography

Concerts are unpredictable. Lighting swings from near-dark to blinding in seconds. A good camera for concerts must handle low light, fast action, and constant movement. This means you need:

  • Fast autofocus to lock onto performers.
  • Strong ISO performance to avoid grainy images.
  • Wide aperture lenses to let in more light.

👉 In short: the right camera makes you feel like you’re not fighting the venue, but dancing with it.

Best Cameras Under £1,000: Entry-Level Excellence

If you’re just starting out or don’t want to break the bank, there are fantastic cameras under £1,000 that perform well in dark venues. These are perfect for students and beginner photographers.

Camera Price Range Pros Cons
Canon EOS R10 ~£850 Affordable, great autofocus APS-C crop factor
Sony a6400 ~£950 Compact, excellent AF Limited battery life
Nikon Z50 ~£800 Easy for beginners, great ergonomics Fewer lenses available

👉 These cameras won’t give you pro-level performance, but they’re reliable, affordable, and perfect for learning.

Canon EOS R10: Affordable yet Powerful

The Canon EOS R10 is one of the best budget cameras for concert photography. With fast autofocus and solid image quality, it punches above its weight.

✅ Great for beginners who want Canon’s user-friendly system.
❌ Low-light performance isn’t as strong as full-frame models.

💡 Quick Answer: A great starter for those who want value and Canon reliability.

Sony Alpha a6400: Compact and Capable

The Sony a6400 is beloved on Reddit forums for its autofocus speed. It’s lightweight, easy to carry, and delivers sharp images.

✅ Perfect for travel and small venues.
❌ Battery life could be better.

💡 Quick Answer: One of the best compact mirrorless cameras for concerts under £1,000.

Mid-Range Marvels: Balanced Performance and Price

If you’re serious about concert photography but not ready for pro-level gear, mid-range cameras are your sweet spot. These offer excellent low-light performance and advanced features without the high-end price tag.

Camera Price Range Why It’s Great
Canon EOS R6 Mark II ~£2,400 Amazing low-light, fast AF
Sony a7 IV ~£2,200 Hybrid photo & video
Nikon Z6 II ~£1,900 Great balance for pros & learners

Canon EOS R6 Mark II: The Balanced Powerhouse

The R6 Mark II is one of the best all-rounders. It shines in low light, which is the holy grail for concerts.

✅ Full-frame sensor, excellent ISO handling.
✅ 40fps burst for action shots.
❌ Pricey for beginners.

💡 Quick Answer: A workhorse for semi-pros and professionals who need reliable performance in dark venues.

High-End Heroes: Top-Tier Technology

For those shooting professionally—magazines, tour photography, or big stages—you need the heavy hitters.

Camera Price Range Strength Best For
Sony a7R V ~£3,900 61MP resolution, sharp detail Pros who need massive detail
Nikon Z8 ~£3,600 Fast, durable, pro features Concert tours, publications

Sony a7R V: High-Resolution Mastery

This camera is a monster in resolution—perfect for printing huge posters or cropping into details without losing quality.

💡 Quick Answer: If detail is your obsession, this is your dream camera.

Nikon Z8: Professional Performance

Think of the Nikon Z8 as the younger sibling of the Nikon Z9—pro features at a (slightly) lower price. Fast, durable, and excellent in challenging light.

💡 Quick Answer: Ideal for photographers covering full tours or working with agencies.

Essential Lenses for Concert Photography

Your camera is only half the story. Lenses matter even more for concerts.

  • Zoom Lens (Nikon 70-200mm f/2.8S): Perfect for covering the whole stage.
  • Prime Lens (Nikon 85mm f/1.8S): Sharp, beautiful, and amazing in low light.

👉 Rule of thumb: Get at least one fast prime lens (f/1.8 or lower).

Must-Have Accessories for Every Photographer

  • Memory Cards (Delkin BLACK CF Express): Never risk losing shots.
  • Custom Earplugs: Protect your hearing in loud venues.
  • Extra Batteries: Concerts are long, don’t get caught empty.

👉 Bonus: If your shots still need polishing, Expert Clipping offers photo cut out service and detailed retouching to make your work stage-ready.

Expert Tips: Mastering Concert Photography Settings

  • Manual Mode: Gives you full control over light and motion.
  • Shoot RAW: More editing flexibility later.
  • Fast Shutter (1/200+): To freeze movement.

👉 Bonus: If your shots still need polishing, Expert Clipping can handle pro-level editing.

Building and Showcasing Your Portfolio

Start with local gigs. Share your work on Instagram, create a portfolio site, and tag bands. Networking is key. Many careers start with one small show.

To make your portfolio look consistent and professional, services like image masking can help refine tricky details such as hair or instruments under stage lights.

A Glimpse into Film Photography for Concerts

Film is making a comeback—even in concerts. Shooting film forces you to slow down and think. Pushing ISO 800 or 1600 film can give a raw, nostalgic look.

Conclusion: Capturing the Concert Magic in 2025

Concert photography is more than just taking pictures—it’s about freezing energy, light, and emotion in a single frame. The best camera for concert photography depends on your budget, style, and goals. From the beginner-friendly Canon EOS R10 to the pro-level Nikon Z8, there’s something for everyone.

And remember: the camera gets you the shot, but editing makes it shine. That’s where Expert Clipping can help polish your work to perfection.

FAQs

  1. What is the best cheap camera for concert photography?
    The Canon EOS R10 and Sony a6400 are both affordable options under £1,000 that perform well in concerts.
  2. Do I need a full-frame camera for concerts?
    Not always. APS-C cameras can work well, but full-frame models handle low light better.
  3. Which phone has the best camera for concerts?
    The iPhone 15 Pro Max and Google Pixel 8 Pro are the best smartphones for concert photography in 2025.
  4. Can I shoot concerts with a point-and-shoot camera?
    Yes, models like the Sony RX100 VII can deliver good results, especially in smaller venues.

5. Which brand is best: Canon, Sony, or Nikon?
All three have excellent options. Canon is great for beginners, Sony leads in autofocus, and Nikon offers strong pro performance.

, ,

Product Photography Pricing Explained (2025 Guide) — Costs, Value & How to Save with Expert Clipping

Product Photography Pricing

How Much Does Product Photography Cost in 2025? (Quick Answer)

If you hire a professional product photographer in 2025, you can expect to pay:

  • $25–$75 per image for a beginner
  • $75–$200 per image for an experienced pro
  • $100–$400 per image for a full-service studio

At Expert Clipping blog comparePro Package starts at just $39 per image, with bulk discounts and free trials for your first 3 images.

Note: Expert Clipping is a photo editing service provider. We do not offer photography services but share expert advice to help you choose the right photographer and save on editing.

Expert Clipping is Photo Editing Company, they build a community and sharing resources for photography but they don’t provide any photography services, But they advice better information for this field.

professional product photography

Average Product Photography Pricing (2025)

Service Type Average Cost per Image Day Rate Notes
Beginner Photographer $25–$75 $250–$500/day Limited editing, smaller portfolio
Experienced Photographer $75–$200 $800–$2,000/day High-quality gear, styling, editing
Full-Service Studio $100–$400 $1,500–$4,000/day Includes props, styling, advanced editing
Expert Clipping Pro Package From $39/image Custom Free trial for first 3 images

Get Instant Cost Estimate — [Click here to use our pricing calculator].

Why Product Photography Prices Vary So Much

Product photography pricing isn’t one-size-fits-all. Rates change depending on:

  • Experience level — Beginners cost less but may lack the skill for complex shoots.
  • Equipment — Pro cameras, lighting rigs, and lenses add cost.
  • Post-productionAdvanced retouching, color correction, and shadow work take time.
  • Licensing — Commercial use rights may cost extra.

On “Product Photography Pricing” Reddit threads, you’ll often see beginners charging $50 per image while established photographers quote $200+. The gap isn’t random — it’s about skill, consistency, and business overhead.

Beginner Photography Prices (2025)

Experience Level Hourly Rate Per Image Typical Clients
Beginner $25–$50 $25–$75 Local shops, startups
Intermediate $50–$100 $75–$150 Small eCommerce brands
Professional $100–$200 $150–$400 Large brands, agencies

Is Professional Product Photography Worth It?

Short answer: Yes — if you care about sales.
High-quality photos can boost online conversion rates by up to 30%.

Example: A small Etsy shop selling handmade candles switched from smartphone shots to professionally styled images. Within two months, their sales doubled, and return rates dropped because customers’ expectations matched the product in the photo.

“Expert Clipping transformed our product images. The shadows, lighting, and clarity made our items look premium — and our sales jumped!”
⭐⭐⭐⭐⭐ — L. Rivera, eCommerce Store Owner

Product Photography Pricing Explained

Choosing the Right Product Photographer

Here’s a quick checklist to help you pick the right fit:

Question to Ask Why It Matters
Can I see your portfolio? Shows style and quality.
Do you include editing in the price? Avoid surprise costs.
What’s your turnaround time? Faster delivery means faster sales.
Do you provide licensing for commercial use? Essential for ads and online sales.
Can you match my brand style? Ensures visual consistency.

Pro Tip: If you want flexibility, consider hiring a photographer for the shoot and Expert Clipping for editing — you’ll get pro-quality results at a fraction of the cost.

Licensing, Legal Use, & Hidden Costs

Some photographers don’t post prices because licensing terms vary. Licensing defines how and where you can use the photos — online store, ads, billboards, etc.

Typical package inclusions:

  • Shooting
  • Basic editing
  • Online gallery
  • Limited licensing

Possible extra charges:

  • Extended licensing for ads
  • Props or models
  • Complex retouching
  • Rush delivery

How to Save Money Without Sacrificing Quality

  • Batch your products — Shooting multiple items at once reduces setup time.
  • Use hybrid services — Shoot in-house, then send RAW files for product photo retouching.
  • Ask for bulk discounts — Many studios offer reduced per-image rates for 50+ photos.

Subscribe & Save — Get up to 20% off with our monthly bulk editing plan.

Customer Reviews

⭐⭐⭐⭐⭐ “The images we got back were crisp, vibrant, and matched our brand perfectly. Worth every penny.” — K. Patel, Shopify Seller

⭐⭐⭐⭐⭐ “Our Amazon listings look professional now — and we didn’t break the bank.” — D. Nguyen, Private Label Brand Owner

⭐⭐⭐⭐⭐ “Fast turnaround, pixel-perfect editing, and great communication.” — M. Thompson, Marketing Agency

Final Thoughts

Professional product photography isn’t just an expense — it’s an investment in your sales. Whether you need white background shots for Amazon, lifestyle images for Instagram, or high-volume edits for an entire store, Expert Clipping delivers premium results at competitive prices.

Request Your First 3 Images Free → [Get Started Today]

,

What is Ghost Mannequin Photography? Explained for eCommerce & Fashion Brands

Ghost Mannequin Photography

Ever wondered how clothing in online stores looks like it’s floating on an invisible body? That’s ghost mannequin photography—a game-changing technique in the world of eCommerce. Imagine your product wearing an invisible superhero cape that helps it stand out without distractions. In this short guide, we’ll explain it step by step. Plus, meet Expert Clipping, your trusted partner for professional ghost mannequin service.

Whether you’re a fashion brand, product photographer, or online seller, this article is your go-to resource. We’ll also introduce Expert Clipping, your reliable partner for professional ghost mannequin services.

What is Ghost Mannequin Photography?

Ghost mannequin photography is a photo editing technique where the mannequin is removed to make clothes appear as if they’re worn by an invisible model.

This technique creates a clean, professional look that allows the product’s shape and fit to shine. It’s widely used in fashion and apparel industries to show clothes without the distraction of a model or mannequin.


What is the Mannequin Ghost Effect?

It’s the magical moment when the mannequin vanishes from your clothing photo, but the shape stays perfect—as if a ghost is wearing it. The final image looks polished and retail-ready. This effect gives products a 3D shape, which flat lays just can’t deliver.


Difference Between Flat Lay and Ghost Mannequin

Feature Flat Lay Ghost Mannequin
Perspective Top-down 3D Front View
Depth Flat Dimensional
Focus Texture Fit & Shape
Visual Appeal Casual Professional

Short Answer: Flat lay shows clothes laid out flat, while ghost mannequin gives them a life-like 3D shape.


Why Ghost Mannequin is Ideal for eCommerce

Ghost mannequin images enhance product visibility, boost customer trust, and increase conversions.

Why it works:

  • Gives a realistic idea of fit.
  • Looks cleaner and more professional.
  • Eliminates distractions.
  • Fast, scalable, and cost-effective.

Expert Clipping makes this even easier by offering a Request Your First 3 Images Free option. Try before you commit!


How Does Ghost Mannequin Photography Work?

It combines photography and post-production. First, multiple photos are taken of the clothing on a mannequin. Then, the mannequin is removed using photo editing tools, and images are combined.

Think of it like a puzzle each shot is a piece, and editing is how we put it all together.

It’s a mix of photos and editing.

  1. Take multiple shots on a mannequin.

  2. Cut out the mannequin using the Pen Tool.

  3. Combine images to get the invisible look.

Think of it like solving a puzzle.

Step-by-Step Process

  1. Shoot Front & Back on a mannequin.
  2. Shoot Neckline/Hollow Area separately.
  3. Remove Mannequin in Photoshop.
  4. Merge Layers to create the invisible look.
  5. Color correct and export.

Tip: For top results, consistency in lighting and angles is key.

Best Equipment You’ll Need

Equipment Purpose
DSLR Camera High-res images
Tripod Stability
Studio Lighting Consistent exposure
Invisible Mannequin Holds shape
Backdrop Clean background


Editing: How to Remove the Mannequin in Photoshop

  1. Use pen tool to cut the mannequin.
  2. Merge hollow part image.
  3. Use layer masks for seamless blend.
  4. Retouch edges, remove shadows.

Or save time: use our ghost mannequin service provider.

Where to Use Ghost Mannequin Images

  • Online Stores
  • Lookbooks
  • Social Media Ads
  • Catalogs
  • Print Brochures

These images make your product the star anywhere you show them.

Best Practices for High-Quality Results

  • Always use consistent lighting.
  • Maintain proper garment positioning.
  • Avoid wrinkles and folds.
  • Keep camera angles uniform.
  • Use high-resolution images for editing.

Who Benefits from Ghost Mannequin Photography?

  • Fashion Brands
  • Online Retailers
  • Product Photographers
  • Dropshippers
  • Printing & Marketing Agencies

Basically, anyone selling clothing online!

When and Where to Use This Technique

When: Product launches, seasonal collections, store upgrades.

Where: Shopify, Amazon, Etsy, Instagram, Print Catalogs.

Ghost mannequin images look consistent across platforms—branding gold!

Cost & Affordability: Is It Expensive?

Service Average Cost/Image
DIY $5–$8 (time-consuming)
Freelancer $7–$15
Expert Clipping From $0.49/image

Want a deal? Click Get Instant Cost Estimate or “Subscribe & Save on Bulk Editing.

Bonus: Other Helpful Services

While editing, you may also need:

Comparison Table: Ghost Mannequin vs Alternatives

Method Cost Quality Turnaround Best For
Live Models High High Slow Premium fashion
Flat Lay Low Medium Fast Casual brands
Ghost Mannequin Medium High Fast All clothing brands


Customer Reviews & Why Brands Love Expert Clipping

“We switched to Expert Clipping and saw a 23% bump in sales! Their ghost mannequin service is flawless and quick. Highly recommend!” – Fashion Plus Co.

“Tried 3 images free, and was instantly sold. Quality, price, and support are unmatched.” – Online Apparel Store Owner

“Expert Clipping saved our holiday campaign. Their edits made our catalog pop!” – Creative Agency Lead

Request Your First 3 Images Free and experience the Expert Clipping difference.

Conclusion

Ghost mannequin photography isn’t just a trend it’s a strategic asset for eCommerce brands. It’s clean, affordable, and makes your products pop. With Expert Clipping by your side, you get expert-level editing without lifting a finger.

Whether you’re just starting out or scaling your store, ghost mannequin service can seriously boost your visual game.

FAQs

  1. Can ghost mannequin photography be done at home?
    Yes, but it requires proper lighting, camera, and editing software—or you can outsource to save time.
  2. Does ghost mannequin photography work for kids’ clothing?
    Absolutely! The technique works for all sizes and styles.
  3. Is ghost mannequin better than live models?
    For budget and consistency—yes. For lifestyle appeal—live models may still win.
  4. How fast is the turnaround with Expert Clipping?
    Typically 12–24 hours. Faster with subscription plans.
  5. Are there alternatives to ghost mannequin photography?
    Yes—flat lay, 3D rendering, live models. But none balance cost and quality quite like ghost mannequin.

Ready to level up your product images?
👉 Request Your First 3 Images Free or Get Instant Cost Estimate at Expert Clipping—where quality meets affordability.