, ,

How to Get Great Photo Edits Without Paying – Free Tools & Techniques

Photo Edits Without Paying

Want to make your photos look professional without spending money?
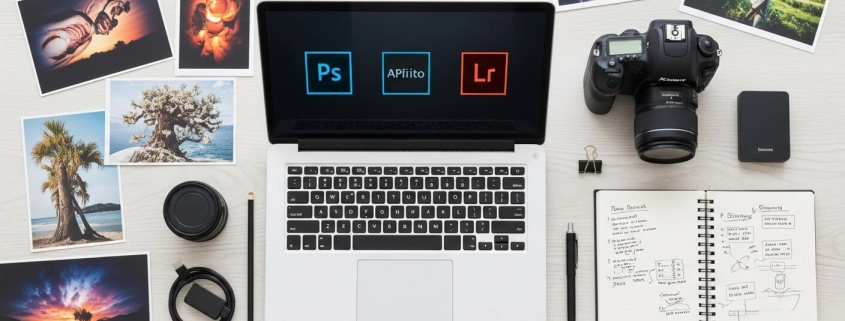
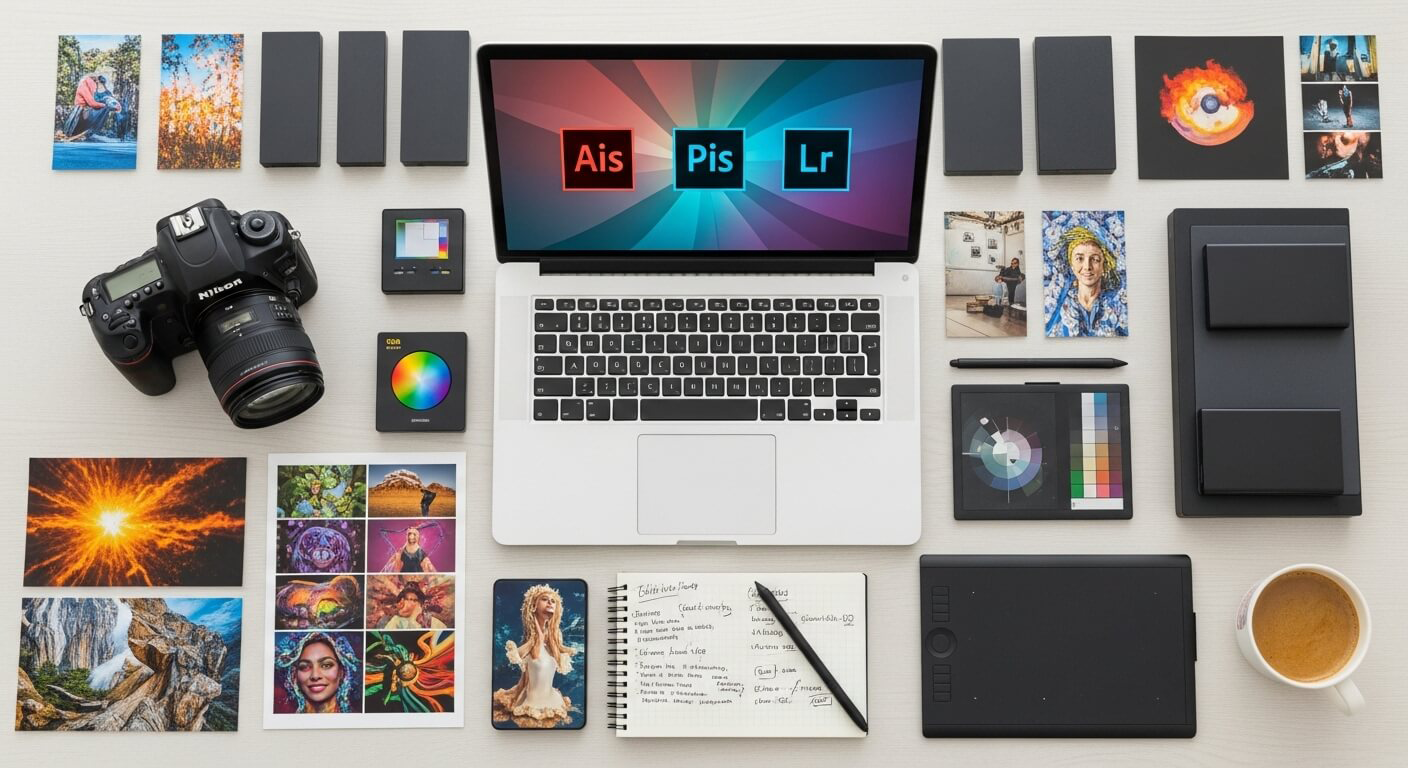
Good news — you don’t need expensive tools like Photoshop to create stunning edits. Many free photo editors can handle everything from quick touch-ups to advanced effects.

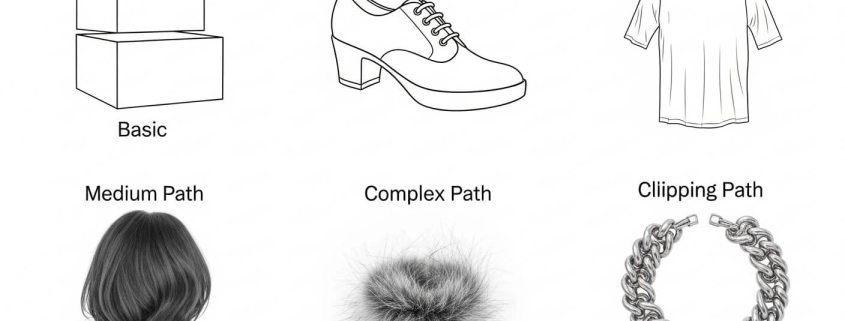
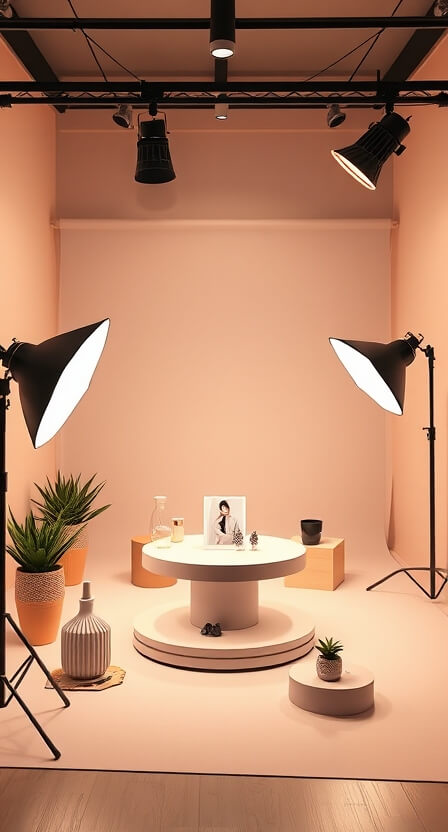
If you ever need expert-level results, try Expert Clipping’s clipping path services. Their team creates pixel-perfect cuts and smooth edges for any product photo.

Which photo editor is 100% free?

Several apps are completely free and never ask you to pay. The most popular ones include:

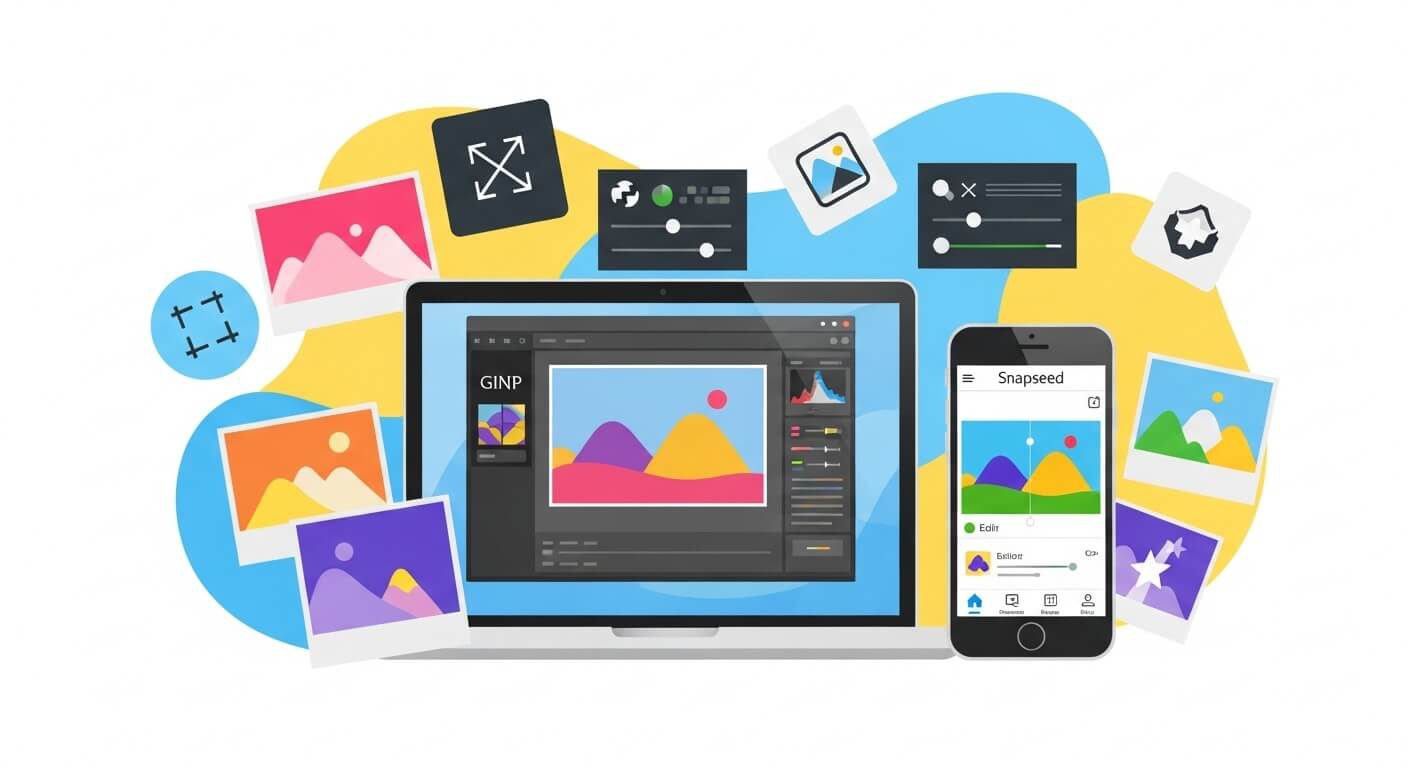
  • GIMP (desktop) – A robust Photoshop alternative with no hidden costs.
  • Snapseed (mobile) – A Google app with zero ads or subscriptions.
  • Photopea (web-based) – Free to use, though ad-supported.

Short Answer: GIMP and Snapseed are 100% free forever.

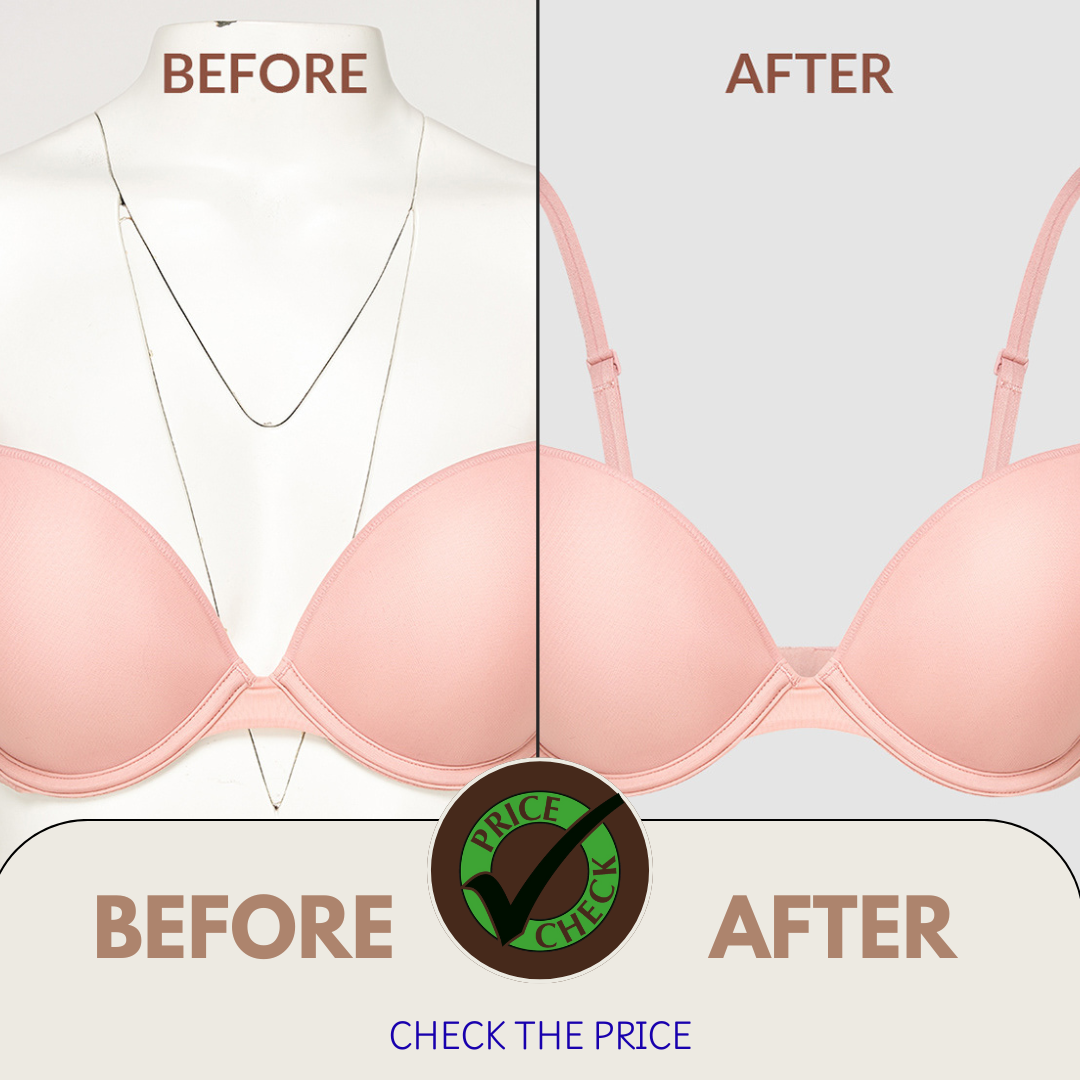
If you ever edit product photos, but need clean, sharp outlines, a photo clipping path service can help refine your edges perfectly.

Is there a free photo editing app that doesn’t require payment?

Yes! Snapseed is one of the best free photo editing apps with no subscriptions or locked features. Unlike some apps that advertise as free but push upgrades, Snapseed gives you professional-level tools without charging.

Short Answer: Snapseed is the best free, no-payment-ever app.

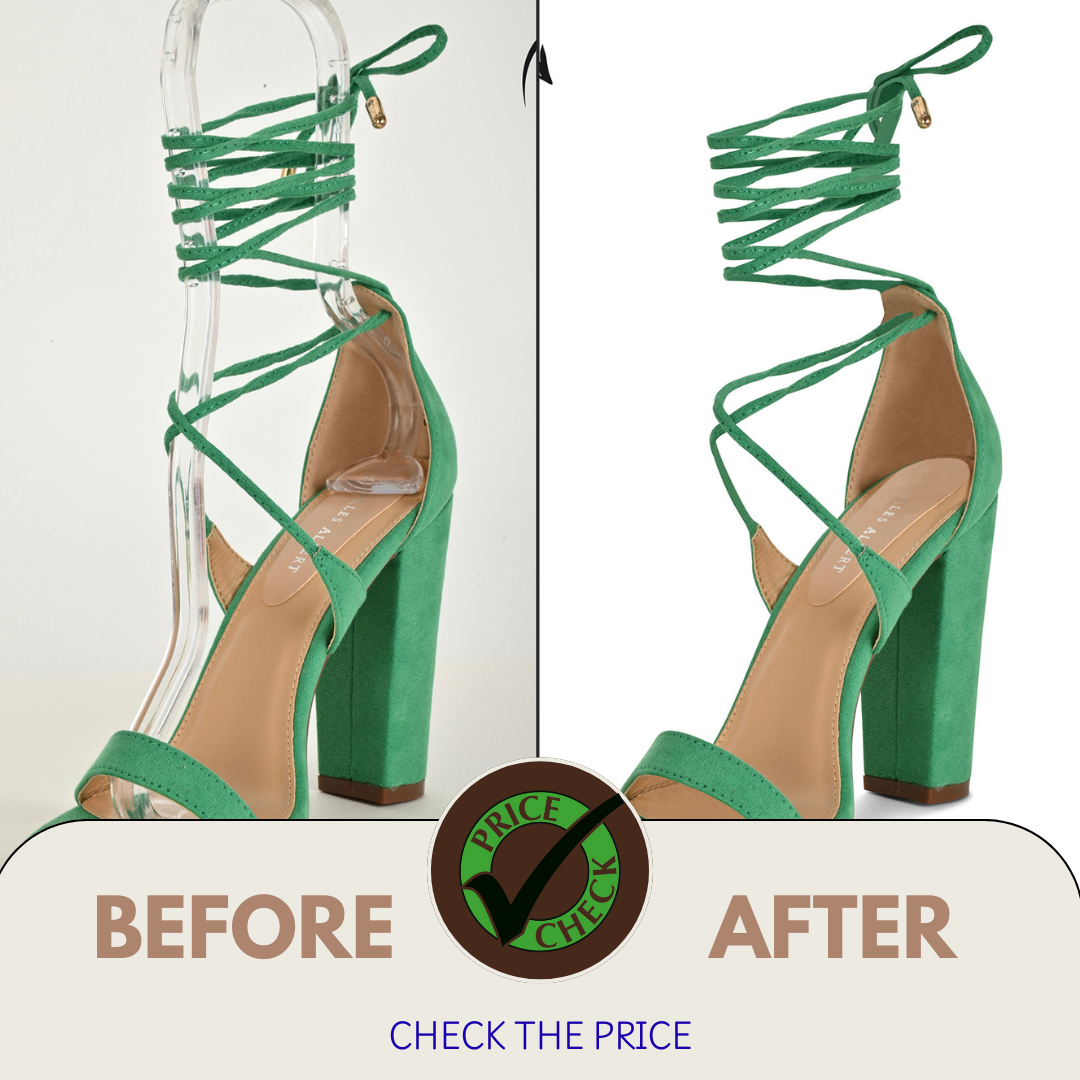
For background cleanup, you can also try background removal services if you want quick and flawless results.

Which is the best photo editing app for free?

The “best” app depends on your needs:

  • For phones: Snapseed (iOS/Android) – simple, powerful, and free.
  • For creative filters: VSCO – free filters with optional upgrades.
  • For design & social media: Canva – great for adding text and graphics.
  • For desktop users: GIMP – full-featured, like Photoshop.

Short Answer: Snapseed for mobile, GIMP for desktop.

And if you ever need to remove models from clothes, explore ghost mannequin services — perfect for eCommerce fashion photos.

What is the closest thing to Photoshop that’s free?

If you’re looking for a free Photoshop twin, try Photopea. It runs in your browser, supports .PSD files, and looks almost identical to Photoshop. On desktop, GIMP comes closest with its advanced layer and retouching tools.

Short Answer: Photopea (browser) and GIMP (desktop).

Want expert-level realism? Add depth and shine with drop shadow services or reflection shadow effects for a polished finish.

Free Editing Software Options

For Desktop

  1. GIMP (GNU Image Manipulation Program)
    • Best for: Complex edits, retouching, and layers.
    • Pros: 100% free, open-source, cross-platform.
    • Cons: Steeper learning curve.
  2. Photopea (Web-based)
    • Best for: Editing .PSD files online.
    • Pros: Looks and feels like Photoshop.
    • Cons: Ad-supported, slower than desktop apps.
  3. PhotoScape X
    • Best for: Both simple and advanced edits.
    • Pros: RAW editing, batch processing.
    • Cons: Interface can feel dated.

For Mobile (iOS & Android)

  1. Snapseed
    • Best for: Fast, professional-quality edits.
    • Pros: No ads, no hidden costs.
    • Features: Selective edits, healing tool, filters.
  2. Adobe Lightroom Mobile (Free version)
    • Best for: Detailed control of exposure and color.
    • Cons: Some advanced tools require a subscription.
  3. VSCO
    • Best for: Artistic, film-inspired looks.
    • Pros: Free filters and editing basics.
  4. Canva
    • Best for: Social media posts and simple edits.
    • Pros: Background remover, templates, and design tools.

5 Basics of Photo Editing You Can Learn for Free

No matter which app you use, mastering these basics will instantly improve your photos:

  1. Adjust brightness & contrast – Brings out details in highlights and shadows.
  2. Crop & straighten – Fix crooked horizons and improve framing.
  3. Correct white balance – Makes colors look natural and true to life.
  4. Tweak vibrance & saturation – Boost colors without making them fake.
  5. Remove blemishes – Use healing or clone tools for small distractions.

Short Answer: Even small tweaks in brightness, crop, and color balance can make a huge difference.

Need professional touch-ups? Try photo retouching services for spotless, natural results.

get Photo Edits Without Paying

Tips for Editing Like a Pro (For Free)

  • Start subtle – Avoid over-editing; less is often more.
  • Use adjustment layers (when available) – Non-destructive edits let you undo changes anytime.
  • Experiment – Try different apps and tools to see what fits your style.
  • Learn from tutorials – Free YouTube guides on GIMP and Photopea can speed up your learning.
  • Rely on Expert Clipping – for expert-level edits like color change services or image masking when you want clean and smooth results.

Short Answer: Practice, patience, and the right free tools will make your edits look professional.

,

Best Photo Editing Services: Simple Guide for Every User

Best Photo Editing Services

Choosing the best photo editing service can feel tricky. There are so many options, from free apps to pro-level tools like Photoshop. The good news? You don’t need to spend hours searching. Let’s break down the most popular editors by features, price, and quality so you can pick the one that fits your needs.

💰 How Much Should You Pay for Photo Editing?

Photo editing costs range from free to $30 a month.

  • Pro tools like Photoshop or Capture One: $10–$30/month.

  • One-time purchase options like Affinity Photo: about $70.

  • Free tools like GIMP and Darktable: $0, with lots of features.

👉 Quick Answer: Expect to pay $10–$30/month for pro tools, or grab Affinity Photo for a one-time fee.

📸 What Editor Do Most Photographers Use?

Most photographers prefer Adobe Lightroom. It’s fast, easy, and works across phones and computers. Plus, it organizes photos and adds AI edits.

👉 Quick Answer: Lightroom is the most popular choice for photographers.

If you are an eCommerce photographer, you may also need background removal services to clean up product photos before editing.

🏆 What Do Professionals Use Most?

Pros rely on Adobe Photoshop. It’s the top pick for retouching, digital art, and complex edits. If you see high-end ads or magazine covers, chances are Photoshop was used.

👉 Quick Answer: Photoshop is the most-used software by professionals.

Many brands also hire a clipping path service provider for bulk editing, especially when they need pixel-perfect cutouts for catalogs and online stores.

🌍 What is the Number One Photo Editor in the World?

Globally, Adobe Photoshop is still #1. It has the biggest user base and the most advanced tools.

👉 Quick Answer: The world’s top editor is Photoshop.

👶 Best Editing Software for Beginners

If you’re just starting, simple tools help you learn fast.

  • Polarr – simple and easy to use.

  • Photoshop Elements – has guided steps.

  • Canva – best for quick, casual edits.

👉 Quick Answer: Beginners should try Polarr or Photoshop Elements for easy side-by-side edits.

And if you sell clothes online, consider using a ghost mannequin service. It makes your apparel look pro, even without live models.

💻 Popular Editors and Their Prices

Here’s what people use and what they cost:

  • Adobe Photoshop – $22.99/month

  • Adobe Lightroom – $9.99/month

  • Capture One – $24/month or $299/year

  • DxO PhotoLab – from $139

  • ON1 Photo RAW Max – $99.99/year

  • Luminar Neo – $14.95/month or $79/year

  • Affinity Photo – $69.99 (one-time)

  • Darktable & GIMP – free

👉 Quick Answer: Free tools exist, but expect $10–$25/month for pro options.

🔒 Best Photo Editor Without a Subscription

Not a fan of monthly fees? You still have great options.

  • Affinity Photo – pro features, one-time cost.

  • DxO PhotoLab – pay once, upgrade if you want.

  • Darktable & GIMP – 100% free.

👉 Quick Answer: Affinity Photo is the best no-subscription editor.

Photo Editing Services

🥇 Best Photo Editing Services Compared

Professional Tools

  • Photoshop – perfect for pros, retouching, and art.

  • Capture One – strong color control and studio tools.

Advanced & Enthusiasts

  • Lightroom – great mobile-to-desktop workflow.

  • DxO PhotoLab – best image corrections.

  • ON1 Photo RAW Max – solid all-in-one editor.

Creative & AI-Powered

  • Luminar Neo – fun AI tools like sky replacement.

Budget-Friendly

  • Affinity Photo – one-time fee, full features.

  • Darktable & GIMP – free and powerful.

Beginner-Friendly

  • Polarr – simple layout.

  • Photoshop Elements – guided learning.

👉 Quick Answer: Photoshop for pros, Affinity for budget users, Polarr for beginners.

For more editing help, you can explore our image masking services or see examples in our gallery.

📌 Key Takeaways

  • Pay $10–$30/month for pro tools, or $70 once for Affinity Photo.

  • Lightroom is most loved by photographers.

  • Photoshop is still #1 worldwide.

  • Polarr and Photoshop Elements are best for beginners.

, , ,

The Complete Guide to Clipping Path Services for Photographers

Clipping Path Services for Photographers(1)

A clipping path service uses a closed vector line in Photoshop to define the boundary of a subject in an image. Inside the path, the subject is preserved; outside, the background can be removed or made transparent. This lets photographers isolate objects cleanly, especially for product photography or marketing use. Subject isolation makes it easy to reposition or layer objects, or place them on any background. It enhances clarity and professionalism by focusing viewer attention solely on the object.

Types / Complexity Levels of Clipping Paths

Clipping paths differ by complexity.

  • Basic clipping path – simple shapes like books or boxes.

  • Medium path – items with more curves, such as shoes or apparel.

  • Complex path – fine details like jewelry, hair, or fur.

  • Multi-clipping path services – multiple paths in one image (like neck joints or overlapping items).

Picking the right level saves money and ensures precision.

How to Use / Create a Clipping Path

To clip a path, you typically use the Pen tool (or equivalent) in software like Photoshop. You trace the outline of the subject, creating anchor points and curves. Once the path is closed, you convert or apply it so that anything outside becomes masked, deleted, or transparent. For best results: zoom in, use more anchor points on curves, fewer on straight lines; do trial paths; refine edges carefully. Practice and familiarity improve speed and quality. It’s key especially when you need a white background, product shots, or consistent catalog images.

This method is especially useful when preparing e-commerce images on a white background.

Clipping Path vs Background Removal vs Image Masking

A clipping path is one way to remove a background. It’s best for sharp edges and solid shapes. Image masking services handle tricky areas like hair, smoke, or fur. Background removal services is the bigger goal, and both clipping paths and masking are tools to achieve it. Sometimes editors use both methods for perfect results.

Product Photography & Editing Add-Ons

In product photography, paths often work together with:

These extras make photos consistent, polished, and ready to boost sales.

How to Get & Order Clipping Path / Background Removal Jobs

When ordering:

  1. Prepare files with instructions (background color, shadow, format).

  2. Pick a clipping path provider that fits your needs (cost, speed, quality).

  3. Check for free trials or sample edits.

  4. Confirm turnaround times and delivery format (PNG, PSD, etc.).

Many providers offer 24/7 support and bulk pricing.

Benefits & Use Cases

Clipping path services benefit photographers and businesses by enabling consistent, clean, professional imagery. Use cases include e-commerce product catalogs, advertising & marketing, print materials, online marketplaces (Amazon, Etsy). High-quality isolated images improve visual appeal, help maintain brand consistency, and allow creative flexibility (placing products on white or styled backgrounds). Also helps save time and focus your effort where it matters (shooting, styling), while outsourcing the tedious editing. Especially valuable when volume is large.

Checklist for High-Quality Clipping Path Work

Here’s a checklist you can use / share to ensure good clipping path / photo editing:

  • Is the path clean and precise around curves and details?
  • Are fine details (hair, complex edges) treated well (masking if needed)?
  • Is the background fully removed or replaced cleanly?
  • Are colors accurate (white balance, exposure)?
  • Is file format delivered as needed (transparency preserved, layered PSD if required)?
  • Is the turnaround time acceptable?
  • Are revisions included / possible?
  • Is the pricing reasonable given complexity and volume?

Use this before choosing a service.

Common Mistakes & Comparisons

Some common pitfalls: using clipping path when masking would have given better detail; underestimating how many anchor points are needed; neglecting color matching after isolation; ignoring background shadows or reflection which give realism; choosing cheapest service that delivers subpar precision. Compare services: simple vs complex clipping path; human-drawn vs automated; local vs offshore; full retouch vs just path extraction. Good comparison helps you decide what trade-offs (cost vs quality vs speed) you are comfortable with.

FAQ Q&A Style Answers (160–200 characters)

Here are concise answers to your listed questions:

Question Answer
What is a clipping path? A clipping path is a vector outline in Photoshop (or similar) used to isolate a subject by removing or masking the background.
What is the basic clipping path? Basic clipping path covers simple shapes with straight edges or slight curves (e.g. boxes), often lowest cost and fast.
How to use clipping path? Use pen tool to draw path around subject → close path → apply mask / remove background / save as transparent format.
How do I clip a path? Trace the subject using anchor points with pen tool in Photoshop, refine curves, close the path, then remove what’s outside.
Learn how product photography and clipping path Product photography paired with clipping path yields consistent, clean images with background removed or replaced, ideal for catalogs.
How to get a clipping path and background removal job Choose an editing service, upload your images, give instructions (background, file format, style), ask for sample or trial edits.
Product Photo Retouching: A Complete Guide for Beginners Retouching includes correcting color, removing imperfections, smoothing textures + using clipping path & masking for edges.
How do I best extract the next picture and have it on a white background? Use clipping path to isolate subject + set background to white or transparent; ensure clean edges and color accurate to keep subject natural.
Removing background from photo Removing background makes subject stand out; done via clipping path or masking depending on detail; result often transparent or white.
Differences Between Background Removal and Clipping Path Background removal is the goal; clipping path is a precise method using vector paths. Masking is another method. Each has strengths.

Companies Table: Top Clipping Path / Photo-Editing Services (USA & International)

Here is a table of 10 companies offering clipping path & related services. Expert Clipping is listed first (per your request). Data includes approximate price, services, pros/cons. Use this for comparison in your article.

Company Based / HQ Price per Image Starting* Key Services Offered Pros / Notes
Expert Clipping USA from US$0.25 Clipping path, background removal, image masking, color correction, ghost mannequin. Known for handmade quality, free trial, supports large volumes.
Graphic Design Eye USA / International ~$0.20-$10 Clipping path, multi-path, background removal, masking, color correction, jewelry retouching. Great for complex work, affordable, reliable deliveries. Graphic Design Eye
Pixelz USA / Global ~$0.75-$20 Automated + manual clipping path, background removal, ghost mannequin, e-commerce post-production. Strong workflow, scalable, subscription plans.
UK Clipping Path (UCP) UK ~$0.29-$20 Clipping path, advanced retouching, ghost mannequin, image masking, shadow effects. Good value, three-step QC, good for various objects.
Path Edits USA & Bangladesh ~$0.39-$20 Clipping path, color correction, background removal, multi paths, retouching. Excellent for high volume, consistent quality.
Color Experts International (CEI) USA / Bangladesh / UAE ~$0.49-$30 Masking, retouching, clipping path, ghost mannequin, color correction. Very experienced, trustworthy, handles tough tasks.
Deepetch USA / Australia ~$0.70-$10 Hand-drawn clipping path, background removal, hair masking, e-commerce edits. Good reputation, vast experience, multiple image editing types.
Creative Clipping Path Ltd Bangladesh / Global ~$0.49-$10 Clipping paths, image masking, shadow, retouching, color correction. Strong artistic team, good for international photo work.
Offshore Clipping USA & Global from ~$0.29 Complex & simple clipping path, retouching, background removal, ghost mannequin. Offers 24/7 service, good for large orders, detailed work. Offshore Clipping
BackgroundRemovalServices.com Bangladesh / Global ~$0.50-$10 Background removal, clipping path, deep etching, masking. Affordable, fast delivery, suitable for bulk edits.

What I Like

  • High precision: I’ve noticed clipping path services give my product shots razor-sharp edges, especially useful for catalog work.
  • Time saved: Outsourcing background removal has freed me to focus more on shooting than repetitive editing.
  • Flexibility: With clipping paths, I can easily switch backgrounds, apply shadows, or adjust colors without re-shooting. This adaptability is a game changer in both e-commerce and creative photography.

Summary: Clipping paths save time, deliver clean results, and add creative freedom.

What Could Be Better

  • Pricing gaps: Some services charge much higher for complex paths, which can feel inconsistent.
  • Turnaround delays: During peak seasons, even top providers may struggle to keep deadlines.
  • Automation limits: AI tools are improving but still miss the fine details—human touch remains essential for quality.

Summary: Pricing, turnaround, and automation challenges remain key areas to improve.

My Personal Experience with Clipping Path Services

I’ve worked with clipping path providers on thousands of images, from fashion shoots to jewelry catalogs. Here’s what stood out:

  • Precise edges on complex items like necklaces.
  • Clean, fast delivery for bulk e-commerce projects.
  • Some providers offered free trials, which helped me test before committing.
  • Ghost mannequin editing made apparel shots look polished.
  • Color correction ensured accurate tones for US buyers.
  • Turnaround times ranged from hours to days, depending on provider.
  • Quality control varied, but top services maintained consistency.
  • Personal support mattered—services with 24/7 chat were far easier to work with.
  • I enjoyed how easy it was to repurpose clipped images for both print and digital ads.

Summary: My experience has been mostly positive, with professional outcomes and better workflow efficiency.

Comparing with Other Brands

I’ve also used Pixelz and Offshore Clipping in addition to Expert Clipping. While all three handled clipping paths, each had its own strengths: Pixelz leaned on automation for speed, Offshore Clipping offered affordability, and Expert Clipping impressed me with hand-drawn precision.

Expert Clipping vs Pixelz: Quick Comparison

Feature Expert Clipping Pixelz
Starting Price $0.25 per image $0.75 per image
Turnaround 6–24 hours 1–24 hours
Method 100% hand-drawn Hybrid AI + manual
Strength Precision + detail Scalability + speed
Best For Jewelry, complex shapes Large e-commerce orders

Summary: Expert Clipping is best for detailed work, while Pixelz suits bulk edits.

Clipping Path Services for Photographers

Recommendation

If you’re a photographer handling complex products like jewelry, fabrics, or lifestyle items, I recommend going with a hand-drawn clipping path provider such as Expert Clipping. If you’re managing high-volume catalogs and need speed over perfection, Pixelz or similar automated services may fit better. For US-based sellers, choosing providers that understand Amazon or Shopify standards ensures compliance and saves headaches.

Summary: Pick services based on detail needs vs speed and platform compliance.

FAQs for Clipping Path for Photographers

What is a clipping path?

A clipping path is a vector outline used in Photoshop to separate a subject from its background.

What is the basic clipping path?

A simple outline used for easy shapes like books, boxes, or round products.

How to use clipping path?

Draw with the Pen tool, close the path, then delete or mask the background.

How do I clip a path?

Trace around the subject, set as a clipping path, and save the cut-out image.

Is clipping path different from background removal?

Yes—clipping path is the method, background removal is the goal. Masking is another method for complex edges.

My Experience

I’ve worked with many providers. Expert Clipping stood out for hand-drawn precision, fast delivery, and reliable support. Their ghost mannequin edits improved my apparel shots, and their retouching ensured perfect colors for online buyers.

Pixelz was faster for bulk work, but Expert Clipping gave me cleaner results on jewelry and complex products.

👉 You can also try their free trial to test quality before ordering.

Conclusion

Clipping path services are more than background removal. They improve product photos, save time, and make images market-ready. For best results, choose a trusted clipping agency that combines skill with reliability.

, , , ,

The Complete Guide to Clipping Path Services for Photographers

Clipping Path Services for Photographers

What is a Clipping Path & Subject Isolation

A clipping path service uses a closed vector line in Photoshop to cut out a subject from its background. The path keeps the subject inside and removes everything outside. This lets photographers isolate objects cleanly, especially for product photography or marketing use. Subject isolation makes it easy to reposition or layer objects, or place them on any background. It enhances clarity and professionalism by focusing viewer attention solely on the object.

Types / Complexity Levels of Clipping Paths

Clipping paths vary by complexity depending on object shape. A basic clipping path is used for simple, straight‐edged or gently curved objects (books, boxes, flat items). A medium path handles items with more curves or partial complexity (e.g. shoes, apparel edges). A complex clipping path involves many curves, holes, fine detail like hair, fur, jewelry. multi-clipping path services are used. Picking the right type ensures clean results without extra cost. Choosing the right complexity ensures precision without overpaying or wasting time.

How to Use / Create a Clipping Path

To clip a path, you typically use the Pen tool (or equivalent) in software like Photoshop. You trace the outline of the subject, creating anchor points and curves. Once the path is closed, you convert or apply it so that anything outside becomes masked, deleted, or transparent. For best results: zoom in, use more anchor points on curves, fewer on straight lines; Clipping paths are especially useful for background removal services when preparing product shots for catalogs or e-commerce.

Clipping Path vs Background Removal vs Image Masking

Clipping path, background removal, and image masking services are related but different. A clipping path is best for sharp edges. Masking is better for soft or see-through details like hair, fur, or smoke. Background removal is the bigger goal—making the subject clear and the backdrop invisible or replaced. Many providers use both clipping path and masking together for the best quality.

Product Photography, Color Correction, Ghost Mannequin & Retouching

In product photography, clipping path providers often add extra edits. These include color change services for accurate tones, ghost mannequin service for fashion images, and photo retouching services to fix flaws. These edits give products a clean, polished look that attracts buyers. For e-commerce, small changes like this can raise sales.

How to Get & Order Clipping Path / Background Removal Jobs

If you need clipping path work, first prepare your files and give clear notes on background, shadow, and final format. Then choose a clipping path company based on quality, speed, and price. Many offer a free trial or sample edit. Check delivery time, pricing, and portfolio before placing a bulk order.

Benefits & Use Cases

Businesses and photographers use photo clipping path services to get sharp, consistent product images. These are useful for e-commerce stores, catalogs, ads, and marketplaces like Amazon. Clean product shots build trust, improve brand style, and let you change backgrounds with ease.

Checklist for High-Quality Clipping Path Work

Here’s a checklist you can use / share to ensure good clipping path / photo editing:

  • Is the path clean and precise around curves and details?
  • Are fine details (hair, complex edges) treated well (masking if needed)?
  • Is the background fully removed or replaced cleanly?
  • Are colors accurate (white balance, exposure)?
  • Is file format delivered as needed (transparency preserved, layered PSD if required)?
  • Is the turnaround time acceptable?
  • Are revisions included / possible?
  • Is the pricing reasonable given complexity and volume?

Use this before choosing a service.

Common Mistakes & Comparisons

Mistakes happen when people use a clipping path where masking was better, ignore color matching, or skip natural shadows. A drop shadow service can make products look realistic. Compare providers: hand-drawn vs AI, local vs offshore, simple vs complex. Each has trade-offs between cost, speed, and quality.

FAQ Q&A Style Answers (160–200 characters)

Here are concise answers to your listed questions:

Question Answer
What is a clipping path? A clipping path is a vector outline in Photoshop (or similar) used to isolate a subject by removing or masking the background.
What is the basic clipping path? Basic clipping path covers simple shapes with straight edges or slight curves (e.g. boxes), often lowest cost and fast.
How to use clipping path? Use pen tool to draw path around subject → close path → apply mask / remove background / save as transparent format.
How do I clip a path? Trace the subject using anchor points with pen tool in Photoshop, refine curves, close the path, then remove what’s outside.
Learn how product photography and clipping path Product photography paired with clipping path yields consistent, clean images with background removed or replaced, ideal for catalogs.
How to get a clipping path and background removal job Choose an editing service, upload your images, give instructions (background, file format, style), ask for sample or trial edits.
Product Photo Retouching: A Complete Guide for Beginners Retouching includes correcting color, removing imperfections, smoothing textures + using clipping path & masking for edges.
How do I best extract the next picture and have it on a white background? Use clipping path to isolate subject + set background to white or transparent; ensure clean edges and color accurate to keep subject natural.
Removing background from photo Removing background makes subject stand out; done via clipping path or masking depending on detail; result often transparent or white.
Differences Between Background Removal and Clipping Path Background removal is the goal; clipping path is a precise method using vector paths. Masking is another method. Each has strengths.

Companies Table: Top Clipping Path / Photo-Editing Services (USA & International)

Here is a table of 10 companies offering clipping path & related services. Expert Clipping is listed first (per your request). Data includes approximate price, services, pros/cons. Use this for comparison in your article.

Company Based / HQ Price per Image Starting* Key Services Offered Pros / Notes
Expert Clipping USA from US$0.25 Clipping path, background removal, image masking, color correction, ghost mannequin. Known for handmade quality, free trial, supports large volumes. expertclipping.com+3expertclipping.com+3Offshore Clipping+3
Graphic Design Eye USA / International ~$0.20-$10 Clipping path, multi-path, background removal, masking, color correction, jewelry retouching. Great for complex work, affordable, reliable deliveries. Graphic Design Eye
Pixelz USA / Global ~$0.75-$20 Automated + manual clipping path, background removal, ghost mannequin, e-commerce post-production. Strong workflow, scalable, subscription plans. Graphic Design Eye+1
UK Clipping Path (UCP) UK ~$0.29-$20 Clipping path, advanced retouching, ghost mannequin, image masking, shadow effects. Good value, three-step QC, good for various objects. Graphic Design Eye
Path Edits USA & Bangladesh ~$0.39-$20 Clipping path, color correction, background removal, multi paths, retouching. Excellent for high volume, consistent quality. Graphic Design Eye+2Offshore Clipping+2
Color Experts International (CEI) USA / Bangladesh / UAE ~$0.49-$30 Masking, retouching, clipping path, ghost mannequin, color correction. Very experienced, trustworthy, handles tough tasks. Graphic Design Eye
Deepetch USA / Australia ~$0.70-$10 Hand-drawn clipping path, background removal, hair masking, e-commerce edits. Good reputation, vast experience, multiple image editing types. Graphic Design Eye+1
Creative Clipping Path Ltd Bangladesh / Global ~$0.49-$10 Clipping paths, image masking, shadow, retouching, color correction. Strong artistic team, good for international photo work. Graphic Design Eye+1
Offshore Clipping USA & Global from ~$0.29 Complex & simple clipping path, retouching, background removal, ghost mannequin. Offers 24/7 service, good for large orders, detailed work. Offshore Clipping
BackgroundRemovalServices.com Bangladesh / Global ~$0.50-$10 Background removal, clipping path, deep etching, masking. Affordable, fast delivery, suitable for bulk edits. Graphic Design Eye+1

What I Like

  • High precision: I’ve noticed clipping path services give my product shots razor-sharp edges, especially useful for catalog work.
  • Time saved: Outsourcing background removal has freed me to focus more on shooting than repetitive editing.
  • Flexibility: With clipping paths, I can easily switch backgrounds, apply shadows, or adjust colors without re-shooting. This adaptability is a game changer in both e-commerce and creative photography.

Summary: Clipping paths save time, deliver clean results, and add creative freedom.

What Could Be Better

  • Pricing gaps: Some services charge much higher for complex paths, which can feel inconsistent.
  • Turnaround delays: During peak seasons, even top providers may struggle to keep deadlines.
  • Automation limits: AI tools are improving but still miss the fine details—human touch remains essential for quality.

Summary: Pricing, turnaround, and automation challenges remain key areas to improve.

My Personal Experience with Clipping Path Services

I’ve worked with many providers, including Expert Clipping. Their hand-drawn paths gave me sharp results, especially for jewelry and fashion photos. Bulk orders were delivered on time, and the ghost mannequin editing made apparel look great. Free trials also helped me test before committing.

I’ve worked with clipping path providers on thousands of images, from fashion shoots to jewelry catalogs. Here’s what stood out:

  • Precise edges on complex items like necklaces.
  • Clean, fast delivery for bulk e-commerce projects.
  • Some providers offered free trials, which helped me test before committing.
  • Ghost mannequin editing made apparel shots look polished.
  • Color correction ensured accurate tones for US buyers.
  • Turnaround times ranged from hours to days, depending on provider.
  • Quality control varied, but top services maintained consistency.
  • Personal support mattered—services with 24/7 chat were far easier to work with.
  • I enjoyed how easy it was to repurpose clipped images for both print and digital ads.

Summary: My experience has been mostly positive, with professional outcomes and better workflow efficiency.

Comparing with Other Brands

I’ve also used Pixelz and Offshore Clipping in addition to Expert Clipping. While all three handled clipping paths, each had its own strengths: Pixelz leaned on automation for speed, Offshore Clipping offered affordability, and Expert Clipping impressed me with hand-drawn precision.

Expert Clipping vs Pixelz: Quick Comparison

Feature Expert Clipping Pixelz
Starting Price $0.25 per image $0.75 per image
Turnaround 6–24 hours 1–24 hours
Method 100% hand-drawn Hybrid AI + manual
Strength Precision + detail Scalability + speed
Best For Jewelry, complex shapes Large e-commerce orders

Summary: Expert Clipping is best for detailed work, while Pixelz suits bulk edits.

Recommendation

For detailed products like jewelry, choose a hand-drawn service such as Expert Clipping. For bulk catalogs, automated providers like Pixelz may suit better. If you want to explore tips and guides, check their clipping path tutorial.

Summary: Pick services based on detail needs vs speed and platform compliance.

FAQs for Clipping Path for Photographers

What is a clipping path?

A clipping path is a vector outline used in Photoshop to separate a subject from its background.

What is the basic clipping path?

A simple outline used for easy shapes like books, boxes, or round products.

How to use clipping path?

Draw with the Pen tool, close the path, then delete or mask the background.

How do I clip a path?

Trace around the subject, set as a clipping path, and save the cut-out image.

Is clipping path different from background removal?

Yes—clipping path is the method, background removal is the goal. Masking is another method for complex edges.

Conclusion

Clipping path services are key to professional product images. They isolate objects, enhance color, and allow flexible edits. Whether you run a small shop or a large catalog, using a trusted clipping agency ensures your photos are clean, consistent, and ready to sell.

, , ,

What Is Macro Photography?

What Is Macro Photography

Introduction to Macro Photography

Imagine stepping into a whole new world where tiny things suddenly look huge and magical. That’s what macro photography is all about getting up close to the little wonders we usually miss. Simply put, macro photography is snapping photos of small things so close that they look life-size or even bigger in your picture. It’s like zooming in with your eyes and a camera to reveal secrets that are invisible to the naked eye.

Macro photography means taking super close-up photos that show tiny things in amazing detail.

When I first tried macro photography, I was stunned. I took a photo of a ladybug, and it looked like a tiny spaceship with textures and colors I had never noticed before. That moment hooked me forever.

Understanding the Basics

Definition and Reproduction Ratio

In photography, the term “macro” usually means capturing a subject at a 1:1 ratio or larger. This means what you see on the camera sensor is the same size or bigger than the actual subject. So, if you photograph an ant, it might appear as big as your thumb in the final image.

Macro means the subject looks life-size or bigger in your photo.

Macro vs. Close-Up Photography

You might wonder isn’t close-up photography the same as macro? Well, not quite. Close-up shots bring things nearer, but macro photos push that boundary to reveal extreme detail. Think of close-up like zooming in with a telescope, while macro is more like using a microscope.

Macro photos show much more detail than regular close-ups.

Essential Equipment for Macro Photography

Macro Lenses

The first tool I got was a macro lens, and it changed everything. These lenses are specially designed to focus super close and keep tiny subjects sharp. They come in different sizes, from 50mm to 200mm the bigger the number, the farther you can stand from your subject and still get a great close-up.

A macro lens helps you take sharp close-up photos.

Extension Tubes and Bellows

If you’re on a budget, you don’t have to buy a macro lens right away. Extension tubes and bellows are cheap and clever tools you can add between your camera and lens. They let your lens focus closer by increasing the distance to the sensor.

Extension tubes let regular lenses focus closer for macro shots.

Tripods and Stabilization Tools

Here’s a little secret: macro photography needs rock-steady hands. Since you’re shooting tiny subjects up close, even a slight shake blurs your image. Using a tripod or any stable surface is like giving your camera a strong handshake steady and sure.

Tripods help keep your camera steady for sharp macro photos.

Lighting Equipment

Lighting can make or break your macro shot. I learned this the hard way when my first bug shots looked dull. Adding a ring light or using natural diffused light makes textures pop and colors come alive without harsh shadows.

Good lighting shows the fine details in your macro photos.

Camera Settings and Techniques

Manual Focus and Focus Stacking

Auto-focus? Forget it for macro. When you’re inches from your subject, auto focus gets confused. Switching to manual focus gives you control and precision. Also, when the depth of field is razor-thin, taking several photos at different focus points (called focus stacking) and blending them in software creates stunning, sharp images all over.

Short answer: Use manual focus and focus stacking for sharp macro images.

Depth of Field Considerations

Ever noticed how little of your macro shot is in focus? That’s because the closer you get, the thinner your depth of field becomes. To get more of your subject sharp, use a smaller aperture (like f/11 or f/16). Just watch out for diffraction too small an aperture can make things soft.

Smaller apertures help keep more of your subject in focus.

Shutter Speed and ISO Settings

Fast shutter speeds freeze motion essential when your tiny subjects wiggle or when the wind moves your flowers. I usually balance shutter speed with ISO; I keep ISO low to avoid grain but bump it up if light is scarce.

Use fast shutter speeds and low ISO for sharp, clean macro shots.

Creative Approaches in Macro Photography

Composition and Background

One thing I love about macro is that you can turn even a dull background into art by blurring it out. Using a wide aperture creates a creamy, soft background that makes your subject pop, almost like a spotlight on a stage.

Blurred backgrounds make tiny subjects stand out beautifully.

Using Patterns and Textures

Macro photography is like a treasure hunt for textures. I’ve spent hours photographing the veins on leaves or the rough skin of insects. These details tell stories and make photos look abstract, like modern art.

Macro shows off cool patterns and textures invisible to the eye.

Experimenting with Perspectives

Don’t just shoot straight on. Try shooting from below, side, or even upside down. I once shot a flower from beneath and got a shot that looked like a colorful umbrella — unexpected and fresh.

Changing angles reveals new details and adds interest.

Common Challenges and Solutions

Dealing with Movement and Wind

Tiny subjects don’t stay still, and the wind loves to mess with your shot. I learned to shoot early mornings when the air is calm. Another trick: place a windbreaker or even your jacket to shield your subject.

Shoot in calm weather and use windbreaks to reduce movement.

Overcoming Lighting Issues

Sometimes natural light just won’t cut it. When that happened, I used small LED panels or ring lights to brighten the scene. Diffuses help soften harsh light and stop ugly shadows from ruining the shot.

Artificial light and diffuses fix tough lighting problems.

Post-Processing Tips

Enhancing Details and Sharpness

Editing can bring your macro shots to life. I like using sharpening tools carefully too much and the photo looks fake, but just enough highlights the textures I worked hard to capture.

Post-editing sharpens details but avoid overdoing it.

Color Correction and Contrast

Sometimes, colors don’t look quite right straight out of the camera. Adjusting white balance and contrast makes your subject look natural and vibrant. Keep it subtle for a realistic feel.

Adjust colors and contrast for natural, eye-catching photos.

Conclusion

Macro photography is like unlocking a secret door to a tiny world full of wonder. It’s challenging but so rewarding when you see the invisible details come alive in your photos. If you love exploring, storytelling, and seeing beauty in the small things, macro photography will become your new best friend.

Trust me, once you start, you’ll find yourself staring at everyday objects with fresh eyes because suddenly, everything has its own tiny universe waiting to be discovered.

FAQs

Q1: Do I need a special lens to do macro photography?
Nope! While a macro lens is best, you can start with extension tubes or close-up filters on your existing lens.

Q2: What is focus stacking, and should I try it?
Focus stacking means combining several photos focused on different parts to get the whole subject sharp. It’s great for very detailed shots.

Q3: How do I avoid blurry macro shots?
Use a tripod, manual focus, and a fast shutter speed to keep things sharp.

Q4: What lighting works best for macro photos?
Natural diffused light or ring lights work well. Use diffuses to soften harsh light.

Q5: Can macro photography be done indoors?
Absolutely! Many macro photographers shoot indoors using artificial lights, perfect for controlled settings.

, , , , ,

Boost Sales with DIY Product Photo Editing | Expert Clipping Path Services

DIY Product Photo Editing Tips for E-Commerce Sellers

“A picture is worth a thousand words.” – Napoleon Bonaparte

When it comes to online shopping, high quality images make or break a sale. Yet how do you differentiate yourself in a crowded e-commerce market without spending a million dollars? The answer: DIY product photo editing! If you know the right tips and tools, your product photos can become stunning visuals that will intrigue your customers and help you boost your conversions. If you’re a beginner or just want to improve your photo editing skills, these DIY photo editing tips will enable you to showcase your products in the best light. Let’s dive in!

Introduction: The Power of DIY Editing

Great visuals in the e-commerce world can mean a huge difference when competition is fierce and attention spans are short. Think about it: The first thing a shopper sees when they land on your product page is your image. They might scroll past without a second thought if it’s blurry or otherwise poorly lit. A high quality, well edited photo can engage them and make them buy. And the best part? To get professional looking photos, you don’t have to hire an expensive photographer. You can do it all yourself with DIY product photo editing tips.

Why Product Photography Matters

Building Trust with Visuals

The closest your customers can get to actually examining your product is a picture of it. Some images can be well lit, clear, and convey professionalism and trustworthiness, and others can be poorly edited, and customers can question your credibility.

Impact on Conversions

Product images are shown to directly affect conversion rates. In fact, we know that high quality images can increase sales by up to 30%! Thus, spend time and effort editing your photos and you will receive great results in the long run.

Essential Tools for DIY Photo Editing

Software Options

You don’t need to be a professional designer to create stunning product images. Here are a few tools to get you started:

  • Adobe Photoshop: The industry standard, offering powerful editing features (though it requires a subscription).
  • GIMP: A free alternative to Photoshop, offering many of the same features.
  • Canva: User-friendly and great for beginners, perfect for quick edits and simple designs.

Free vs. Paid Tools

While paid tools like Photoshop offer advanced features, free options like GIMP and Canva provide robust editing capabilities at no cost. The key is to choose the one that best fits your needs and skill level.

Step-by-Step DIY Editing Process

Preparing Your Image

First, you want to make sure your images are organized. Back up your work to prevent you from losing your work and keep your original files safe. Your camera images should be well lit and in focus.

Basic Adjustments

Start with simple adjustments:

  • Cropping: Cut away background or distractions that don’t add value.
  • Brightness and Contrast: Make these adjustments to make the product more stand out.
  • Sharpness: Make your product look crisp and clear.

Advanced Enhancements

Once the basics are covered, dive into more advanced edits:

  • Background Removal: It draws attention to your product.
  • Color Correction: Make sure the true colors of the product are shown.
  • Retouching: Remove dust or scratches on the product.

Optimizing for E-Commerce

Image Compression and Quality

But high quality images are important, and must be optimized for web use. With image compression, you are reducing file size without compromising on the quality, which means faster loading times of your product page.

Mobile Optimization

As more people shop on mobile devices, it’s more important than ever that your product images look good on smaller screens. Test your images on mobile before publishing them.

Tips for Consistency Across Product Photos

Lighting and Background Uniformity

Consistency is the key to selling your products. All photos are to be kept consistent with lighting. Just like with all product shots, use the same background colour for all of them for a cohesive online store.

Consistent Editing Style

Once you have a style for editing your product images (bright, minimalist or vibrant) stick to it in all product images to reinforce your brand.

Common Mistakes to Avoid

  • Over-editing: It’s tempting to apply filters galore, but don’t overdo it. Your product should still look real.
  • Ignoring Image Size and Quality: Images in low resolutions can ruin your brand’s credibility. Upload high quality, well optimized photos every time.
  • Neglecting Mobile Viewers: Images may look great on a desktop, but don’t forget to see how they will look on mobile devices.

Conclusion

The ability to DIY product photo editing is a valuable skill for every e-commerce seller to learn. With the right tools and techniques, you can put together eye catching images that will engage customers and get sales. No matter if you’re just starting or want to level up your skills, these tips will let you showcase your products in the best way, without having to work with professional photographers.

DIY Product Photo Editing

FAQs

  1. What is the best software for product photo editing?
  • The industry leader is Adobe Photoshop but free tools like GIMP and Canva are great alternatives if you’re on a budget.
  1. How do I remove the background from my product photos?
  • Easy background removal can be done with tools such as Photoshop’s Magic Wand or services like Canva’s Background Remover.
  1. How can I ensure my product images are mobile-friendly?
  • Test your images on mobile devices always before publishing. File sizes need to be small and look good on small screens.
  1. What adjustments should I make first when editing product photos?
  • Crop, adjust your brightness and contrast and sharpen your image to highlight product details.
  1. How can I make my product photos look more professional?
  • Be sure to use the same lighting, backgrounds and editing techniques on all your product images.
, , ,

Cake Smash Photography Near Me

cake smash photography near me expert clipping

Cake smash photography is an introductory way of photographing a child

Cake smash photography as a trend in first birthday photography has become popular among parents who want to capture their child’s first birthday in a unique way. It is a birthday concept, where the birthday boy or girl is enjoying a nicely decorated cake, with a video camera capturing their spontaneous reactions, messy faces and pure joy. These candid moments from a cake smash photo session become precious keepsakes, encapsulated in the sweetness of your child’s first birthday in a unique and memorable way.

Cake Smash Photography

Finding a cake smash photographer near where you live

Finding a good cake smash photographer is the key to success when you are doing cake smash photography. Start your search through online or by asking your friends for recommendations. Focus on photographers that are experts in smash cake photography near me and whose portfolio reflects their ability of freezing these moments in time, which are fleeting yet priceless. Spend some time reading through reviews and client testimonials to get a feel of the satisfaction of their cake smash photoshoot near me.

Questions to ask when picking a cake smash photographer

Before hiring a cake smash photographer, you should make sure to ask a series of questions to check whether they meet your requirements. Start with the question about their background, especially the number of cake smash session they’ve attended. See if they provide themed setups or props, or if you need to provide your own. Talk about where the shoot will happen, whether it is in studio or on location, and don’t forget to ask about their safety protocols just to make sure that the baby will be comfortable and safe during the baby 1st birthday photoshoot near me.

Achieving the perfect cake-smash shot

You can catch the unique cake smash moment by creating a relaxed and fun atmosphere for your toddler. Choose a theme that reflects your child’s individuality or something they are passionate about, and connect with the photographer beforehand. Your cake should be not only visually attractive but also appetizing for your little child so that he would enjoy splitting it. A key element of the session is the curiosity of your child towards the cake. Let the photographer to record the most authentic reactions of your child, which will produce the most heartwarming smash cake pictures.

cake smash props and set ups

The props and accessories are what make the cake smash photography experience fun and exciting. Coordinate with the photographer regarding the variety of props and decorations available on hand or if you are going to bring your own. Contemplate adding, say, balloons, banners, or any other accessories that will blend in with the theme you’ve chosen. Prop such as old crates, toys or colorful fabrics can create a second layer of elegance to the photographs. The most prolific cake smash photographers available locally will give you tips on how to use those props in a way that the result will be visually striking and unusual photos.

Cake smash photo shoots packages and prices

Cake smash photography needs to consider the numerous packages and pricing structures presented by the photographer. Take a look at the packages’ details, for instance, the number of the retouched images, printing options, and other things such as albums or canvases. Talk about pricing and any possible extra charge. The duration for the delivery of the edited photos should also be fixed and the photographer needs to be understood regarding the usage restrictions.

Conclusion – Cherishing the most precious moments

Cake smash photography is a wonderful way of documenting the most delightful moments of your baby’s first year. Through choosing a close by skilled smash cake photographer, posing relevant questions and carefully choosing props and decorations, you are well prepared for a remarkable and pleasant photo session. The real and happy faces which are captured on the 1 year old cake smash photography will become the treasured mementos which you can enjoy for years and years. Take advantage of this moment to enjoy your one-year-old’s first birthday cake smash photography.

sports photography near me

Exploring the Thriving World of Sports Photography Jobs Near Me

Introduction to Sports Photography Jobs

As a passionate photographer, the power of making a shot that freezes the special moments in sports has always been very fascinating to me. The energy from a football game to the grace of a gymnastics performance is what sports photography is all about, it allows us to pause the moment and keep the excitement forever. If you’re looking forward to converting your passion into a profession then you will be amazed to discover the numerous sports photography jobs that are available near you. In this blog, I will cover the sport photographers near me and the available opportunities, necessary skills, and equipment that you need to succeed in this field.

sports photography near me

What Makes Sports Photography so Popular.

In the last couple of years, the demand for sports photography has been increased. Meanwhile, the tremendous growth of social media and the increasing fame of sports athletes have increased the demand for high-quality sports photo and sports photos which will be shared and enjoyed by the millions of sports fans all over the world. Sports photography is an artistic representation of sports competitions, athletic abilities, and emotions that are associated with sporting events. It depicts stories that cannot be told only by words. This demand has literally opened a door to the world of opportunities for the upcoming sports photographers like us, creating more demand for the sports photography.

Sports Photography Job Positions Around Me

The sports photography jobs include many options of sports photography which are available around you. Whether you are a sports fan keen on professional sports or a casual fan of youth athletics, there is a niche for anyone. Let’s open the door to some of the sports photographer positions that are available near you.

Types of Sports Photography Jobs Near Me

Job Types in Sports Photography in My Area

Sports Team Photography In My Area

If you enjoy taking pictures that convey the spirit and unity of a sport team, then sports team photography may be the right choice for you. Often, sports teams, from little leagues to professional clubs, bring in team picture photographers to take team photos, individual portraits, and game and practice shots. As a part of this job, you will get to be involved in athletes’ lives and the whole process of their journey.

Sports Photography for Youths Nearby

Youth sports photography is a rewarding and thriving area of photography that enables photographers to capture the happiness and resoluteness of young athletes. From soccer to basketball, there are numerous youth sports leagues in the area that need photographers to take sports photos of youth games and tournaments as well. This position lets you to embody the spirit of youth in order to motivate the future athletes.

Sports Action Photography Close To Me

Sports action photography is the process of capturing the thrill and fast pace of sporting events. From the sound of the cheering crowd to the sweat on the athlete’s brow, sports action photography captures these moments in time. Either it is taking a last minute goal or a winning play, sports action photography is a field of excitement and it requires fast reflexes and sharp eye.

Team and Individual Sports Photography in My Neighborhood

Many sports agencies, both the amateur and professional levels, hire photographers to take both the team and individual portraits. Here this entails portraying the team as a whole and the individual players with their unique personalities and skill set. The ability to display the team spirit and uniqueness of athletes through sports portraits and sports portrait photography is a must for the sports photographer.

Sports Photography Products and Equipment Near Me

Sports photography requires the right equipment and tools such as high-speed cameras and telephoto lenses to be able to produce the best results. There are different products and equipment for sports photography in your area that are made purely to meet the needs of sports photographers. The camera gear investment is not only for the improvement of the quality of your photographs but also for the simplification of your work and making it more efficient.

Prerequisites for Sports Photography Jobs – Skills and Qualifications

To be a successful sports photographer, passion is not just important but also your qualifications and skills will give you an edge in the competitive sports photography world.

To start with, one should have a clear idea about the photography techniques, including composition, lighting and exposure. The ability to get the perfect shot in dynamic and ever-changing sporting events means that photography should be conducted with technical expertise and adaptability, two factors that make up the essence of photography technique.

Furthermore, to be a sports analyst, you need to be familiar with sports and their rules. Knowing the flow of the game and predicting important moments will help you get the most exciting photos. In addition to this, possessing excellent communication skills is also essential to interact with athletes, coaches and other professionals participating in sports events, by using your knowledge of sports to foresee and capture the moments.

Therefore, apart from being physically fit, being agile is also a bonus in sports photography. Looking for a good picture, you are sometimes requested to take positions that are difficult to hold, or to run alongside athletes. Endurance and agility are the basic requirements for the success of this area, and this indicates the significance of physical fitness in photography.

Sports Photography Course and Training Near Me

To improve your sports photography skills and stand out, you can consider enrolling in sports photography classes and sports photography workshops from your area. These classes provide the students with hands-on training, advice from the industry professionals and networking with other photographers. Through these sports photography workshops and classes, you can learn advanced techniques, improve your skills, and be updated on the latest trends and technologies in sports photography.

Sports Team Photos Near Me

A sport team photography is a kind of photography which is niche and hence focused on team spirit and unity As a sports team photographer or team pictures photographer, you might deal with various sports teams, from little leagues to professional organizations, to shoot team photos, individual portraits, and game and practice action shots. Through the lens of sports team photography, this position enables you to work one-on-one with athletes and to be a part of their journey, emulating the core of sports.

Sports Photography for Youth Near Me

Sports photography for the youth is a fulfilling and thrilling career that enables you to document the pure joy and the determination of young athletes. By participating in youth sports photography, you can be a part of several leagues, where you will be required to take shots of players during the games and tournaments. This is a perfect opportunity for you to capture the essence of youth and motivate upcoming athlete generations through amazing photos.

Sports Action Photography Near me

Sports Action photography is about freezing the action, the intensity and the adrenaline of a sporting event. From crowds cheering in the background to athletes sweating, sports action photography captures these moments. Whether you are scoring the last-minute goal or celebrating the victory, this beautiful game needs to be played very fast with the right foot for the winning moment.

Team and Individual Sports Photography Near Me

Many sport organizations, both at the amateur and professional levels, need photographers to take team and individual sports portraits. This also includes capturing the whole team as well as the individual athletes’ personalities and skills through sports portrait photography. Capturing the team spirit and personality of athletes is a key skill in sports portraits.

Sports Photography Products and Equipment Around Me

To be a champion in sports photography, you must have the right tools and equipment for sports photography. Ranging from high-speed cameras to telephoto lenses, there are many products and equipment in your area that are tailored specifically for sports photographers. Purchasing the right equipment will help you take better photos and also make your job easier and more efficient.

Senior Sports Banner Photography Near Me

Senior sport photography is a specialty within sports photography that concentrates on taking pictures of graduating high school athletes. These athletes will continue to their next chapter in life and senior sports photography allows you to capture their athletic accomplishments in time. A majority of high schools and sports organizations around the area provide this exclusive service, which is a great chance for photographers who are interested in this particular niche of sports photography.

Tips for Starting a Career in Sports Photography

The career in sports photography needs a lot of perseverance, dedication and good portfolio. Here are some tips to help you kick start your journey in the dynamic world of sports photography:Here are some tips to help you kick start your journey in the dynamic world of sports photography:

1. Build a sports photography portfolio: Begin with the sports competitions in your locality and create a portfolio that exhibits your skills and shows your ability to take great sports photos.

2. Engage in networking for photographers: Attend sports events, camera conferences, and join online communities to meet up with industry professionals. The right networking for photographers can create avenues for employment and offer invaluable knowledge for those aspiring to join the sports photography field.

3. Volunteer and intern in sports photography: Get practical experience by taking on a responsibility of photographing local sports events or by working as an intern in the field of sports photography with established professionals. This applied way of learning will enable you to learn the basics and create the essential networks in the industry.

4. Embrace photography technology: Keep current with the latest developments in the field of photography technology, such as photography equipment, editing software and social media platforms, so as to display your sports photography work in the best possible way.

5. Exhibit perseverance in sports photography: The industry is highly competitive, so don’t let the rejection depress you. Practice your skills constantly, learn from your mistakes, and never hesitate to take on new opportunities that can help you to become better in sports photography.

Conclusion

Sports photography as a career provides a thrilling and fulfilling journey for those who love to capture athletic performances. Ranging from the excitement of youth sports to the high stakes of professional game, sports photography as a career gives you a chance to be part of amazing moments and tell gripping stories through your lens. The right skills, tools, and determination will allow you to turn your passion for sports photography into a profitable and rewarding career. Thus, grab your camera and get ready to be in the thick of things by capturing the unraveling action.

, , ,

Navigating the Evolving Photography Landscape: A Guide for Photographers and Clipping Path Services

Photography Landscape Guide 2

In the world of photography, technology is essential for everyone. Photographers and related services must stay at the forefront. Photographers face challenges due to technology and seek solutions to navigate. We will discuss the role of clipping path services. They intersect with the changing needs of photographers.

Changing Technology in Photography: A Photographer’s Dilemma

Photographers today are racing to adapt to the latest camera equipment. They also need to keep up with the latest editing software. The challenges are many due to advanced sensors and mirror less cameras. Artificial intelligence also plays a role in post-processing. Photographers must learn. They can attend workshops and engage online.

Upgrading equipment often has a big cost and is challenging. Strategic investment decisions and careful financial planning are crucial. Photographers must assess the ROI. They should budget for upgrades. Exploring trade-in programs helps manage costs.

Photography Landscape Guide

The Role of Clipping Path Services in Modern Photography

Clipping path services are important in post-processing. They provide precision and accuracy in isolating objects from backgrounds. Photographers rely on these services to improve their images. They also use them to create professional visuals. Additionally, these services help meet industry demands.

Benefits of Clipping Path Services for Photographers:

1. Clipping path services streamline editing, saving photographers time and effort.

2. Photographers can enhance their creativity by using intricate cut-outs. They can also experiment with precise edits for different backgrounds. This fosters creativity by allowing for various compositions and ideas.

3. Clipping path services maintain consistent image quality, meeting client and audience standards.

Solutions for Photographers and Clipping Path Services: A Synergy

Strategic Collaboration: Photographers and clipping path service providers can collaborate to enhance efficiency. Ensuring that editing requirements are met is key to communication. We must preserve the artistic vision of the photographer.

Clipping path services can embrace technology, using AI-driven tools. They can also stay updated on industry trends to stay ahead. This ensures they provide cutting-edge solutions to photographers who rely on their services.

Both photographers and clipping path service providers can enjoy networking opportunities. Building professional relationships can open new avenues for growth and learning. Attending industry events is another way to expand your network. Collaborating on projects also offers opportunities for growth and learning.

Conclusion: Navigating the Future Together

The challenges of changing technology in photography are met with adaptability. Collaboration and strategic decision-making are also key solutions. Photographers and clipping path services are essential in the dynamic ecosystem. They can overcome challenges and thrive in modern photography by collaborating. Embrace change. Stay informed. Let innovation drive greater creativity and success.

, , ,

Navigating Networking and Marketing Challenges

photography career challenges

Mastering the art of capturing moments is the beginning in photography. Photographers often encounter difficulties when it comes to networking and marketing. In this blog post, we’ll explore common hurdles photographers face. We’ll provide detailed solutions to help you overcome these challenges.

photography career challenges expert clipping

Crafting a lasting brand is a challenge. You must create a distinct brand identity that resonates with your audience. It can be a daunting task.

Start by defining your own style. Determine your visual aesthetic. Decide on the story you want your brand to tell. Consistency across your portfolio and online presence will make your brand memorable.

Establishing a strong online presence and utilizing social media may seem overwhelming.

Develop a professional website. This website will serve as a hub for your portfolio. It will also provide your contact information. You can manage social media profiles by engaging with your audience. Use strategic hashtags and understand platform algorithms for better results.

Building a network in the photography community takes time and effort. Connecting with potential clients within the industry is also challenging.

Attend photography events, join online communities, and engage in forums. Building authentic connections with fellow professionals and clients creates a supportive network.

Creating a portfolio that showcases your skills and style can be perplexing.

Update your portfolio with diverse, high-quality work. Tailor it to emphasize your strengths. Consider creating specialized portfolios for various niches.

Gaining positive testimonials can be challenging. This is especially true for emerging photographers.

Provide outstanding service to clients and request feedback. Showcase client testimonials on your website and in marketing materials to build credibility.

Determining the right pricing strategy can be confusing for photographers. The challenge is transparent pricing and packages.

Research industry standards. communicate your pricing. Consider offering customizable packages to cater to different client needs.

Getting discovered online is a challenge because of the vast content. SEO Optimization for Visibility is the solution.

Optimize your website for search engines. Use relevant keywords, meta tags, and descriptions. Also optimize your social media profiles.

Continuous learning is vital for growth. The challenge is staying updated with industry trends and technologies. It can be time-consuming.

Dedicate time for ongoing learning. To improve your skills, attend workshops and take online courses. Stay updated on industry advancements by engaging with photography communities.

By implementing these solutions, photographers can transform their challenges into opportunities for growth. To succeed in networking and marketing, you need a strategic approach. It also requires consistent effort and a commitment to continuous improvement. Mastering these aspects is essential for a thriving photography career. Whether you’re a beginner or experienced, it’s important. The world of photography is always changing, so keep up.

In conclusion, the journey to success in photography involves two things. First, you must improve your skills. Second, you must learn how to showcase your work. To have a successful photography career, you need three key elements. These are a well-crafted brand, a compelling online presence, and effective networking. These pillars provide the foundation for success. Remember, as you face these challenges, each step brings growth. Keep in mind, progress is made with every forward movement. Always remember, you are getting closer to reaching your potential. This potential lies in the captivating realm of photography.