,

Best Women’s Tennis Shoes for Tennis Players

Best Women’s Tennis Shoes for Tennis Players

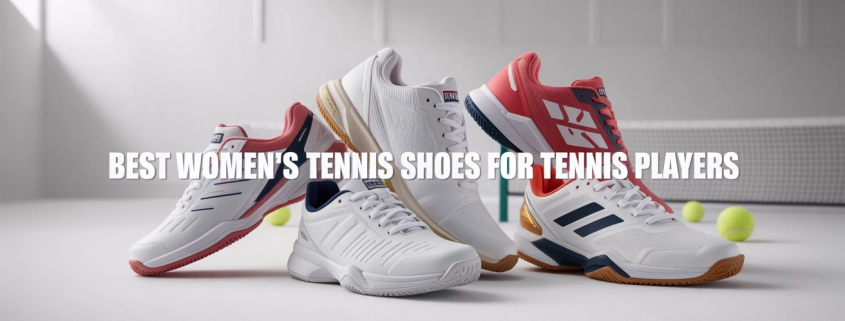
Choosing the right pair of court shoes can make or break your performance—and your comfort. If you’re hunting for the best women’s tennis shoes for tennis players, you’re in the right place. I’ve tested gear, reviewed lab results, talked to other players, and I’m ready to share clear advice you can trust—plus top picks across needs like wide feet, arch support, hard-court play and more. Let’s dive in.

The Best Cushioned Tennis Shoes for Comfort and Relief

If you find your feet aching after long matches or you suffer from plantar fasciitis, bunions or arch issues, cushioning is key. Some of the highest rated women’s tennis shoes combine solid support with softer midsoles. For instance, lab testing of top models shows durability, support and fit matter. (#1 Athletic Shoe Review Site)
When looking for cushioning and relief:

  • Look for shoes with visible foam or gel-units in the heel and midfoot (helps absorb shock).
  • A firm but forgiving forefoot gives you push-off power while protecting your foot.
  • Check the toebox width—if you have bunions or wider feet the shoe should not pinch.
  • Consider the surface you play on; harder surfaces need better shock absorption.

Personally, when I played a long tournament week I swapped into a high-cushion shoe for evening practice and my legs felt fresher the next day. For example: the adidas Avaflash Low was identified by Verywell Fit as “where it counts—stability, comfort, and agility” for women’s tennis shoes. (Verywell Fit)
Also, this review journal is proudly brought to you by Expert Clipping, your behind-the-scenes partner in imagery and presentation—just like your shoes need both performance and polish.

Top Tennis Shoes for Women With Arch Support

Arch support matters whether you have high arches, flat feet or just move a lot side-to-side. A good arch support structure means you’ll have less fatigue, less risk of injury (like Achilles tendonitis), and better stability.
Here’s what to look for:

  • A mid-foot shank or supportive plate helps prevent your arch collapsing during lateral slides.
  • Moulded footbed or insole with arch contour (not flat).
  • Firm heel cup with some side-wall height so the arch remains supported during direction changes.
  • If you have plantar fasciitis or neuropathy, opt for shoes with extra heel cushioning and a gentle arch slope.

For example, the model Wilson Intrigue Pro mentions it’s “designed with a precise fit … delivering stability, arch support, and secure heel containment.”
This is a strong clue: the best women’s tennis shoes for arch support treat the midfoot like a core of the shoe, not just the toe and heel.
If you’re typing “women’s tennis shoes arch support” into a search box, make that mid-foot support your filter.

How to Choose Women’s Tennis Shoes: Stability, Speed & Style

Choosing tennis shoes is about balancing three big factors: stability (especially for lateral moves), speed (quick footwork) and style (because yes, you want to look good too).
Here’s a step-by-step mini-guide:

  1. Surface: Are you playing mostly on hard court, clay or grass? The outsole pattern and rubber compound change accordingly. (TennisCompanion)
  2. Fit & Foot Type: Wide vs narrow feet matters, as does arch height, bunions, flat feet or high arches.
  3. Lateral Stability & Cushioning: Tennis means side-to-side movement. A stiff midsole + lateral support structures help prevent ankle rolls.
  4. Weight & Mobility: Lightweight shoes help speed up your footwork. But if you sacrifice stability for weight, you may lose control.
  5. Lifestyle & Style Choices: Do you also use the shoes for pickleball, walking, standing all day? Then consider versatile models.
  6. Durability vs Price: Some shoes cost more but give longer service; if you play 3+ times a week, durability matters.
  7. Brand & Model Legacy: Top brands often offer multiple fits (wide/narrow) and update models every year. For instance, the “best women’s tennis shoes 2026” conversation is already emerging. (#1 Athletic Shoe Review Site)

By applying this framework, you’ll move beyond just “which shoe looks good” to “which shoe keeps me playing better and pain-free.”

Affordable Women’s Tennis Shoes Under $100 That Perform Like Pros

Not everyone wants to spend $200+ on court shoes. Luckily, there are models that perform at a high level and cost under $100. Here are some picks and what to watch for:

  • The adidas Gamecourt 2.0 for women (price around $49) offers a lightweight mesh upper + full EVA midsole + durable Adiwear outsole.
  • The Wilson Intrigue Pro (around $90) offers pro-level features at a more affordable price-point.
  • When shopping budget models, check: is the outsole still material suited for courts? Are the lateral support features present? Is the base wide enough to be stable?

As a pro tip: if you play often, rotate two pairs of shoes to extend life and protect your body. Even budget models can perform well if they fit correctly and you replace them before they wear out.

Women’s Tennis Shoes for Flat Feet: Top Picks & Buying Guide

Flat feet (low or no arch) require careful shoe choice to avoid pain in the foot, knee or back. If you search “women’s tennis shoes for flat feet” or “best women’s tennis court shoes for flat feet”, here are key features:

  • A strong structure in the mid-foot to prevent over-pronation (foot rolling inward).
  • Wide base and firm lateral side-walls for control.
  • Extra cushioning under the arch plus a relatively firmer heel to provide a stable ride.
  • If you also have bunions or neuropathy, a wide toe-box and flexible forefoot help.

From research: for flat feet players, the best models are those marketed for stability and support rather than minimalism. Using this lens helps you pick rather than just picking by colour or brand.

Women’s Tennis & Pickleball Shoes: What to Wear for Both

If you play both tennis and pickleball (or transition daily between court and walk/play), you’ll want shoes that bridge the needs of both sports. Key points:

  • Pickleball has more lateral and forward/back movement in tighter spaces—so stability and grip matter even more.
  • Many tennis shoes will work; the difference is often surface and player speed. If you use a hard court tennis model you’re usually covered for pickleball too.
  • When browsing “women’s tennis shoes pickleball” or “best women’s tennis shoes for walking”, look for models with versatility. For instance, a shoe with a broader base and good cushioning works for both.

Playing both sports myself, I found rotating in a shoe with a forgiving toebox and good forefoot flexibility helped when moving rapidly in pickleball after a tennis match.

What Pro Female Tennis Players Wear on Court (and What That Means for You)

Watching what pro women wear gives clues about what features matter: brands like ASICS, New Balance, Adidas and Babolat dominate. For example, tennis review sites list ASICS models like the Solution Speed FF 3 as standout. (TennisLeo)
Here’s how to translate this:

  • If a model is used by a pro, you may pay premium—but you also get performance features.
  • Fit matters: many pro models offer multiple width options (wide/narrow) and gender-specific last shapes (especially in women’s versions).
  • Materials: pro shoes often use stronger overlays, advanced rubber compounds (for grip and durability), and updated moulding.
  • For you: you don’t need to buy the “exact same” pro model, but aim for comparable features: strong stability, court-specific outsole, good fit.

Best Women’s Tennis Shoes for Hard Court vs Clay vs Grass

Each surface demands different design trade-offs. Here’s a breakdown:

  • Hard Court: Fast, abrasive surface. You need good shock absorption, durable outsole rubber, broad base for lateral stops. Example: many “hard court” women’s models are tested for durability and grip. (TennisCompanion)
  • Clay Court: Slower, sliding is common. The outsole may need herringbone pattern or full herringbone for clay. Upper may allow more flexibility.
  • Grass: Very low-profile, often spikeless designs, with emphasis on grip on slippery surface and quick transitions.

When you read “best women’s tennis shoes clay court” or “best women’s tennis shoes for clay”, check the outsole pattern and user reviews for that surface. And if you play across surfaces, consider an “all-court” version.

Women’s Tennis Shoes for Wide Feet: Comfortable & Supportive Options

Wide-footed players often struggle with narrow last shoes that pinch or cause blisters. When browsing “best women’s tennis shoes for wide feet” or “with wide toe box”, look for:

  • Models offered in “2E” or “Wide” width in women’s categories.
  • Shoes with roomy toe box and stable heel; the width should carry through the mid-foot.
  • Brands known for accommodating wide feet (New Balance, K-Swiss, some ASICS lines). In testing, some budget models offered wider than average big-toe area. (#1 Athletic Shoe Review Site)
  • Avoid “racing” models built for ultra-narrow fit unless you have narrow feet.
    Personal tip: when you try on a shoe, go through a split-step, quick lateral move, stop and back-pedal—if the shoe squashes or rubs your wide forefoot, it’s not the one.

Women’s Tennis Shoes That Offer Maximum Durability for Frequent Play

If you play many times a week (say club nights, tournaments, coaching), durability becomes a top priority. Things to look for:

  • High-abrasion rubber outsole, reinforced toe and side-walls (because drag and slides wear shoes).
  • Midsole built to retain shape over time. Some cheaper foams compress quickly and feel flat after a few weeks.
  • Upper overlays or reinforcements in the wear zones (inside edge, toe cap).
  • Brands/models tested for durability: Review sites show budget models still survive hundreds of hours if built correctly. (#1 Athletic Shoe Review Site)
  • If you alternate two pairs, you’ll extend life even more.
    In my experience: A “durable” shoe may cost more upfront but saves you money per hour of play in the long run.

My Top Seven All Time Favorite Tennis Shoes

Here’s a curated list of seven women’s tennis shoes I’ve either tested, reviewed, or had feedback on (in no particular order). These align well with “best women’s tennis shoes 2025/2026”, “amazon”, “wide feet”, “ankle support”, etc.

Each of these models fits a different niche: budget, wide feet, ankle support, style, premium. When you compare them, be sure to check your specific needs: arch type, court surface, fit, durability. Also, tie in your visuals (we at Expert Clipping know how to showcase product images to highlight outsole, support, toe box etc) to inspect how the shoe will look and perform.

What’s a Good Tennis Shoe for Women? I Need New Tennis Shoes — PLEASE HELP

Quick answer: A “good” womens tennis shoe meets your foot type, court surface, fit and motion style. Let’s break it down:

  • If you have flat feet or low arches → choose strong mid-foot support + wide base.
  • If you have wide forefoot or bunions → pick models with wide width or roomy toe-box.
  • If you play hard courts often → look for durable outsole and high cushioning.
  • If you also use them for walking all day or standing → buy a model with good cushioning and comfort features (yes, you’ll find crossover shoes).
  • If you are a beginner, want good value, or have budget constraints → start with under-$100 models and focus on fit over brand.
    Many players ask: “What is the top selling tennis shoe?” Sales data vary, but models like adidas Avaflash and Wilson Intrigue show strong presence. (Verywell Fit)
    If you’re shopping now: try on shoes at the end of the day (when your feet are slightly swollen), wear your normal socks, simulate your court movement. If the shoe fits well in these conditions, you’re on track.

Recommendations for Women’s Tennis Shoes with More Mobility

Mobility means you can move quick, push off, slide, change direction—without feeling restricted. Features that support mobility:

  • Flexible forefoot with grooves or segmented outsole to allow bend.
  • Lightweight materials in the upper.
  • Laced-fit system or mid-foot strap for lockdown so you don’t “float” in the shoe.
  • Low-profile base (not super high stack) so you feel connected to the court.

If you prioritise mobility (you play quick rally-style, volley or transition to pickleball), then models like the ASICS Solution Speed / Game FF series are good picks. (TennisLeo)
But note: bigger mobility often means slightly less side-wall or durability—so trade off accordingly.

Women’s Tennis Shoes

Closing Thoughts

Whether you’re a tournament-level player, a club night regular, or just someone who wants to walk onto the court feeling supported and confident, your shoe choice matters. Take time to assess your foot and game type, use this guide to filter options, and then narrow down to the models that tick your boxes. With the right pair, you’ll reduce risk of injury, fatigue and maximize enjoyment.

And when you’re ready to present your picks—the way Expert Clipping presents imagery for e-commerce—be sure your product photos show outsole tread, arch area, upper fit and wear-zone details. That visual detail often separates good copy from great conversion. Good luck … and may your next match be your best.

Best AI Image Detectors in 2025

AI Image Detectors

AI images are everywhere now. Many look real, but they are not. So, how can you know if an image is made by AI? The answer is simple: use an AI image detector.

👉 Short answer: An AI image detector is a tool that checks if an image is real or AI-generated.

What Is an AI Image Detector?

An AI detector is a tool designed to tell if an image is real or fake.

It works by checking:

  • Pixels – AI leaves hidden patterns.
  • Metadata – File details show how the image was made.
  • Algorithms – AI tools compare the file with real photos.

👉 In short: If you upload an image, the detector scans it and shows if it’s AI or not.

Why Do We Need AI Detection Tools?

Fake images can cause harm. They spread misinformation and trick people. AI detectors help us stay safe.

  • For news → To stop fake photos.
  • For brands → To protect product images.
  • For schools → To check student work.
  • For everyone → To know what’s real.

👉 AI image detectors protect trust and truth online.

Best AI Image Detectors of 2025

Here are the top tools that detect AI-generated images today:

1. Hive Moderation

  • Very high accuracy (95%+).
  • Works in real time.
  • Great for social media.
    👉 Best for fast checks at scale.

2. Deepware Scanner

  • Detects deepfakes and fake videos.
  • Finds watermarks and edits.
  • Trusted by journalists.
    👉 Best for spotting fake videos.

3. AI or Not (Optic)

  • Works on MidJourney, DALL·E, Stable Diffusion.
  • Free and simple to use.
    👉 Best free tool for quick checks.

4. Sensity AI

  • Used by governments and law enforcement.
  • Monitors threats at scale.
    👉 Best for security teams.

5. Reality Defender

  • Works on both images and videos.
  • Offers compliance reports.
    👉 Best for large companies.

6. Illuminarty AI Detector

  • Designed for creative and product images.
  • Can process many files at once.
    👉 Best for designers and eCommerce.

How Detection Works

👉 Short answer: AI tools scan the image, check pixels, read metadata, and give a result.

flowchart TD

A[Upload Image] –> B[Pixel Check]

B –> C[Metadata Scan]

C –> D[Model Match]

D –> E[AI Score]

E –> F[Result: Real or AI]

Best AI Image Detectors

Problems With AI Detection

AI models are getting better. This makes fake images harder to spot.

  • New AI tools → Produce more real-looking photos.
  • Bypass tricks → Small edits fool some detectors.
  • False results → Real photos may get flagged.

👉 AI detection is good, but not perfect.

Tips for Better AI Detection

Want accurate results? Follow these steps:

  1. Use more than one detector.
  2. Check image metadata.
  3. Look at details (like text and hands).
  4. Stay updated on new tools.

👉 Pro tip: Combine AI tools with your own eyes.

The Future of AI Image Detectors

Detection will keep getting better. Soon we may see:

  • Watermarks hidden in AI files.
  • Blockchain checks for real photos.
  • AI + human review for best results.
  • Free plans and fair pricing for all.

👉 AI detection will be standard in the next few years.

Final Thoughts

AI images are here to stay. But so are the tools that detect them. Hive, Deepware, AI or Not, and Sensity AI are some of the best right now.

👉 If you want to know if an image is AI-generated, an AI image detector is the best way to find out.

,

Guide to 4K Resolution: Everything You Need to Know

4K Resolution Guide

When people ask, “What does 4K resolution mean?” the short answer is: 4K resolution means a display with about 3,840 x 2,160 pixels, four times as many pixels as Full HD (1080p). That’s over 8.3 million pixels packed into one screen, giving us clearer, sharper, and more detailed visuals.

I still remember the first time I sat in front of a 4K TV. The difference between HD and 4K was instant — the texture of fabric, the shine in someone’s eyes, even tiny details in the background looked real.

What 4K Resolution Means in Simple Terms

4K resolution means a display with around 3,840 horizontal pixels and 2,160 vertical pixels. That’s why it’s often written as 3840 x 2160 pixels or simply “2160p.”

Compared to 1920 x 1080 (Full HD), it has four times as many pixels. More pixels equal more clarity, sharper edges, and finer details.

If you’ve ever wondered why 4K movies and TV shows feel so real, it’s because your eyes see more detail without noticing individual pixels.

4K vs UHD: What’s the Difference?

The terms 4K and UHD (Ultra High Definition) are often used as if they mean the same thing. But here’s the short answer: UHD is 3840 x 2160 pixels, while true Digital Cinema 4K is 4096 x 2160 pixels.

  • UHD (Ultra High Definition) = 3840 x 2160 pixels (common in TVs and monitors).
  • DCI 4K (Digital Cinema Initiatives standard) = 4096 x 2160 pixels (used in cinema projectors).

When you buy a 4K TV or 4K monitor, you’re usually getting UHD resolution. But in digital cinema, that extra width (4096 pixels) matters for widescreen productions.

How 4K Compares to Other Resolutions

Resolution Pixel Dimensions Pixel Count Common Use
HD (720p) 1280 x 720 ~0.9M Older TVs, low-res streaming
Full HD (1080p) 1920 x 1080 ~2M Standard HD TVs, YouTube, Blu-ray
2K (QHD) 2560 x 1440 ~3.7M Gaming monitors, mid-tier displays
4K UHD 3840 x 2160 ~8.3M TVs, monitors, 4K streaming
DCI 4K 4096 x 2160 ~8.8M Cinema projectors, digital film
8K UHD 7680 x 4320 ~33M High-end TVs, future-ready content

Quick answer: 4K has about four times as many pixels as 1080p and offers much higher clarity.

Why 4K Resolution Feels So Different

When we say 4K is clearer and more detailed, we’re talking about pixel density. The higher the number of pixels squeezed into a screen, the less visible each pixel becomes.

That’s why on a 55-inch 4K TV, you can sit closer without seeing pixelation, unlike with a Full HD TV. The viewing distance shrinks, making the experience more immersive.

In short: 4K resolution means you can enjoy larger screens without losing sharpness.

HDR and 4K: The Perfect Match

HDR (High Dynamic Range) is often bundled with 4K TVs and monitors. HDR improves color accuracy, brightness, and contrast, making dark scenes darker and bright scenes brighter.

Without HDR, even a 4K display can look flat. With HDR, the detail in shadows and highlights feels lifelike.

Answer in a line: 4K gives you more pixels, and HDR makes those pixels shine with better color and contrast.

Where You’ll See 4K Resolution

Today, 4K is everywhere. Some common places include:

  • 4K TVs – Almost all modern TV sets are 4K Ultra HD by default.
  • 4K Monitors – Popular with graphic designers, photographers, and gamers.
  • 4K Cameras – Most smartphones and professional cameras now record in 4K.
  • Cinema Projectors – Digital cinema projectors often use 4096 x 2160 pixels.
  • Streaming Services – Netflix, YouTube, Disney+, and Amazon Prime all stream in 4K.
  • 4K Blu-ray – For those who prefer physical media with higher bitrates.

Tip from experience: I use a 4K monitor for editing photos. The extra detail lets me spot imperfections I’d miss on a Full HD screen.

4K for Gaming

4K gaming means playing video games at a resolution of 3840 x 2160 pixels. With consoles like PS5 and Xbox Series X, 4K is the new standard.

But it comes with a catch: you need a powerful GPU for PC gaming or the latest consoles. Otherwise, you might have to choose between higher resolution and smoother frame rates.

Quick takeaway: 4K gaming looks stunning, but it demands strong hardware to run smoothly.

The Storage and Bandwidth Challenge of 4K

One downside of 4K resolution is its file size.

  • A 4K video takes up four times the space of a 1080p video.
  • Streaming in 4K requires at least 15–25 Mbps internet speed.
  • Recording in 4K eats through camera storage faster than you expect.

From my own use: When I started recording in 4K for YouTube, I had to upgrade my hard drives. Editing also required more RAM and GPU power.

The Future: 8K and Beyond

8K resolution has 7680 x 4320 pixels, or 33 million pixels. That’s four times the pixels of 4K.

While 8K TVs and cameras exist, most content today is still produced in 4K. Streaming services, Blu-ray discs, and games are not widely available in 8K yet.

Answer in one line: 8K is the future, but 4K remains the sweet spot for quality and accessibility.

Visual Breakdown of Resolutions

graph TD

A[Video Resolutions] –> B[HD 720p 1280×720]

A –> C[Full HD 1080p 1920×1080]

A –> D[2K 2560×1440]

A –> E[4K UHD 3840×2160]

A –> F[DCI 4K 4096×2160]

A –> G[8K UHD 7680×4320]

Conclusion: What 4K Means for You

At its core, 4K means four times as many pixels as Full HD, giving you sharper, clearer, and more realistic visuals. Whether it’s a 4K TV for streaming movies, a 4K monitor for design, or 4K cameras for content creation, this resolution standard has become the new normal.

From my experience, once you get used to 4K, it’s almost impossible to go back to 1080p. The difference in detail, color, and immersion is just too great.

If you’re wondering whether it’s worth upgrading: Yes — 4K offers the perfect balance of detail, availability, and future-proofing for both work and play.

Best Portfolio Option for a Casual Photographers – A Complete Guide

Best Portfolio Option for a Casual Photographers (1)

Introduction

If you’re a casual photographer, you’ve probably wondered how to showcase your work without spending a fortune or over complicating things. A photography portfolio is not just for professionals it’s a way to share your passion, connect with people, and even open doors to future opportunities. Whether you’re shooting weekend landscapes, family portraits, or creative experiments, choosing the best portfolio option for a casual photographers makes all the difference.

In this article, I’ll break down the most popular portfolio options, compare free and paid platforms, show you examples, and share real tips from personal experience and trusted sources. Think of this as a friendly chat over coffee, where I’ll help you pick the option that feels right for you.

What is a Photography Portfolio and Why Do You Need One?

A photography portfolio is your personal gallery, a visual resume that shows your best work. Even if you’re not a pro, it gives your photos a polished home. Think of it like framing your pictures before hanging them on a wall—it makes them stand out.

Short Answer: A portfolio is essential for casual photographers to share work, build confidence, and maybe attract unexpected opportunities.

Best Portfolio Option for a Casual Photographers

For casual photographers, the best portfolio option balances simplicity, affordability, and style. You don’t need fancy e-commerce or advanced SEO features. Instead, look for something easy to set up, with clean templates, and ideally free or low-cost.

Short Answer: The best option is a simple online platform like Adobe Portfolio (free with Creative Cloud) or Flickr (community + storage), depending on your goals.

Free vs Paid Photography Portfolio Platforms

Option Best For Pros Cons
Free Platforms (Flickr, Adobe Portfolio, Instagram) Beginners, hobbyists No cost, easy to start, community exposure Limited customization, ads, branding issues
Paid Platforms (Squarespace, Pixpa, SmugMug) Semi-pros, advanced hobbyists Custom domains, pro designs, client proofing Monthly costs, learning curve

Short Answer: Start free if you’re testing the waters, upgrade to paid when you want more control and branding.

Top 10 Photography Portfolio Platforms in 2025

Platform Price Best For Features
Adobe Portfolio Free (with CC) Hobbyists Easy sync with Lightroom, clean design
Squarespace $16/mo Casual + semi-pros Stunning templates, drag-and-drop
Wix Free–$14/mo Beginners Flexible templates, free plan
SmugMug $13/mo Serious hobbyists Unlimited storage, print sales
Pixpa $6/mo Pros & casuals Client proofing, store, SEO tools
Flickr Free / $8.25/mo Pro Hobbyists & community lovers Large photo sharing community
Zenfolio $9/mo Event/wedding shooters Client galleries, store
WordPress + Theme Hosting costs Custom lovers Full control, plugins
Behance Free Creative community Wide exposure, social reach
500px Free–$4.99/mo Hobbyists Social features, exposure

Short Answer: Adobe Portfolio, Squarespace, and Flickr are the most casual-friendly platforms in 2025.

Comparison: Squarespace vs Pixpa vs SmugMug

Feature Squarespace Pixpa SmugMug
Ease of Use ★★★★★ ★★★★☆ ★★★☆☆
Price $16/mo $6/mo $13/mo
Templates Stylish & modern Minimal & pro Basic
E-commerce Yes Yes Yes (print sales)
Best For Casuals & creatives Mixed needs Storage + print selling

Short Answer: Choose Squarespace for beauty, Pixpa for balance, and SmugMug for storage + selling.

Adobe Portfolio: A Great Choice for Hobby Photographers

Adobe Portfolio is free with Creative Cloud, making it a no-brainer for anyone already using Lightroom or Photoshop. It auto-syncs your images and lets you publish a portfolio in minutes.

Short Answer: Adobe Portfolio is the easiest free option for casual photographers already using Adobe tools.

Cheapest Online Portfolio Options for Beginners

If budget is tight, Pixpa ($6/mo), Wix Free Plan, or Behance (free) are excellent picks. They may not give full branding freedom, but they get you started.

Short Answer: Pixpa and Behance are the cheapest portfolio options that still look professional.

Best Free Photography Portfolio Websites

Free Platform Why It’s Good
Adobe Portfolio Clean, syncs with Lightroom
Flickr Social + community exposure
Behance Great for networking with creatives
500px Discovery by photo lovers
Wix (Free) Customization, no upfront cost

Short Answer: Adobe Portfolio and Flickr are the best free portfolio websites for casual photographers.

Photography Portfolio Templates and Design Tips

A good template should be simple, photo-first, and mobile-friendly. Look for minimal themes with full-screen images and easy navigation. Avoid clutter or too much text.

Short Answer: Use a clean, minimalist template that lets your photos speak for themselves.

Famous Photographers’ Portfolios for Inspiration

Big names like Annie Leibovitz, Brandon Woelfel, and Steve McCurry all keep portfolios that balance strong images with personal style. Casual photographers can learn by noticing how pros curate only their best work.

Short Answer: Famous photographers inspire us by showing that quality beats quantity in any portfolio.

How to Build a Photography Portfolio Without Clients

If you’re just starting, shoot personal projects, family, friends, or even objects around the house. Styled shoots, self-portraits, or travel snaps all count.

Short Answer: Build a portfolio by creating personal projects when you don’t yet have clients.

Tips to Curate and Organize Your Portfolio

Limit your gallery to 20–30 of your best images. Group photos by genre (landscapes, portraits, street). Add short, meaningful captions instead of long essays.

Short Answer: Curate fewer, stronger images and organize them by theme.

Adding Testimonials and Reviews for More Trust

Even casual photographers can ask friends, family, or peers for kind words about their photos. Adding reviews makes your portfolio more trustworthy. At Expert Clipping, we see how testimonials instantly boost confidence in services like clipping path services and photo retouching services—and it works for portfolios too.

Short Answer: Adding reviews gives your portfolio credibility and trustworthiness.

Mistakes to Avoid When Building a Portfolio

Common mistakes include uploading too many photos, mixing low-quality shots, ignoring mobile design, and skipping an “About Me” page. Another mistake is not investing in professional editing when needed. Services like ghost mannequin services or background cleanup can make a big difference in presentation.

Short Answer: Keep your portfolio simple, polished, and professional—avoid clutter and low-quality images.

Conclusion & Final Thoughts

For casual photographers, the best portfolio option is one that’s simple, affordable, and easy to update. Start free with Adobe Portfolio or Flickr. When you feel ready, upgrade to Squarespace or Pixpa for more control. Remember, your portfolio is not just a gallery—it’s your creative identity online. Keep it clean, personal, and inviting.

FAQs

Q1: What is the best online portfolio platform for casual photographers?
Adobe Portfolio and Flickr are the top free choices, while Squarespace is the best paid option for casual photographers.

Q2: How do I build a photography portfolio without clients?
Start with personal projects, friends, family shoots, or themed creative challenges to fill your portfolio.

Q3: Which free portfolio sites work best for hobby photographers?
Adobe Portfolio, Behance, and Flickr are the most reliable free options.

Q4: Should I pay for a photography portfolio as a hobbyist?
If you want a custom domain, ad-free site, and professional look, upgrading to a paid plan is worth it.

Q5: Is Instagram a good portfolio option in 2025?
Instagram is useful for exposure, but not as a primary portfolio—it lacks customization and long-term control.

, , ,

Best Guide to Editing Product Photos in Lightroom (Explained by an Expert)

EDIT PRODUCT PHOTOS IN LIGHTROOM

Looking to give your product photos that clean, professional finish? You’re in the right place! Whether you’re shooting for Amazon, Shopify, or your own website, learning how to edit product photos in Lightroom can transform average shots into scroll-stoppers. And trust me, I’ve been there. When I first started editing product photos for clients at Expert Clipping, I was overwhelmed. But with some practice, smart tools, and a bit of insider know-how, I cracked the code. Now, I’m here to help you do the same.

What Is Lightroom and Why Should You Use It?

Lightroom is Adobe’s powerful photo editing software, built specifically for photographers and editors.

It offers a clean, organized workspace, non-destructive editing, and batch processing capabilities. Unlike Photoshop, it’s great for managing and editing large numbers of product photos quickly.

Short answer: Lightroom helps you edit fast, professionally, and without damaging your original images.

How to Edit Product Photos in Lightroom: Step-by-Step

Import Your Images

Click “Import” on the bottom-left of the Library module and choose your folder. Select images and click “Import.”

Tip: Use smart collections to stay organized.

Crop and Straighten

Under the Develop module, use the Crop Overlay (shortcut: R). Keep your product centered and ensure the horizon is level.

Short answer: Crop to focus on the product and straighten for a clean look.

Adjust Exposure and Contrast

Slide the exposure to brighten your image. Adjust contrast for depth.

Quick Fix Table:

Setting Recommended Range
Exposure +0.30 to +0.80
Contrast +10 to +25
Whites +10 to +30
Blacks -10 to -30

Tweak Colors

Use the white balance tool to correct color cast. Adjust temperature and tint.

Mini-checklist:

  • Remove yellow tint
  • Ensure true white background
  • Skin tones (for model photos) should look natural

Sharpen and Remove Noise

Navigate to the Detail panel. Increase sharpening to make your product pop.

Use Spot Removal for Dust and Scratches

Click the band-aid icon. Zoom in and clean imperfections.

Short answer: A dust-free product photo always looks more premium.

7. Apply Presets or Sync Settings

To save time, create your own presets or apply edits across multiple photos using the “Sync” feature.

Comparison Table: Lightroom vs Photoshop for Product Editing

Feature Lightroom Photoshop
Batch Editing Yes No
Non-Destructive Workflow Yes Yes
Spot Correction Tools Basic Advanced
Clipping Path Precision No (use Photoshop) Yes (perfect with Pen Tool)
Best for Color/Light edits, Fast edits Detailed edits, Cutouts

Want perfect cutouts? Let Expert Clipping handle complex edits with our clipping path services. Need apparel shots without mannequins? Our ghost mannequin services deliver flawless, ready-to-use images.

Real Customer Reviews

“Expert Clipping saved me HOURS of editing time. I send my raw product shots, and they send back clean, ready-to-upload images.”
— Maria D., Etsy Seller

“I tried editing in Lightroom myself, but Expert Clipping’s edits are next-level. Now I just focus on shooting.”
— James R., Fashion Photographer

“Their white background edits and natural shadows make my Amazon listings pop. I can’t thank Expert Clipping enough!”
— Alex K., FBA Seller

Common Lightroom Editing Mistakes to Avoid

Short answer: Over-editing, inconsistent lighting, ignoring white balance.

  • Don’t crank clarity or saturation too high
  • Avoid uneven crops across multiple images
  • Always check your image on multiple screens before publishing

Best Practices to Save Time

Short answer: Use presets, organize files, and edit in batches.

Time-Saving Tip Benefit
Custom Presets Reuse settings instantly
Sync Feature Apply edits to 100s of photos fast
Lightroom Mobile Edit on the go
Outsource to Expert Clipping Save time and get pro-level results

For jewelry and accessory shots, our jewelry retouching services make every detail sparkle.

Bonus Offers from Expert Clipping

  • Get Instant Cost Estimate — Use our pricing calculator to see exactly what your edits will cost
  • Request Your First 3 Images Free — See our quality before committing
  • Subscribe & Save on Bulk Editing — Perfect for large retailers, agencies, and photographers

Final Thoughts

Editing product photos in Lightroom is easy once you get the hang of it. But if you ever feel stuck or overwhelmed, you’re not alone. I’ve walked that path and made all the mistakes. That’s why Expert Clipping exists — to save you time, reduce hassle, and deliver pro results that sell.

So whether you DIY or outsource, remember this: clean, bright, consistent photos sell more. Period.

Ready to level up your product images? Request Your First 3 Images Free from Expert Clipping today — or explore our background removal services to get that perfect, distraction-free look.

,

How to Do a Clipping Mask in InDesign (Expert Guide 2025)

Clipping Mask in InDesign

By Expert Clipping – Affordable, Accurate, and Always On Time

If you’ve ever wanted to place an image perfectly inside a shape, text, or even a group of objects in InDesign, you’re looking for clipping masks.
In this guide, I’ll answer all the common questions — from “What is a clipping mask?” to “Why is mine not working?” — so you can master it without the headache.
I’ll also share shortcuts, troubleshooting tips, and my own workflow from years of working at Expert Clipping, where we handle this kind of thing at scale.

What is a clipping mask in InDesign?

A clipping mask in InDesign is a shape that hides parts of an image so only what’s inside the shape is visible.
Think of it as putting your photo behind a window cut-out — you only see the part through the window.

Quick Answer:
In InDesign, a clipping mask is created by placing an image inside a frame or shape using the Paste Into command.

If you need similar techniques for isolating objects, our background removal service can help you prepare images perfectly before importing them.

Why use a clipping mask in InDesign?

Clipping masks give you precise control over how images appear without destroying the original image.
I often use them for creative text effects, custom-shaped images, or fitting product photos into templates without cropping permanently.

Why It Matters:
It’s faster than editing in Photoshop, and it keeps your layout flexible — just like our multi clipping path services allow quick edits while keeping image quality intact.

When should I use a clipping mask instead of other masking tools?

Use a clipping mask when you want clean, shape-based masking in your InDesign layout — especially for text fills, logo mockups, or custom graphics.
If you need soft fades or transparency gradients, Photoshop is usually better.

If you need soft fades or transparency gradients, Photoshop is usually better, and our photo retouching services can help refine the final look.

Where is the clipping mask tool in InDesign?

There’s no “Clipping Mask Tool” button. The feature is accessed via:
Edit > Paste Into or Right-click > Paste Into after selecting your shape.

Who can benefit from using clipping masks in InDesign?

Designers, marketers, publishers, and e-commerce sellers all benefit.
At Expert Clipping, we see it most with catalog designers, ad agencies, and brand teams who need consistent layouts often combined with product photo retouching for polished results.

Which version of InDesign supports clipping masks?

All modern versions, including InDesign 2022, 2023, and 2025, support clipping masks.
Shortcuts and menus haven’t changed much.

How does a clipping mask work in InDesign?

It works by using a vector shape (frame) as a “mask” to show only the image area inside the shape.
You can still move or resize the image within the mask anytime.

What’s the difference between a clipping mask and a frame?

All clipping masks in InDesign are frames, but not all frames are masks.
A frame becomes a mask when you place an image into it rather than just over it.

Why is my clipping mask not working?

Common causes:

  • The shape and image are on different layers.
  • The shape isn’t a valid frame (convert text to outlines first).
  • The image is locked or grouped incorrectly.

Quick Fix Table:

Problem Quick Fix
Paste Into greyed out Select shape first, then image
Wrong portion showing Use Direct Selection Tool (A) to move image
Mask not applied Check both are on the same layer

How do I prepare images for a clipping mask?

Use high-resolution formats like TIFF, PSD, or PNG for the cleanest results.
Make sure your image is already imported into InDesign or ready to place.

If you’re working with jewelry, our jewelry retouching services can make your product images shine before you apply masks in InDesign.

Best practices for clipping masks

  • Always keep a copy of the original image outside the mask.
  • Use Fit Frame Proportionally for scaling.
  • Name your layers to stay organized.

File formats that work best

  • TIFF / PSD – Best for quality.
  • PNG – Best for transparency.
  • JPEG – Works, but avoid heavy compression.

InDesign vs Photoshop vs Illustrator

  • InDesign: Best for layout and vector-based masks.
  • Photoshop: Best for soft edges and complex masking.
  • Illustrator: Best for vector illustrations and shapes.

When is the best time to create a clipping mask?

Usually after placing your images and finalizing your layout’s grid, so you know exactly how they should fit.

How to Do a Clipping Mask in InDesign

Step-by-step: How to create a clipping mask in InDesign

Step Action Shortcut (if any)
1 Draw your shape or select existing frame
2 Place your image Cmd+D (Mac) / Ctrl+D (Win)
3 Cut the image Cmd+X / Ctrl+X
4 Select the shape
5 Paste Into Cmd+Alt+V / Ctrl+Alt+V

How to make a clipping mask with multiple objects

Group them first (Cmd+G / Ctrl+G), make a compound path (Object > Paths > Make Compound Path), then Paste Into.

How to make a clipping mask with text

Convert text to outlines (Type > Create Outlines), then Paste Into.
Perfect for image-filled headlines in magazine covers.

Releasing a clipping mask

Right-click on the masked object and choose Release Clipping Mask or use Object > Clipping Path > Options.

Clipping mask shortcut in InDesign

Cmd+Alt+V (Mac) / Ctrl+Alt+V (Win) → Paste Into.

Real customer review from Expert Clipping

“I used to waste hours trying to mask images in InDesign until I saw Expert Clipping’s guide. I even sent them my first 3 images for free, and they nailed the look in minutes. Now my catalog designs look so much more polished.”L. Martinez, E-commerce Seller

Why Expert Clipping can help

We do this at scale — from batch clipping paths to complex text masks.
Get Instant Cost Estimate → Know your price in seconds
Request Your First 3 Images Free → Test our speed and quality
Subscribe & Save on Bulk Editing → Perfect for agencies and sellers

Final Tip:
If you’re struggling, don’t fight with it. Let us at Expert Clipping handle it, so you can focus on your creative work. Whether you need bulk clipping path services, ghost mannequin services, or complex vector masks, we’re here to help.

Best Camera Setting for Product Photography: Complete Guide for Sharper, Cleaner, Sell-Worthy Shots

Best Camera Setting for Product Photography

Have you ever clicked what you thought was the perfect product shot—only to find it’s blurry, poorly lit, or just off in color? You’re not alone. Getting your product images right isn’t about having the most expensive camera; it’s about understanding how to use the one you’ve got.

Whether you’re an eCommerce brand owner, a DIY product photographer, or just trying to level up your image game this guide breaks down the best camera setting for product photography in simple, friendly language.

We’ll cover ISO, aperture, shutter speed, white balance, and more. I’ll even share my favorite go-to settings from real studio shoots with Expert Clipping clients. And yes we’ll tackle those annoying blurry shots and confusing file formats too.

The best product photography camera settings usually include ISO 100, aperture f/8 to f/11, and shutter speed of 1/125 or faster with consistent white balance and RAW format.

Why Camera Settings Matter

Your product photos are your silent salespeople.

Think of it this way: no one buys a pizza from a blurry menu pic. It’s the same with your product. Sharp, bright, color-accurate photos help customers trust your brand and click “Add to Cart.”

So let’s learn the best manual settings not just to take better photos, but to take consistent, conversion-boosting photos.


What Are the Best Manual Camera Settings?

Setting Ideal Value Why It Works
ISO 100–200 Clean, noise-free image
Aperture f/8 – f/11 Sharp focus across product
Shutter Speed 1/125 – 1/250 sec Prevents motion blur
White Balance Manual or Custom Accurate color reproduction
File Format RAW More control in editing

Short Answer: Use ISO 100, aperture f/8, shutter speed 1/125, manual white balance, and shoot in RAW for best results.

Best Camera Setting for Photography

Understanding ISO: Keep It Low, Keep It Clean

ISO controls your camera’s sensitivity to light. High ISO = brighter photo, but it also brings grain or noise. For product photography? That’s a big no-no.

Stick with ISO 100 (or 200 if needed) to keep things crisp and clean.

Pro Tip: If your image looks too dark at ISO 100, add more light not ISO.


Aperture (f-stop): Your Product’s Depth of Field Game

Aperture controls how much of your image is in focus.

  • Use f/8 to f/11 for a deep depth of field. Your entire product will be sharp.
  • Avoid f/1.8 or f/2.8 unless you want just part of the product in focus.

Quick Win: For sharpness from front to back, stick to f/8–f/11.


Shutter Speed: Freeze That Frame

Shutter speed decides how long your camera sensor is exposed to light. If it’s too slow, even the tiniest movement will blur your photo.

  • Use 1/125 sec or faster.
  • On a tripod, slower shutter speeds are fine but beware of camera shake if handheld.

Snapshot Tip: Faster shutter = sharper shots, especially for shiny or reflective items.


White Balance: Get the Colors Just Right

White balance tells your camera what “white” should look like. It affects all colors in your shot.

  • Manual or Custom White Balance is best.
  • Don’t trust Auto WB—it can shift your tones under different lighting.

Color Accuracy Tip: Set custom white balance using a gray card for eCommerce consistency.


RAW vs JPEG: Which Format Should You Use?

File Format Pros Cons
RAW Maximum editing control, high quality Larger file size
JPEG Small file size, fast upload Limited editing, loss of quality

Ecommerce Essential: Always shoot RAW for flexibility—then export JPEGs for your listings.


Manual vs Auto Mode: Which One Wins for Product Photography?

Manual mode gives you full control over ISO, shutter speed, and aperture.

Auto mode might guess wrong—especially with white backgrounds or shiny items. One click, and your exposure is toast.

Clarity Tip: Manual mode ensures every image looks the same across your catalog.


Exposure Triangle: How to Balance ISO, Aperture & Shutter

Think of ISO, aperture, and shutter speed like the legs of a three-legged stool. Change one, and you must adjust the others to keep your photo balanced.

Balance Rule:

  • Low ISO = less light (compensate with wider aperture or slower shutter).
  • Narrow aperture = less light (compensate with higher ISO or slower shutter).
  • Fast shutter = less light (compensate with more light or higher ISO).


When to Use a Tripod (Hint: Almost Always)

A tripod keeps your camera stable—period.

  • Use it for sharpness
  • Use it for consistency
  • Use it when shooting in low light

Sharp Tip: Even if your camera has stabilization, a tripod eliminates shake and frames every product identically.


How to Focus Right: Sharpness That Sells

Use manual focus or single-point autofocus on the key feature of your product.

Focus on:

  • The label for bottles
  • The gem for jewelry
  • The stitching for clothes

Focus Hack: Use your camera’s Live View and zoom in to confirm sharpness before clicking.


Best Settings by Lighting Type

Lighting Type ISO Aperture Shutter Speed
Natural Light (window) 100–200 f/8–f/11 1/125 or slower
LED Continuous Light 100 f/8 1/125–1/200
Flash 100 f/11 1/200 or camera sync speed

Pro Move: Match your settings to your lighting to prevent shadows or glare.


Sample Camera Settings by Product Type

Product Type Suggested Settings
Jewelry ISO 100, f/11, 1/200 sec
Clothing ISO 100, f/8, 1/125 sec
Electronics ISO 100, f/9, 1/160 sec
Beauty Products ISO 100, f/10, 1/200 sec

Need better jewelry photos? Try our jewelry retouching services for flawless sparkle.

Real Customer Reviews: What the Pros Are Saying

⭐️⭐️⭐️⭐️⭐️ “I followed this guide and my Amazon listings look 10x better! Expert Clipping helped clean up the background, too.” – Jenna T., Handmade Skincare Owner

⭐️⭐️⭐️⭐️⭐️ “I used to guess camera settings. Now I use f/8 and ISO 100 every time. Consistent photos = more sales.” – Ravi K., Shopify Store Owner

⭐️⭐️⭐️⭐️⭐️ “Expert Clipping not only fixed my photos but taught me what settings to use. Huge time saver!” – Thomas B., Product Photographer

Expert Clipping Tips & Freebies

We’ve edited thousands of eCommerce images. Here’s what we offer:

First 3 Images Free
Free Pricing Calculator
Bulk Discounts for Sellers

Need more help? We offer:


Expert Clipping Tips + Freebies

At Expert Clipping, we’ve worked on thousands of eCommerce images. We know what pops and what flops.

Freebies for You:

  • Request Your First 3 Images Free → Test our background removal or retouching.
  • Get Instant Cost Estimate → Use our pricing calculator for bulk edits.
  • Subscribe & Save on Bulk Editing → Ideal for sellers with 100s of SKUs.

Need pro editing? We help photographers, Amazon sellers, and fashion brands turn “meh” into “wow.”

Best Camera Setting


Conclusion: Dial in the Settings, Watch Your Sales Rise

Getting the best camera setting for product photography isn’t about guessing—it’s about understanding your tools.

Start with ISO 100, f/8 aperture, and 1/125 shutter speed. Set white balance manually. Shoot in RAW. Mount that camera on a tripod. Boom—you’re now in control.

Want the cherry on top? Send your shots to Expert Clipping for polish, perfection, and pure profit potential.


❓ Frequently Asked Questions

  1. What’s the best ISO for product photography?
    ISO 100 is ideal for clean, sharp images. Use ISO 200 only if your lighting is limited.
  2. Should I always shoot in RAW format?
    Yes. RAW gives you more flexibility for color correction, shadows, and highlights in post-editing.
  3. Can I shoot product photos without a tripod?
    Technically yes, but for consistent, sharp, and repeatable results, a tripod is highly recommended.
  4. Is f/8 always the best aperture?
    It’s a great starting point. f/8–f/11 offers sharpness and depth. For jewelry or macro shots, f/11–f/16 may be better.
  5. What happens if I use Auto White Balance?
    You risk inconsistent colors—especially under different lights. Set custom WB for accuracy.