How to Photograph White Products on a White Background for eCommerce
Photographing white products on a white background sounds simple… until you try it. Everything looks too bright, too dull, or just blends into one big washed-out blob. I’ve been there. The first time I tried this setup, I felt like I was trying to photograph a snowman in a snowstorm. But with the right steps, you can get crisp, clean, professional eCommerce product photos without frustration.
In this guide, I’ll walk you through the entire process from lighting and camera settings to composition and editing. Whether you’re shooting for Amazon, Shopify, Etsy, or your own store, this breakdown will help you get consistent, studio-quality results even with a simple setup.
Introduction to White-on-White Photography
White-on-white photography is exactly what it sounds like: shooting white products against a white background. It looks minimal, clean, and professional perfect for eCommerce. But because the product and background are the same color, the camera struggles to tell them apart. That’s why you need to use lighting and exposure carefully to make the product stand out.
Why White Product Photography Matters
White product photography isn’t just an aesthetic choice. It’s the industry standard for eCommerce because:
- It highlights the product clearly without distractions.
- It creates trust—clean photos make your brand look reliable.
- It blends well with most website designs.
- Marketplaces like Amazon require pure white backgrounds (RGB 255,255,255).
If your product photos look dark or grayish, you risk losing sales before shoppers even click your listing.
Learn how white backgrounds boost conversions in our guide on background removal services.
Essential Gear You Need
You don’t need a high-end studio. Here’s a simple list of essentials:
● Camera (DSLR, mirrorless, or high-end smartphone)
Any modern camera works as long as you can control exposure.
● Tripod
Keeps your shots sharp and consistent.
● Lighting
Use softbox lights, LED panels, or daylight.
- Softbox lights
- Continuous LEDs
- Natural light from a large window
● White backdrop
Choose paper, vinyl, or fabric—but avoid textured surfaces.
● Reflectors
To bounce light and reduce shadows.
● Diffusers
For softening harsh light.
Think of these tools as the paintbrushes you need to “sculpt” your product with light.
Choosing the Right White Background
Not all white backgrounds are equal. Here are your best options:
● White Seamless Paper
Best for smooth, wrinkle-free backgrounds.
● White Acrylic Sheet
Gives a glossy reflection effect.
● White Cloth
Budget-friendly but needs steaming or ironing.
● Lightbox
Perfect for small products.
The key is consistency—stick with one type so your catalog looks uniform.
Understanding Light for White Backgrounds
To make white products stand out, you need controlled lighting. The goal is to light the background enough to make it white, but not so much that it overwhelms the product.
You want:
- Soft light (so shadows aren’t harsh)
- Even light (no dark patches)
- Separate background and product lights
For extra tips, see our product photo retouching guide.
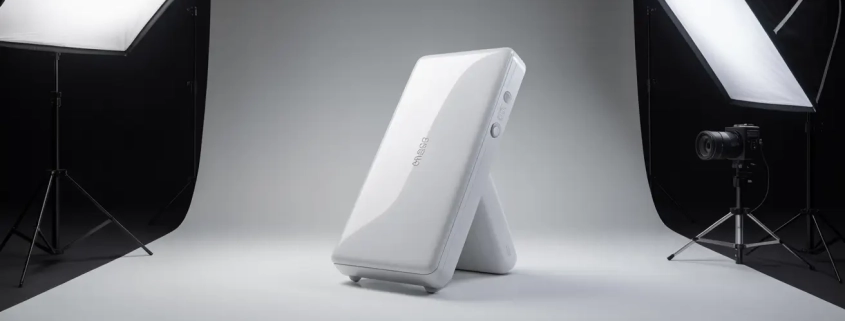
Setting Up the Perfect Lighting Arrangement
Here’s a simple, effective setup:
● Two lights facing the background
These ensure the backdrop becomes pure white.
● One or two soft lights angled toward the product
This brings out shape, texture, and detail.
● Reflectors placed on the sides
To fill shadows.
If you only have one light, place it at a 45° angle and use reflectors on the opposite side.
Camera Settings for White-on-White Shots
You don’t need complicated settings. Start with:
- ISO: 100–200
- Aperture: f/8–f/11 for clarity
- Shutter speed: 1/125 or as needed
- White Balance: Set manually or use “Daylight”
- Shoot in RAW: Gives more flexibility in editing
Your camera might want to darken the scene, so be prepared to correct exposure.
How to Expose White Products Properly
Exposure is tricky because your camera thinks everything is too bright.
Here’s what to do:
● Use Exposure Compensation (+1 to +2 EV)
This brightens the whites correctly.
● Check the histogram
Aim for a gentle curve toward the right, not spiking.
● Make sure details don’t blow out
You still want to see shape, texture, and edges.
Positioning Your Product
Placement affects how clean your final image looks.
● Center the product
Keeps your layout consistent.
● Keep some distance from the background
This reduces unwanted shadows.
● Adjust angles
Some products look better slightly tilted; others need a straight-on shot.
For more tips on presentation, check out our photo cut-out service.
Avoiding Color Casts and Shadows
Sometimes the product picks up blue, yellow, or green tones from lights or surroundings. You can fix this by:
- Using lights with the same color temperature
- Avoiding mixed lighting (window + bulb)
- Adding diffusion to soften shadows
- Using white foam boards as reflectors
Clean color means your product looks true to life.
Shooting Different Types of White Products
● Glossy Products (ceramics, plastics, bottles)
Use larger diffusers to soften reflections.
● Matte Products (fabric, paper, food items)
Increase contrast slightly to keep details visible.
● Transparent Products (glass, acrylic)
Add backlighting and dark edges to define shape.
● Textured Products
Use side lighting to bring out patterns.
Each category needs slight adjustments, but the foundation remains the same.
Using Reflectors and Diffusers
Reflectors bounce light back onto the product, reducing shadows and adding dimension.
Diffusers soften the main light so the product looks smooth and natural.
This combo helps prevent the product from blending into the white background.
Step-by-Step Shooting Workflow
Here’s a simple workflow you can follow every time:
Step 1: Set up background
Make sure it’s clean and wrinkle-free.
Step 2: Position lights
One or two for the product, two for the background.
Step 3: Place your product
Keep some distance from the backdrop.
Step 4: Dial in camera settings
Start with ISO 100, f/8, +1 EV.
Step 5: Take test shots
Check exposure, shadows, and color.
Step 6: Adjust lighting
Fix shadows, remove color casts, tweak angles.
Step 7: Shoot from multiple angles
Front, side, 45°, overhead.
Step 8: Review images
Zoom in for dust, scratches, and details.
Step 9: Move to editing
Enhance brightness, contrast, and edges.
Once you follow this workflow a few times, it becomes second nature.
Editing White Product Photos for eCommerce
Editing is where everything comes together.
● Increase brightness slightly
Make the background pure white.
● Adjust contrast
To make the white product stand out.
● Use the brush tool
Brighten only the background when needed.
● Fix imperfections
Remove dust, scratches, or fingerprints.
● Export in high resolution
Most stores require at least 1500–2000 px on the long side.
If editing feels tricky, you can always try our photo retouching services trusted by eCommerce brands.
Final Tips for White Background Consistency
- Always shoot with the same lighting setup.
- Save your camera settings as a preset.
- Use the same background material for every product.
- Keep your editing style consistent across the entire catalog.
Consistency builds brand trust and makes your store look more professional.
Conclusion
White product photography may seem intimidating at first, but once you understand lighting and exposure, everything becomes easier. Think of it as learning to “paint with light.” With the right setup, your white-on-white images will look clean, bright, and perfect for eCommerce—helping your brand shine and your products stand out.
If you want to level up your visuals, explore our clipping path services — perfect for creating pure white backgrounds and professional product edges.
FAQs
1. Why is white product photography so challenging?
Because the product and background blend together, making it hard for the camera to capture detail without overexposure.
2. Do I need expensive gear for white-on-white photography?
Not at all. A simple light setup, a tripod, and a white background are enough to get professional results.
3. How do I keep the background pure white?
Light the background separately using two lights or increase brightness selectively during editing.
4. Should I use natural or artificial light?
Both work, but artificial light gives more consistency. Natural light is great if you have a large window with soft daylight.
5. Can I fix a grayish background in editing?
Yes, you can brighten the background using the brush tool, curves adjustment, or levels, but make sure it still looks natural.