How to Edit Product Photos in Lightroom – Step-by-Step Guide for 2025
Ever scrolled through an online store and thought, “Wow, these products just pop off the screen”? That magic is often thanks to professional editing and Lightroom is the secret sauce. Whether you’re a small business owner, an Amazon seller, or a photographer, mastering edit product photos in Lightroom is the key to leveling up your online visuals.
At Expert Clipping, we know that polished product photos can make or break a sale. In this guide, I’ll walk you through every step, setting, and secret Lightroom trick like we’re editing side by side. Let’s turn your good product shots into scroll-stopping, cart-filling masterpieces.
➡️ Request Your First 3 Images Free – Test our editing quality at Expert Clipping!
What Is Lightroom Used for in Product Photography?
Lightroom is Adobe’s powerful image editing tool designed for photographers and creators. It’s like your visual control center for organizing, tweaking, and perfecting every detail of a photo. For product shots, it’s where you:
- Fix color accuracy
- Enhance textures and contrast
- Batch edit hundreds of images efficiently
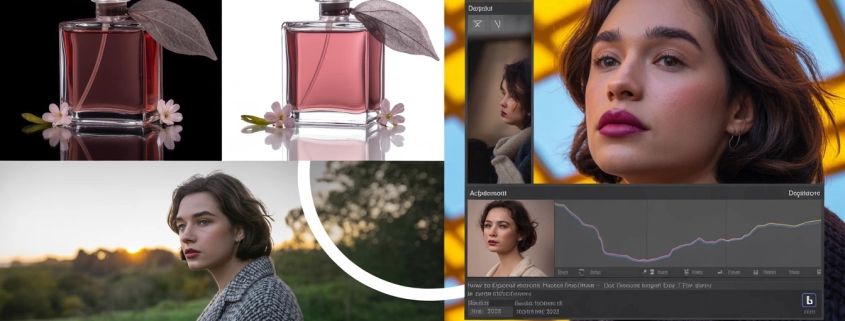
The Develop module is where all the magic happens. Think of it as your virtual darkroom only faster, cleaner, and digital.
🟢 Want consistency across your entire product catalog? Lightroom makes it happen.
Why Use Lightroom to Edit Product Images in 2025?
Lightroom isn’t just another app—it’s the tool trusted by eCommerce giants and pro photographers alike. Why?
- Batch Editing: Apply edits to 10 or 1,000 images in seconds.
- Non-Destructive Workflow: Edits never overwrite your original photos.
- User-Friendly Interface: Especially great for beginners.
➡️ Subscribe & Save on Bulk Editing with Expert Clipping’s monthly plans.
Best Lightroom Tools for Product Photography
Here are the key Lightroom tools every product photographer should master:
| Tool | Function |
| White Balance | Adjusts color tone to reflect natural whites |
| Exposure | Brightens/darkens the image |
| Highlights & Shadows | Recovers lost details in bright/dark areas |
| Clarity | Enhances texture and sharpness |
| Spot Removal | Fixes dust, scratches, and blemishes |
White balance is especially vital. Products should appear exactly as they do in real life—or returns will spike.
Step-by-Step: How to Edit Product Photos in Lightroom
Let’s walk through editing a product photo, step-by-step:
✅ Step 1: Import & Organize
- Use folders and keywords to stay organized.
✅ Step 2: Adjust White Balance
- Use the eyedropper on a neutral gray area.
✅ Step 3: Tweak Exposure & Contrast
- Keep the product bright but not blown out.
✅ Step 4: Recover Highlights & Shadows
- Bring out textures in fabrics, bottles, or packaging.
✅ Step 5: Sharpen with Clarity
- Don’t overdo it. +10 to +20 is usually perfect.
✅ Step 6: Crop & Straighten
- Make sure the product is centered and aligned.
✅ Step 7: Spot Removal
- Clean up dust, background smudges, etc.
✅ Step 8: Sync Edits for Batch Processing
- Select images > Click “Sync” > Choose settings to copy.
✅ Step 9: Export
- JPEG, sRGB, 72dpi for web; TIFF for print.
➡️ Get a Quick Quote for our product photo retouching.
Batch Editing Made Easy: The Sync Feature Explained
Lightroom’s Sync feature is like a copy-paste for edits. You edit one image perfectly, then apply those settings to others with one click.
| Feature | Benefit |
| Sync | Saves time, ensures consistency |
| Auto Sync | Real-time batch editing while adjusting sliders |
Pro Tip: Create a “master image” from each shoot as your baseline edit.
➡️ Try your first 3 images free to see our synced editing in action.
Best Export Settings for Shopify, Etsy, Amazon & More
Here’s a quick comparison chart for export settings:
| Platform | Format | Size | Color Space |
| Shopify | JPEG | 1200px wide | sRGB |
| Amazon | JPEG | 2000px+ | sRGB |
| Etsy | JPEG | 1000-1500px | sRGB |
Use 72dpi for web, and always double-check color mode is sRGB.
What Are Lightroom Presets & Are They Worth It?
Presets are saved sets of edits. Click once boom, your image is transformed. Think Instagram filters, but smarter.
You can:
- Buy from marketplaces
- Create your own
- Use Expert Clipping’s free starter pack
➡️ Save time with bulk edits—we can add your preset to every shot.
Lightroom for Mobile – Can You Edit on the Go?
Yes, you can! Lightroom Mobile is surprisingly powerful. Perfect for:
- Instagram pre-edits
- Quick adjustments during shoots
- Editing while commuting
But it lacks the batch tools and export controls of desktop.
Lightroom vs. Photoshop: Which One Wins for Products?
| Feature | Lightroom | Photoshop |
| Batch Editing | ✅ | ❌ |
| Background Removal | ❌ | ✅ |
| Presets | ✅ | ❌ |
| Layer Control | ❌ | ✅ |
Verdict: Use Lightroom for speed. Use Photoshop for heavy retouching.
Need to remove backgrounds? Check out our clipping path services and ghost mannequin services.
For jewelry, see our jewelry clipping path for perfect shine.
➡️ Need background removal? Expert Clipping has you covered.
Troubleshooting Common Lightroom Product Editing Issues
Problem: Colors look weird after export.
Fix: Set color profile to sRGB.
Problem: Lightroom is slow.
Fix: Increase RAM or use Smart Previews.
Problem: Sync not working.
Fix: Select images, click “Sync” in the bottom right.
Tips to Speed Up Your Lightroom Workflow
- Use Smart Previews to edit faster.
- Create a naming system (e.g., SKU_ProductName_Date).
- Save your favorite edits as presets.
➡️ Subscribe & Save on Bulk Editing with Expert Clipping’s pro packages.
Who Should Use Lightroom for Product Editing?
- Ecommerce Sellers: For fast, brand-consistent images
- Photographers: For flexibility and power
- Agencies: For team workflow and presets
Even if you’re just starting out, Lightroom grows with you.
➡️ Get Instant Cost Estimate for large batch photo editing.
Where to Go Next: Presets, Metadata & More
Apply Metadata:
- Add keywords like “red hoodie” or “glass vase” for SEO.
Organize with Collections:
- Group images by client, season, or product line.
Download Presets:
- Start with Expert Clipping’s free preset pack for new users.
Conclusion & Final CTA
Editing product photos in Lightroom doesn’t have to be scary. With a few simple steps, you can go from decent shots to eye-catching masterpieces that boost sales and reduce returns.
Whether you’re DIY-ing it or ready to outsource, Lightroom is your best friend.
👉 Don’t have time to edit hundreds of photos? Let Expert Clipping handle the work for you.
➡️ Request Your First 3 Images Free
➡️ Subscribe & Save on Bulk Editing
FAQs
- Can Lightroom remove backgrounds from product photos?
No, Lightroom can’t remove detailed backgrounds—Photoshop or Expert Clipping’s background removal service is better. - Should I shoot in RAW or JPEG for editing in Lightroom?
RAW. It captures more data and gives you better editing control. - What’s the best Lightroom version for beginners?
Lightroom CC is easier for beginners, while Classic is great for batch edits. - Are Lightroom edits non-destructive?
Yes, your original photo stays untouched. Edits are saved as instructions. - Can I use Lightroom on my phone?
Yes! Lightroom Mobile is great for light edits and sharing on the go.
Need help fast? Visit Expert Clipping and start your free trial today.