ISO Aperture Shutter Speed: Master Product Photography Settings
When you’re doing product photography, using the right settings for ISO, aperture and shutter speed is key. In this guide I’ll walk you through the best camera settings for product shots. I’ll share what works for studio setups, daylight scenes, smartphone shoots and budget workflows using Expert Clipping tips you can apply right away. Let’s get your product photos sharp, clean and consistent.
Best Camera Settings for DIY Product Photography (ISO, Aperture & Shutter)
When you photograph a product, three settings matter most: ISO, aperture f-stop and shutter speed. Together they determine how bright the photo is, how much is in focus and how sharp the image will be. The goal is clean, crisp product shots no blur, no grain, full detail.
Start like this: set ISO to its lowest native value for example ISO 100 to keep noise down. Set your aperture around f/8 to f/11 so the whole product is in focus. Then adjust shutter speed to get correct exposure. Using a tripod helps because your subject isn’t moving so you can use a slower shutter speed and avoid camera shake.
If you switch to manual mode which lets you control all three, you’ll gain much better consistency than relying on auto-settings. Many DIY product photographers find this shift makes a big difference.
Studio Camera Settings: Exact ISO, Aperture & Shutter for Sharp Product Photos
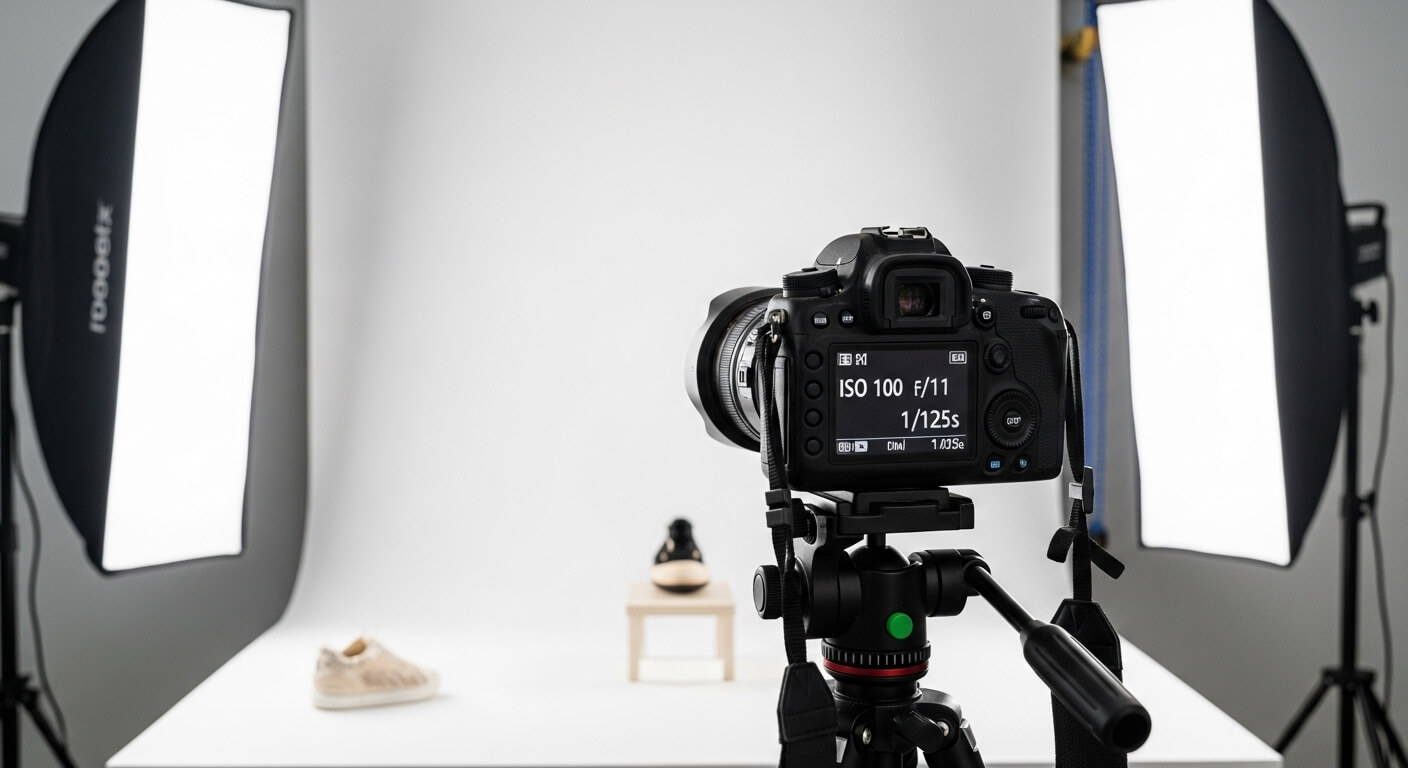
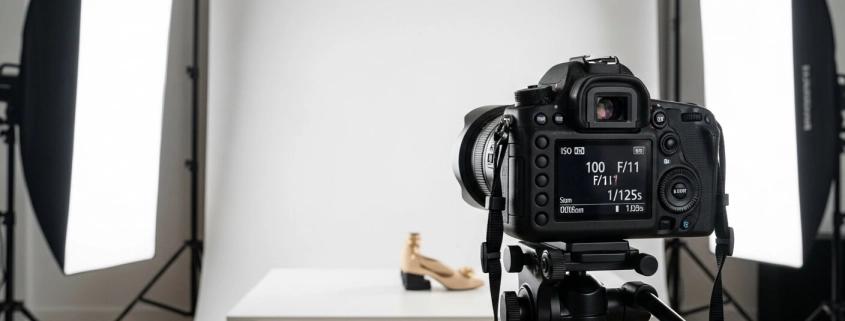
In a studio environment where you control your lighting, you can aim for optimal settings. For example: ISO 100 or as low as your camera allows, aperture f/11 to f/16 to maximize depth of field, and shutter speed adjusted to match your light intensity often somewhere between 1/60 s and 1/125 s if using continuous light, or sync speed if using strobes.
Using strobes: keep ISO at its minimum, set shutter speed to your camera’s flash sync often 1/200 s or 1/250 s and use aperture to control how bright the product appears. Shutter speed won’t matter as much once sync is reached.
For example: you might shoot ISO 100 / f/11 / 1/125 s with a soft box light and tripod. That gives you clean files, plenty of depth, and control over the background. Then you can later pass the image to services like Expert Clipping for post-production, or perform your own editing.
8 Simple Camera Settings Every Beginner Needs for Product Photography
Here are eight beginner-friendly settings or rules you should keep in mind:
- Shoot in RAW if your camera allows it – gives more editing flexibility.
- Use the lowest native ISO (e.g., ISO 100) to minimize noise.
- Use a narrow aperture higher f-stop like f/8–f/11 so the whole product is sharp.
- Use a tripod so you can use slower shutter speeds without blur.
- Use manual mode (M) rather than auto or program mode to lock in your settings.
- For white background shots, use consistent lighting and expose to really blow out the background while keeping your product properly exposed.
- Monitor your histogram and avoid clipped highlights or deep blacks.
- Clean your product, background and lighting setup before shooting dust, smudges and inconsistent lighting ruin results.
How to Choose Aperture for Product Photos: Depth of Field Explained
Aperture the f-stop controls two main things: how much light enters the lens, and how much of the scene is in focus depth of field. A low f-stop number like f/2.8 means a wide aperture: lots of light, but shallow focus good for blurred background. A higher f-stop like f/11 or f/16 means a narrow aperture: less light, but more of the product is in focus.
For product photography, we generally prefer a narrower aperture higher f-stop because we want the entire product sharp and clear. That is especially important for e-commerce, where every detail matters. If you used f/11, you will have more depth of field and less risk of part of your product being out of focus. If you went too wide say f/2.8, you might only have a small slice of the product in focus which can look unprofessional.
But there are exceptions: if you are trying to highlight a detail like a logo on a watch, or a texture on fabric, you might choose a slightly wider aperture to blur the rest and draw attention. The key is to match the aperture to your intent.
Low ISO, Narrow Aperture, Slow Shutter: A Step-by-Step Product Photography Workflow
Here is a step-by-step workflow you can follow, using the “low ISO / narrow aperture / slow shutter” strategy:
- Set up your product on a clean table or light box. Use a white background if required pure white for e-commerce.
- Mount your camera on a tripod. Use manual mode (M).
- Set ISO to lowest native e.g., ISO 100.
- Set aperture to f/11 or f/16 if you need extra depth.
- Choose shutter speed such that exposure is correct use your camera light meter or histogram. Because ISO is low and aperture is narrow, shutter will likely be somewhat slower but the tripod ensures no blur. For example 1/60 s or 1/30 s depending on your lighting.
- Take test shots. Review them. Check focus, clean background, no motion blur, no noise. Check the histogram for clipped highlights.
- If the image is too dark: raise shutter speed slower would make brighter, or open aperture a bit smaller f-stop if you are okay with slightly less depth of field. If too bright: increase shutter speed faster or narrow aperture higher f-stop. You could also slightly raise ISO but only if necessary since higher ISO adds noise.
- Once satisfied, photograph your product from the required angles top, front, macro details and feed the shots to post-production in this case you might hire or partner with Expert Clipping for background removal, clipping path, shadow creation, etc.
By following this workflow you ensure consistent high-quality results. Many professionals swear by the “low ISO + narrow aperture + tripod + slow shutter” method because the product is static you don’t need freezing speed.
Optimal Lenses & Settings for Product Photography (Shoes, Jewelry, Apparel)
Choosing the right lens also makes a difference. For larger products like shoes or apparel, a standard lens 50 mm or 85 mm on a full-frame camera works well because it gives natural perspective and minimal distortion. If you are shooting small items like jewelry or macro details, you might use a macro lens (e.g., 90mm macro on APS-C) so that you can focus close and capture fine texture.
For example: a 50 mm lens might be ideal for general e-commerce shots; an 85 mm lens gives compressed perspective which can look premium and is often used in higher-end apparel photography. A macro lens allows you to zoom in on stitching, gemstones or fine surfaces. In all these cases you’ll still follow the ISO + aperture + shutter rules: lowest ISO, narrow aperture to get everything in focus, and adjust shutter speed accordingly.
If you are using an 85mm lens for e-commerce photos of shoes or apparel, set your aperture around f/8–f/11, ISO 100–200, and shutter speed matched for your lighting. For macro jewelry shots: you may go f/16 for even more depth, ISO 100, and correspondingly slower shutter speed tripod essential.
Natural Light vs Strobes: Camera Settings for Window & Studio Product Shoots
Natural light setups and studio strobe/continuous lighting each have pros and cons. In window-light natural light setups you may need to raise ISO say to 200-400 if light is weaker, widen aperture a little say f/8 and ensure you still use a tripod because shutter may slow. For example, in a daylight shoot you might use ISO 200, f/8, shutter 1/30s. Pixel-based resources suggest ISO 200-800 when using natural light.
In a studio with controlled lighting soft boxes or strobes you can keep ISO at minimum 100, set aperture f/11–f/16, and shutter speed in sync with your lighting if using strobes, at or below sync speed). Light is consistent so you get full control. One article says: “if you are using continuous light, you may choose the meter reading, but if using strobes use shutter speed to sync and aperture to control brightness.”
Therefore:
- Natural light variant: ISO 200–400, f/8, shutter speed matched to light or tripod used for slower shutter.
- Studio variant: ISO 100, f/11–f/16, shutter speed 1/200 s (or sync speed) if strobes, or slower if continuous and tripod.
How to Shoot White Background Product Photos (Settings + Lighting Cheatsheet)
White background product photography is common in e-commerce (pure white = #FFFFFF). Here’s a cheat-sheet for settings + lighting for white background:
- Use a white fold, sweep or lightbox as background. Prop your product so that no harsh shadows fall onto the white.
- Set ISO to 100 or lowest.
- Set aperture to f/11 or f/16 if you need extra depth.
- Set shutter speed so that the background is properly exposed often slightly over-exposed relative to your product test and adjust.
- Use soft, even lighting umbrella, soft box, diffused window. Avoid direct harsh light that creates “hot spots”.
- Use a tripod. Shoot RAW so you can fine-tune in post.
- After shooting, check histogram: ensure product detail is good and background is near white without clipping crucial parts of the product.
- Then in post you may send to Expert Clipping or similar for clipping path, background cleanup, consistent white background, shadow creation and output ready for e-commerce.
Fast Product Photography on a Budget: Settings That Get Consistent Results
You don’t need a huge budget to get clean results. Here’s a budget workflow:
- Use a simple table, white foam-board background, a window with indirect daylight or cheap continuous LED panel.
- Mount your camera on a tripod can get a decent one for under $100.
- Use lowest native ISO 100.
- Use aperture f/8–f/11 for decent depth.
- Use shutter speed that matches light with tripod you can go slower.
- Use a reflector white foam board to bounce light and reduce shadows.
- Shoot RAW, clean in post, and if you serve many images outsource to Expert Clipping for background removal or clipping path.
This gives you consistency, sharpness and the ability to scale without heavy gear. Many guides mention that lens and lighting matter more than expensive bodies.
Troubleshooting Exposure: Metering, Histogram & Camera Settings for Product Photos
Even with good gear, things can go wrong. Here are common issues and fixes:
- Blown highlights: If your background is pure white but your product has bright parts, the camera may over-expose. Use histogram to check: the right edge should not be spiking massively. If it is, reduce exposure faster shutter, narrower aperture or use fill light.
- Under-exposed product: If product looks dark, either increase shutter time slower, open aperture smaller f-stop or raise ISO but watch noise.
- Shallow depth of field showing parts out of focus: Increase aperture higher f-stop or switch to smaller aperture to increase depth.
- Inconsistent exposures across product shots: Use manual mode and fixed settings rather than auto. Lock metering mode spot or center-weighted that suits your scene.
- Metering errors: Use your camera’s histogram rather than trusting the LCD preview. Many product photography guides highlight this.
- Camera shake / blur: Use a tripod, use self-timer or remote release, and ensure shutter isn’t extremely slow unless tripod is stable.
Using these checks will prevent most exposure problems and make your job or your service at Expert Clipping easier in post-production.