How to Remove Mannequin from Photo: Best Methods, Tools & Tips (Explained)
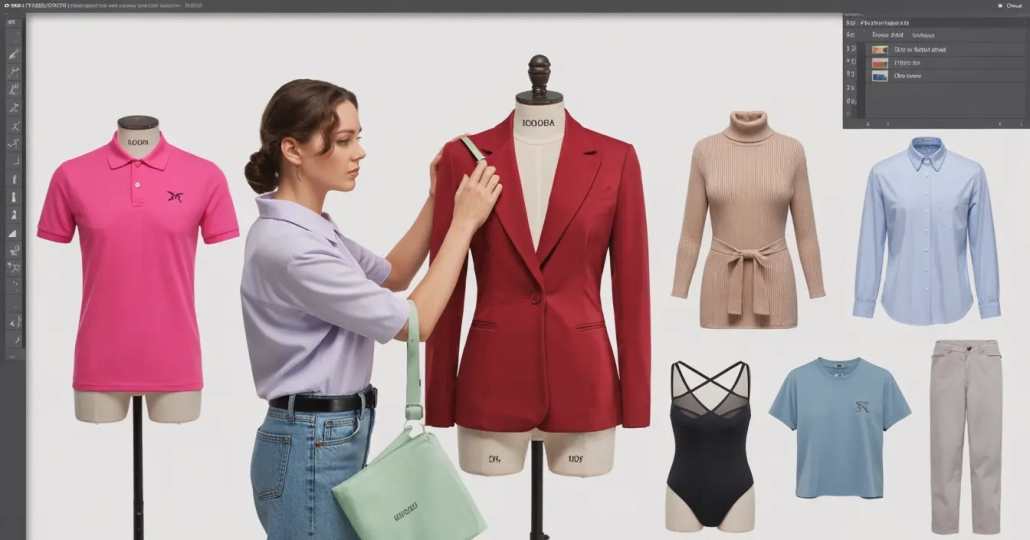
If you’ve ever wondered “How do brands get that clean, floating apparel look online?”, you’re not alone! This technique, often called the ghost mannequin effect, transforms regular product photos into polished, professional images that boost sales and brand trust. In this detailed guide, we’ll explore remove a mannequin from a photo, why it matters, and share expert tips from Expert Clipping your trusted partner for affordable, high-quality ghost mannequin service.
Contents
- 1 What is the Ghost Mannequin Effect?
- 2 Why Remove Mannequins from Product Photos?
- 3 Best Tools & Software for Mannequin Removal
- 4 Step-by-Step: How to Remove a Mannequin in Photoshop
- 5 Pen Tool vs. Content-Aware Fill: Which One’s Better?
- 6 Adding Neck Parts & Drop Shadows for Realism
- 7 Common Mistakes & How to Avoid Them
- 8 Manual vs. AI Mannequin Removal: Pros & Cons
- 9 Checklist Before Starting Mannequin Editing
- 10 Where to Learn & Who Should Use Ghost Mannequin Editing?
- 11 Pricing: Get Instant Cost Estimate
- 12 Customer Reviews: Why Brands Love Expert Clipping
- 13 FAQs
- 14 Conclusion: Ready to Transform Your Photos?
- 15 Extra Snippet-Ready Q&A for Featured Snippets
What is the Ghost Mannequin Effect?
The ghost mannequin effect (also known as invisible mannequin) removes the visible mannequin, letting apparel appear naturally shaped yet “floating.” Imagine you’re shopping online: instead of flat, lifeless photos, you see a realistic 3D view—almost as if the garment is worn by an invisible model. That’s the magic!
This effect helps customers see the fit, neckline, and details—building trust and encouraging purchase.
Why Remove Mannequins from Product Photos?
Here’s why it matters:
✅ Looks clean, premium, and professional
✅ Keeps the garment’s natural shape
✅ Matches marketplace image guidelines
✅ Increases click-through & conversion rates
Using a professional ghost mannequin service provider can save time and give the best results.
Best Tools & Software for Mannequin Removal
| Tool | Best For | Why Use It? |
| Adobe Photoshop (Pen Tool) | High precision | Control over every curve |
| Content-Aware Fill | Quick fixes | Auto-removes background |
| Clone Stamp | Fine details | Fix textures and spots |
| AI Editors (Remove.bg, etc.) | Simple edits | Faster but less precise |
👉 Which one is better? For professional results, Photoshop (with manual pen tool) is king.
Step-by-Step: How to Remove a Mannequin in Photoshop
Ready? Here’s how pros do it:
1️⃣ Open your product photo in Photoshop
2️⃣ Use the Pen Tool to trace around the garment
3️⃣ Create a new layer with your selection
4️⃣ Remove the mannequin areas
5️⃣ Use Clone Stamp or Content-Aware Fill for holes
6️⃣ Add missing neck part or inner back if needed
7️⃣ Refine edges (feather: 0.3–0.5px)
8️⃣ Add realistic drop shadows
9️⃣ Save as transparent PNG or on white background
💡 Pro tip: Always shoot on a plain background for cleaner edits. If you don’t have editing skills, choose a ghost mannequin service. They can do it fast and keep your photos clean.
Pen Tool vs. Content-Aware Fill: Which One’s Better?
| Feature | Pen Tool | Content-Aware Fill |
| Precision | ⭐⭐⭐⭐⭐ | ⭐⭐ |
| Speed | ⭐⭐ | ⭐⭐⭐⭐ |
| Best for | Complex shapes | Simple, flat areas |
| Final look | Crisp edges | Sometimes blurry |
👉 Professional editors almost always prefer the Pen Tool for accuracy.
Adding Neck Parts & Drop Shadows for Realism
After mannequin removal, adding the neck part (inner collar) makes the garment look 3D. Drop shadows ground the product visually, preventing it from floating unrealistically.
Checklist:
- Neck part shot separately
- Blend smoothly
- Add light, realistic shadows (not too harsh)
This step can boost perceived quality and even sales.
Common Mistakes & How to Avoid Them
🚫 Jagged edges → Use feathering
🚫 Overusing auto tools → Stick to manual edits for complex clothes
🚫 Wrong lighting → Match shadows to photo light source
🚫 Missing neck parts → Always shoot them
Manual vs. AI Mannequin Removal: Pros & Cons
| Manual Editing | AI Tools | |
| Quality | ⭐⭐⭐⭐⭐ | ⭐⭐ |
| Cost | Higher | Lower/free |
| Time | Slower | Faster |
| Best for | Professional photos | Casual, small batches |
Expert Clipping uses both: manual editing for perfect results, and AI to speed up simple tasks.
Why trust Expert Clipping?
At Expert Clipping, we offer ghost mannequin services, product photo retouching services, and more.
Our team works fast, keeps quality high, and our prices are fair.
Need a test? Try our free trial.
Checklist Before Starting Mannequin Editing
✅ Shoot on white or grey background
✅ Capture neck parts and sleeves separately
✅ Use high-resolution photos
✅ Keep consistent lighting
✅ Decide final output size (web, print)
📝 Subscribe & save on bulk editing with Expert Clipping.
Where to Learn & Who Should Use Ghost Mannequin Editing?
📍 Where? YouTube, Adobe tutorials, blogs like this.
👤 Who? Fashion brands, photographers, e-commerce sellers, print & marketing agencies.
If you don’t have time? Hire experts! Get instant cost estimate.
Pricing: Get Instant Cost Estimate
| Service | Starting From | Turnaround |
| Ghost Mannequin | $0.39/image | 6–24 hrs |
| Background Removal | $0.25/image | 3–12 hrs |
| Shadow/Neck Add | $0.10–0.20/image | add-on |
📦 Request your first 3 images free to test quality!
Customer Reviews: Why Brands Love Expert Clipping
“We saved hours every week! Photos look stunning and sales went up.” – Jane, Boutique Owner
“Tried the free trial. Quality was better than expected, fast delivery too.” – Mark, Amazon Seller
“Perfect edits for our cookbook. Will order again!” – Priya, Fashion Brand
FAQs
Q1: Can I remove mannequins with free tools?
Yes, but results might be rough. Photoshop or professional services are better.
Q2: Why use ghost mannequin instead of flat lay?
It shows the garment’s shape naturally, making it look premium.
Q3: Should beginners use the pen tool?
Yes! It’s worth learning for clean edges.
Q4: Is the ghost mannequin effect necessary?
For fashion e-commerce—almost always yes.
Q5: Do mannequins hurt online sales?
Visible mannequins can look unprofessional; removal usually increases clicks.
Conclusion: Ready to Transform Your Photos?
Removing mannequins isn’t just photo editing—it’s storytelling. It shows your products in the best light, builds brand trust, and can boost sales.
Expert Clipping is here to help, whether you need a quick edit or full catalog processing. Remember:
- Request your first 3 images free
- Get instant cost estimate
- Subscribe & save on bulk editing
Let’s turn ordinary photos into scroll-stopping visuals!
Extra Snippet-Ready Q&A for Featured Snippets
What’s the fastest way to remove a mannequin?
Use Photoshop’s content-aware fill for quick edits, but pen tool is best for quality.
How do you keep the natural shape?
Add neck parts & refine edges to keep the garment’s true form.
Which tools give the cleanest results?
Photoshop pen tool + clone stamp for detail work.
Can beginners use free tools?
Yes, but practice is key. Results vary compared to pro editing.
Why do e-commerce stores use ghost mannequin?
For a premium, realistic look that increases buyer confidence.
If you’d like, I can also generate:
✅ Featured image
✅ Pricing calculator table
✅ Printable checklist PDF
Would you like me to create those next?


Leave a Reply
Want to join the discussion?Feel free to contribute!